


Having trouble deciding whether to opt for a 4-inch vs. 6-inch smash cake for a baby's first birthday celebration?
Celebrating a baby's first birthday is a milestone worth commemorating, and what better way to do so than with a fun and photo-worthy smash cake experience?
Let's dive into how you can create the perfect smash cake, from selecting the right size to decorating it with flair.
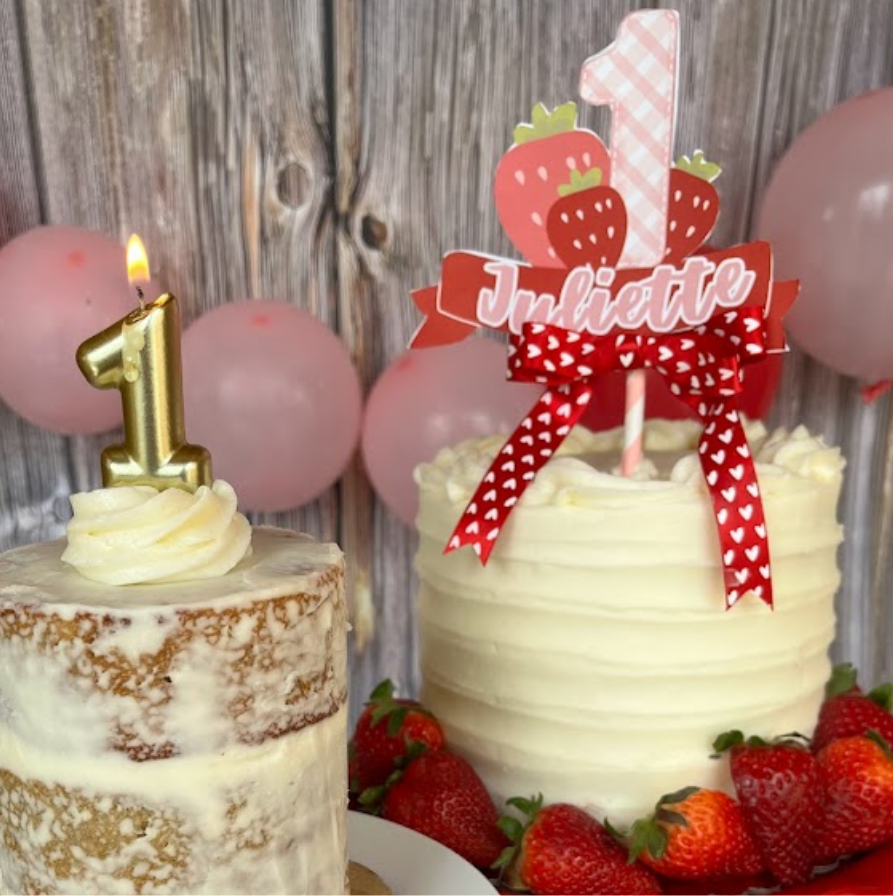
4 Inch vs 6 Inch Smash Cake
When it comes to deciding between a 4-inch and a 6-inch smash cake, there are a few things to consider:
- The 4-inch mini cake option is perfect for those cozy, small celebrations and allows your little one to dive into a smaller, more manageable cake.
- On the other hand, the 6-inch small cake offers more surface area for decorating and is ideal for capturing stunning photographs during cake smash sessions.

Whether you go for the smaller or bigger size, it's all about making sure it's cute enough for snapping those Instagram-worthy photos!
How Much Batter Do You Need: 4 Inch vs 6 Inch Smash Cake
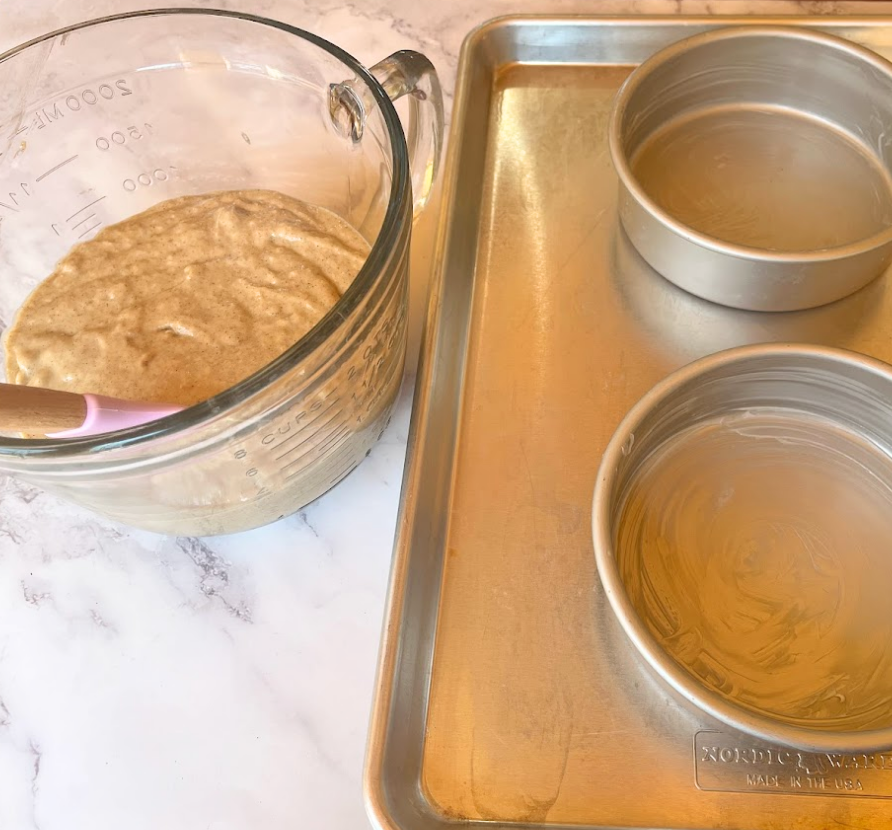
Determining the amount of batter required for your smash cake is important for getting the perfect height in your cake layers.
- To fill three 4-inch pans you'll need about 2 cups of batter.
- To fill two 6-inch pans you'll need about 3 cups of batter.
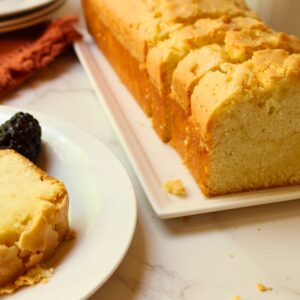
My Favorite Smash Cake Recipe
This Applesauce Cake is a great recipe that's perfect for a baby's first birthday cake. It's a healthy smash cake recipe that is not too sweet and is made with simple ingredients.
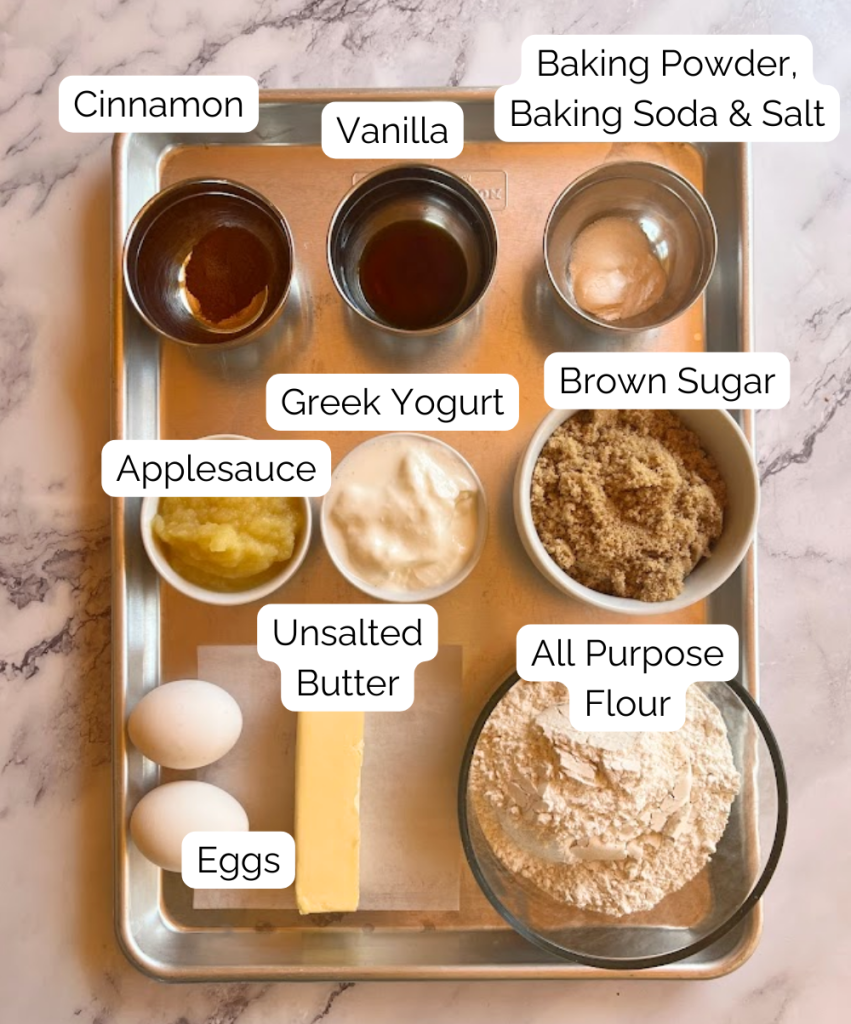
Ingredients for This Cake
This cake recipe is made with a mix of common pantry ingredients and healthy additions. Each ingredient adds something special to this cake's delicious taste and texture.
Healthy Ingredients: Whole milk (or plant-based alternatives like soy milk), unsweetened applesauce, and plain Greek yogurt.
Pantry Staples: All-purpose flour, baking powder, baking soda, salt, ground cinnamon, unsalted butter, granulated sugar, large eggs, and vanilla extract.
The recipe makes enough cake batter to make either:
- 2-layer 6-inch cake
- 3-layer 4-inch cake. (plus extra batter for a few cupcakes)
For a double tall 6-inch cake, just double the recipe and use 4 layers instead of two. The full recipe can be found in the recipe card at the bottom of this post.
Tips for Baking and Cooling a Cake
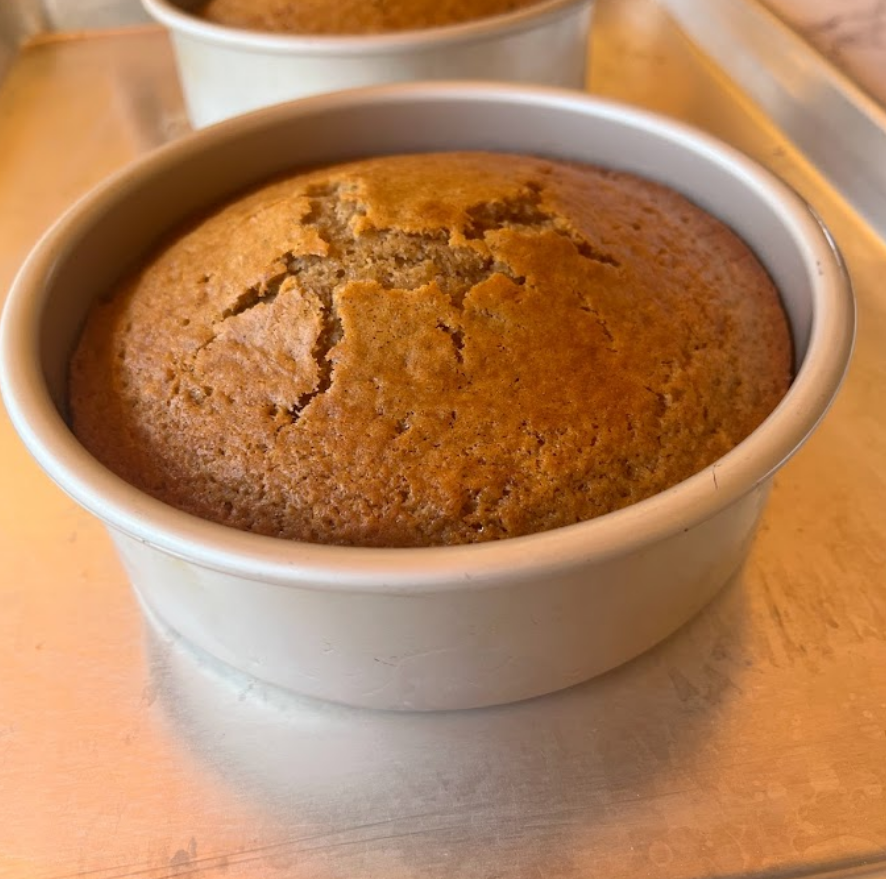
- Baking: Once your batter is mixed, pour it into your prepared cake pans and bake according to the recipe instructions. Keep an eye on the cakes while they bake as small cakes bake quickly. They should be fully baked but still moist.
- Cooling: Allow your cakes to cool partially in the pans before removing them. Once the pans are cool to the touch, invert them onto parchment and allow them to cool fully.
- Leveling: Use a knife or cake leveler to trim the tops of the cakes to create an even surface for stacking.Wrap layers in plastic wrap to retain moisture until ready to frost.
What's The Best Frosting for a First Birthday Cake?
When it comes to choosing the best frosting for a smash cake, a simple and versatile option like cream cheese buttercream is often a great choice.
It's easy to make, requires minimal ingredients, and is lower in sugar than other options. Plus, it pairs well with a variety of cake flavors, including chocolate cake, carrot cake, and vanilla cake.
Whether it's your first time making a smash cake or you're a seasoned baker, cream cheese vanilla buttercream is a great option that yields delicious results every time.
My favorite Cream Cheese Vanilla frosting recipe can be found in the recipe card at the bottom of this post.
Frosting Tips
- Using room temperature butter ensures that the frosting whips up smoothly.
- This batch makes enough to frost a 6 inch cake, or a 4 inch cake with some left over.
Decorating Your Smash Cake
Here are a few tips to help you do a simple cake decoration on a small cake:
- Bake and Cool Your Cake: Start by baking your cake according to the recipe below. Let it cool completely before you start frosting.
- Prepare Your Frosting: Before you start frosting your cake, make sure your frosting is ready to go.
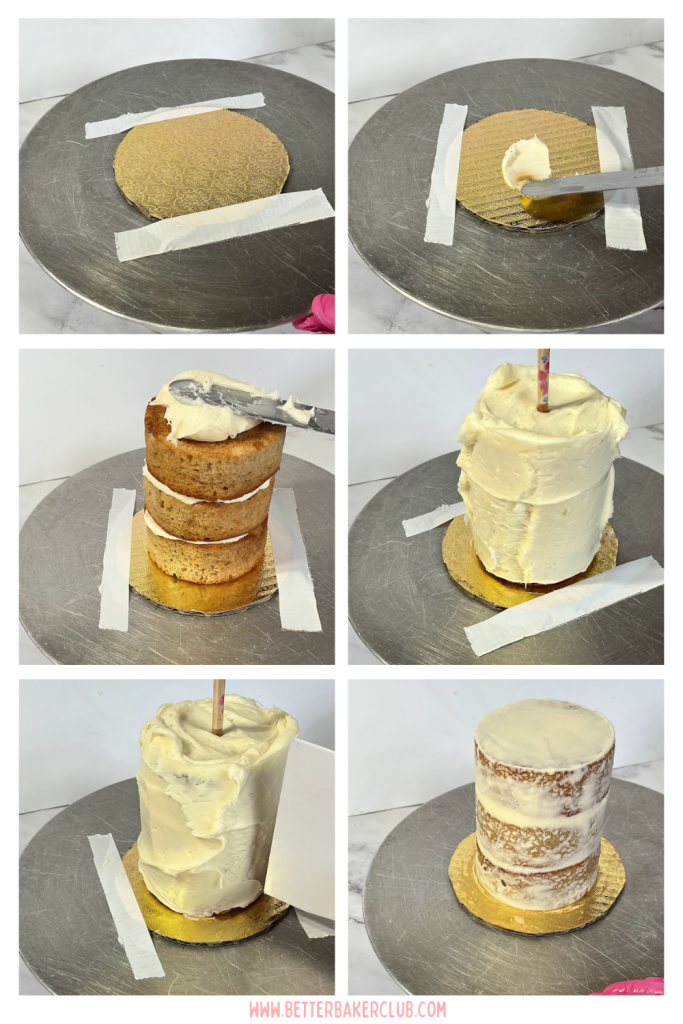
- Secure the Base: Smash cakes are light and move when you apply pressure so tape the edges of your base with a few strips of tape before starting.
- Assemble the Layers- Stack each layer in place with a dollop of frosting between each one.
- Dowel the Cake-Use a chopstick, straw or dowel to secure the layers while you frost the sides.
- Crumb Coat: Apply a thin layer of frosting all over the cake to seal in any crumbs. This will make it easier to frost the cake without getting crumbs in the final layer.
- Chill the Cake: Place the cake in the fridge for about 15-30 minutes to allow the crumb coat to set.
- Final Frosting: Once the crumb coat is set, apply a thicker layer of frosting to the top and sides of the cake. Use a spatula to spread it evenly, creating a smooth finish.
When it comes to decorating your baby's smash cake, the possibilities are endless.
You can get creative with your decorations by adding swirls, patterns, or any design you like to the outside of the cake. You can also add toppings like sprinkles, fresh fruit, or flowers for extra flair.

What to do with any remaining frosting?
After decorating a 4-inch smash cake, you may find yourself with some leftover frosting. Here are a few ideas for what you can do with it:
Frost Cupcakes: If you have enough frosting left, you can use it to frost a batch of cupcakes. Simply pipe or spread the frosting onto the cupcakes for a delicious treat.
Spread on Cookies: Use the remaining frosting as a filling or topping for cookies. Sandwich two cookies together with the frosting in the middle, or simply spread it on top of cooled cookies for a sweet finishing touch.
Dip Fruit: Dip strawberries, banana slices, or other fruit into the frosting for a decadent dessert. Allow the frosting to set before serving for a delicious treat.
Although, let's be honest, sometimes the best way to enjoy leftover frosting is straight from the spoon!

Moist Applesauce Cake with Cream Cheese Frosting
Ingredients
Cake Ingredients
- 1 ½ cups all-purpose flour
- 1 teaspoon baking powder
- ½ teaspoon baking soda
- ½ teaspoon salt
- 1 teaspoon ground cinnamon
- ½ cup unsalted butter softened
- ¾ cup granulated sugar
- 2 large eggs
- 1 teaspoon vanilla extract
- ½ cup whole milk
- ½ cup unsweetened applesauce
- ½ cup plain Greek yogurt
Frosting Ingredients
- 8 oz cream cheese, softened
- ¼ cup unsalted butter softened
- 1 teaspoon vanilla extract
- 2 cups powdered sugar
- Pinch salt optional
Instructions
Cake Instructions
- Preheat your oven to 350°F (175°C). Grease and flour 2 6-inch round cake pans (or 3 4-inch cake pans).
- In a large bowl, whisk together the flour, baking powder, baking soda, salt, and cinnamon until well combined. Set aside.
- In a medium bowl, combine the applesauce, Greek yogurt, and milk. Whisk till smooth and set aside.
- In a large mixing bowl, cream together the softened butter and granulated sugar until light and fluffy.
- Beat in the eggs, one at a time, until well incorporated. Stir in the vanilla extract.
- Gradually add the dry ingredients to butter and egg mixture, alternating with the applesauce mixture, beginning and ending with the dry ingredients. Mix until just combined.
- Pour the batter into the prepared cake pans and smooth the top with a spatula.
- Bake in the preheated oven for 25-35 minutes, or until a toothpick inserted into the center of the cake comes out clean. Smaller cakes will bake a little faster than larger cakes so watch them closely and check for doneness beginning at 20 minutes.
- Allow the cakes to cool in the pans for 10 minutes before transferring them to a wire rack to cool completely.
Frosting Instructions
- In a large mixing bowl, beat the softened cream cheese and unsalted butter together until smooth and creamy.
- Add the vanilla extract and continue to beat until well combined.
- Gradually add the powdered sugar, a little at a time, while continuing to beat the mixture.
- If desired, add a pinch of salt to enhance the flavor of the frosting. Mix until smooth and creamy.
Frosting the cake
- If your cakes have domed tops, you can level them with a serrated knife to create an even surface for stacking.
- Store any leftover frosting in an airtight container in the refrigerator for up to one week.
- Put a small dollop of frosting in the center of your serving plate or cake board (if using). This will help secure the cake in place.
- Scoop a generous amount of frosting onto the center of your first cake layer. Use an offset spatula or icing knife to spread the frosting evenly to the edges.
- Carefully place the second cake layer on top of the first, making sure it's centered.
- To prevent crumbs from mixing into your final coat of frosting, you can apply a thin layer of frosting all over the cake. This is called a crumb coat. Chill the cake for about 15 minutes to let the crumb coat set before applying the final layer of frosting.
- Starting with the top of the cake, scoop a generous amount of frosting onto the center. Use your spatula to spread it evenly towards the edges, letting it cascade over the sides as you go. Continue spreading and smoothing the frosting until the entire cake is covered.
- Once the cake is covered, use your spatula to smooth out any bumps or ridges in the frosting. You can also use the edge of the spatula to create decorative patterns or swirls.
- If there's any excess frosting on the plate or board, use a clean towel or paper towel to wipe it away for a clean presentation.
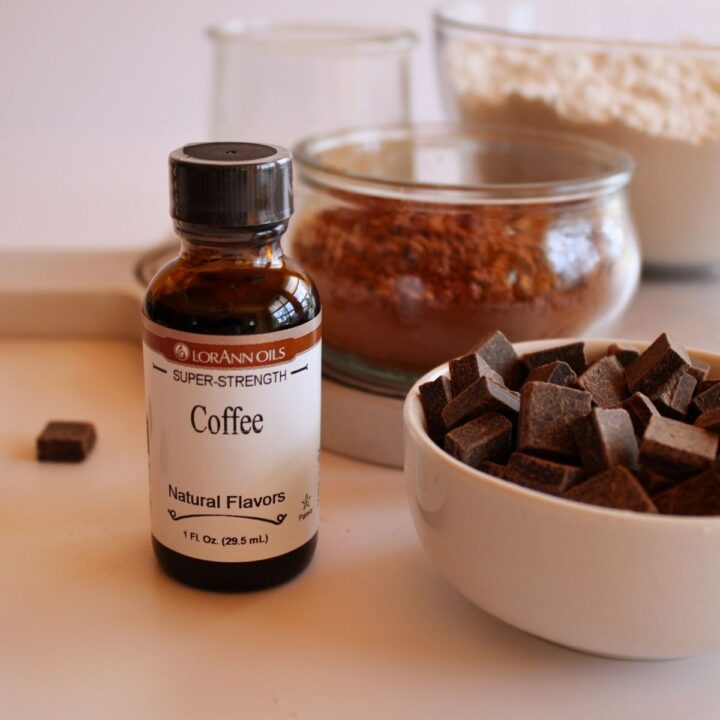
Vanessa says
Hello, just curious, in the ingredient picture above you have brown sugar but the ingredients say granulated sugar. Are they interchangeable in this recipe? Looks good and wanting to make for my little ones smash cake. Thank You
Better Baker says
I've made this cake both ways, with granulated sugar, and with brown sugar. The brown sugar adds a bit of moisture to the cake, but they are interchangeable in the recipe.