


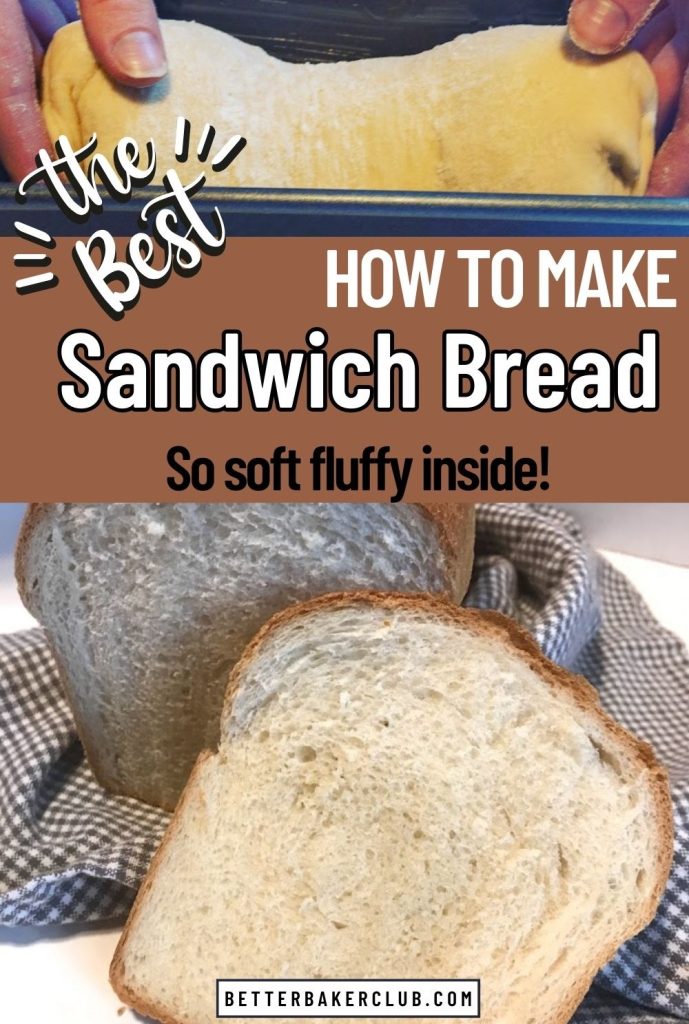
Learn the secret of making fluffy soft sandwich bread at home with this easy, 5 ingredient white bread recipe.

Not all bread recipes are the same! Sometimes even when you try your hardest, you end up with a loaf that's too heavy and falls apart easily. But I've got a trick to share with you today that'll take a simple white bread recipe and turn it into a super soft and fluffy loaf, that tastes better than store-bought bread.
Be sure to follow me on social media for more bread-baking inspiration and all things baking! I'm currently most active on Tiktok, where I share bread-baking videos, tips, and tricks. Don't miss out on the fun -follow me on social media and explore more Better Baker Club recipes and content!
How to make softer homemade bread
Using a poolish starter in homemade bread makes it softer and fluffier. When left to ferment overnight this simple mixture of flour, water, and yeast develops enzymes that soften the dough and improve the flavor.
I've been sharing bread-baking videos on social media for a while now and I have an entire series dedicated to baking with a poolish. You can check it out here.
Poolish vs. sourdough starter
Poolish is not the same as a sourdough starter. They are both types of preferments used in bread making, but they have distinct characteristics and are used in different ways.
- Poolish: a yeasted pre-ferment made with equal parts water and flour along with a small amount of commercial yeast.
- Sourdough starter: is a living culture of natural yeast and lactic acid bacteria, created through days of active feeding and regular maintenance.
The choice between using a poolish starter or a sourdough starter depends on your personal preference. They both improve the flavor and texture of bread, but they have different processes and final products.
- Poolish dough is ready quickly, while sourdough starter requires longer fermentation times
- Poolish dough has a simple flavor, while sourdough has a tangy flavor and chewy texture
Overall, the choice to use poolish in this Easy 5 Ingredient White Bread Recipe means that you can have 2 soft, spongy soft loaves of bread in about 3 hours.
Don't forget to plan ahead and mix your poolish the night before you plan to bake bread!
Let's get ready to make this 5 ingredient white bread recipe
Just 5 simple ingredients are all you need to make this easy white bread recipe!
Ingredients you need to make your own bread
- Flour- Bread flour is ideal but you can substitute all-purpose flour if needed.
- Oil- Use a neutral oil like canola. (More flavorful oils like olive oil don't work well in this recipe)
- Sugar-Granulated sugar gives a delicious flavor and helps feed the yeast.
- Salt- Salt plays an important role in bread baking so don't be tempted to cut back on the amount.
- Yeast- You can use active dry yeast, instant yeast, or rapid-rise yeast for this recipe.
Equipment you need for baking a loaf of bread
- Stand mixer- Use a stand mixer with the dough hook attachment to knead this double batch the dough.
- Loaf pan-Loaf pans come in different sizes. Look for pans that hold about 1 ½ lbs. of dough. You'll need two for the recipe.
- Large bowl- You'll need a large mixing bowl for proofing the dough.
How long will it take to bake your own bread?
To make bread at home, you'll need about three hours from start to finish. Most of the time required for this recipe is the passive time when the dough rests. Depending on the room temperature, rise times can vary. I recommend starting the recipe about 4 hours before you want to eat fresh warm bread
- Mixing: about 20 minutes
- First rise: about 60 minutes
- Shaping: 15 minutes
- Proofing loaves: about 60 minutes
- Baking: about 30 minutes
Is it better to weigh or measure bread ingredients
Weighing ingredients is more accurate. Measuring your ingredients on a food scale gives you the exact amount needed for your recipe every time.
Since the actual number of cups may vary slightly based on how tightly the flour is packed, it's always best to use a kitchen scale for accuracy.
This recipe calls for 32 ounces of flour, which equals about 7 cups of flour.
Can I substitute all-purpose flour for bread flour
Bread flour has a higher protein content than all-purpose flour, which gives bread its structure and chewiness.
If you substitute all-purpose flour for bread flour, you may notice a slight difference in texture. Bread made with all-purpose flour might be slightly softer and less chewy compared to bread made with bread flour.
How long does fresh bread last
To extend the shelf life of bread, be sure and use proper storage techniques.
- Room Temperature Storage: Homemade bread typically stays fresh at room temperature for about 2 to 3 days.
- Refrigerated Storage: Refrigerating bread can extend its shelf life to around 5 to 7 days, but it may lose some softness. While refrigerating inhibits molding, it does speed up staling.
- Freezer Storage: You can freeze this bread for up to 3 months without significant quality loss. For best results, slice the bread, wrap it in plastic wrap, and store it in a freezer-safe ziplock bag.
Remember, homemade bread without preservatives tends to have a shorter shelf life, and it's always best to store it in an airtight container.
Please click the link to explore my Amazon store, where you can find a selection of my preferred bread-baking tools and storage solutions. This includes some affiliate links.
Here are the steps to bake the best bread at home
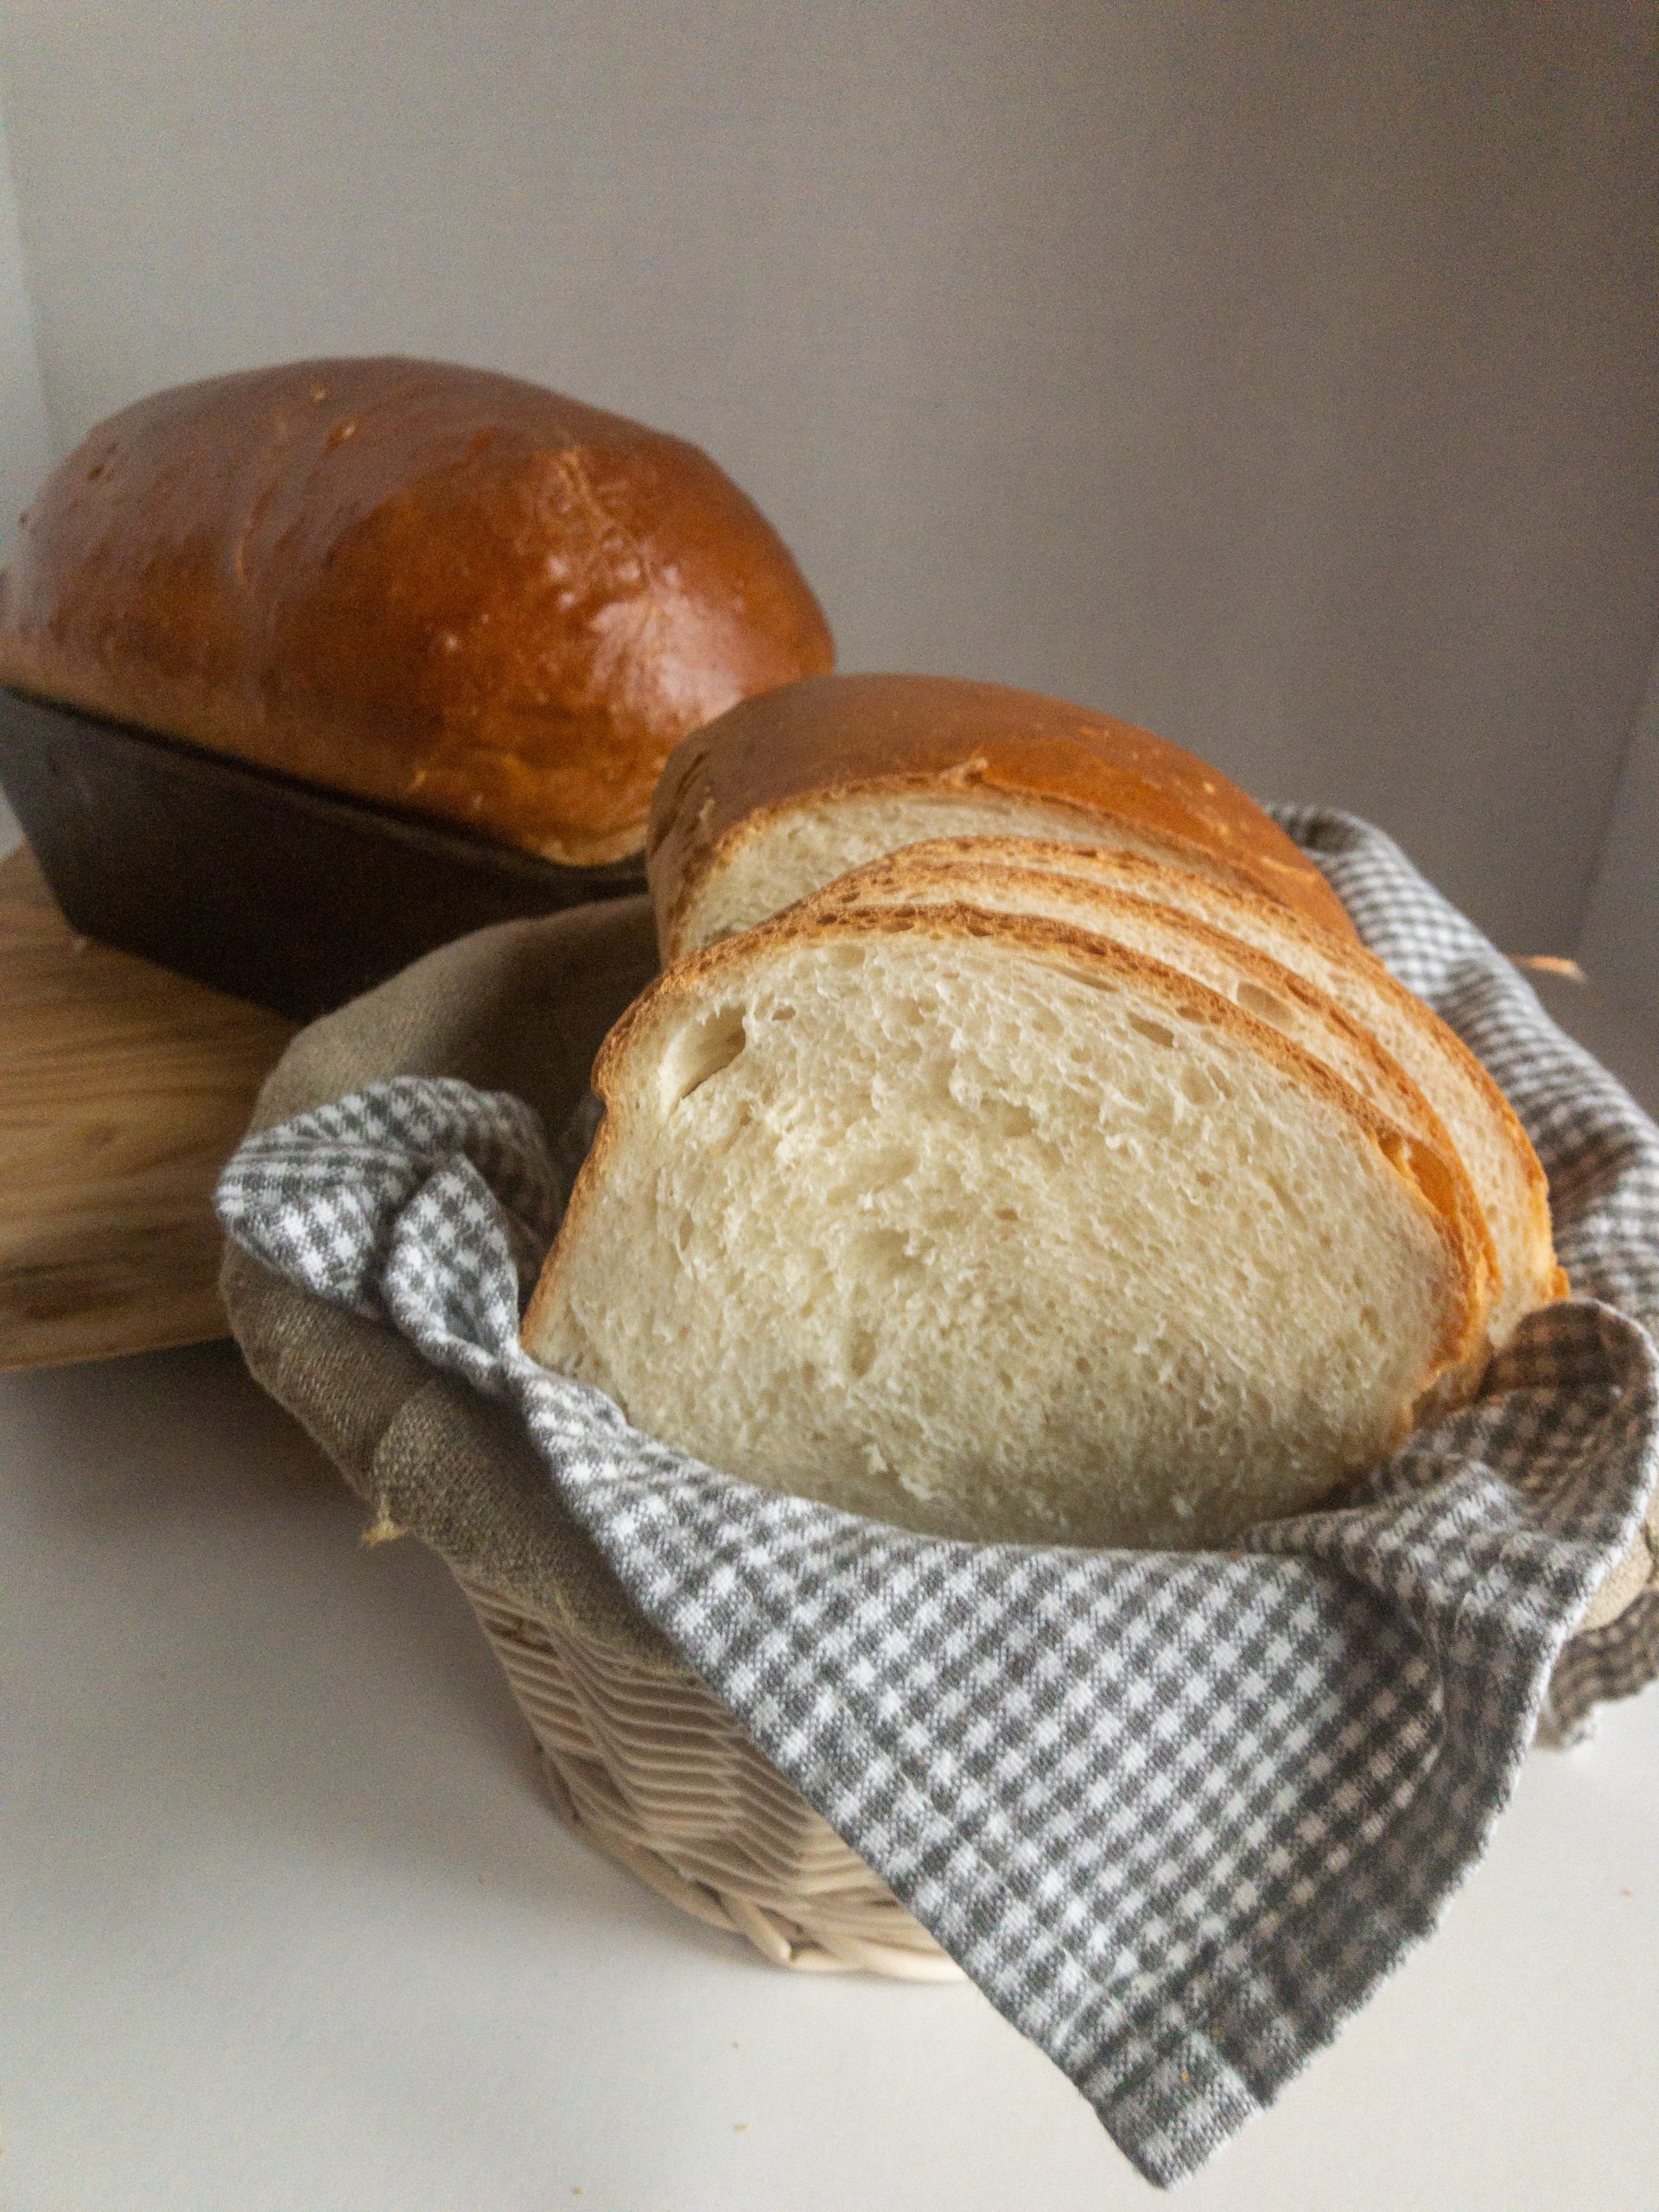
Let's start baking! This recipe yields two loaves of bread, ideal for making sandwiches or toast, or for pairing with a bowl of soup.
*** THE NIGHT BEFORE***
1: Mix a poolish the night before
- Combine bread flour, water, and a pinch of yeast
- Stir until there is no dry flour
- Cover and leave at room temperature overnight
***THE NEXT DAY***
2: Scald the milk
- Heat 1 cup of milk for 90 seconds in the microwave
- Allow it to cool to room temperature
3: Activate the yeast
- Measure cold water
- Add scalded milk (you can use an instant-read thermometer to verify that its 100 degrees F or cooler)
- Sprinkle in the yeast
4: Knead the bread dough
- Add the dry ingredients to the bowl of a stand mixer
- Pour in the yeast mixture, along with oil and sugar measurements
- Add the poolish and knead until the dough pulls away from the sides of the bowl
5: First rise
- Place the dough in a large mixing bowl that has been brushed with oil
- Set in a warm place to rise
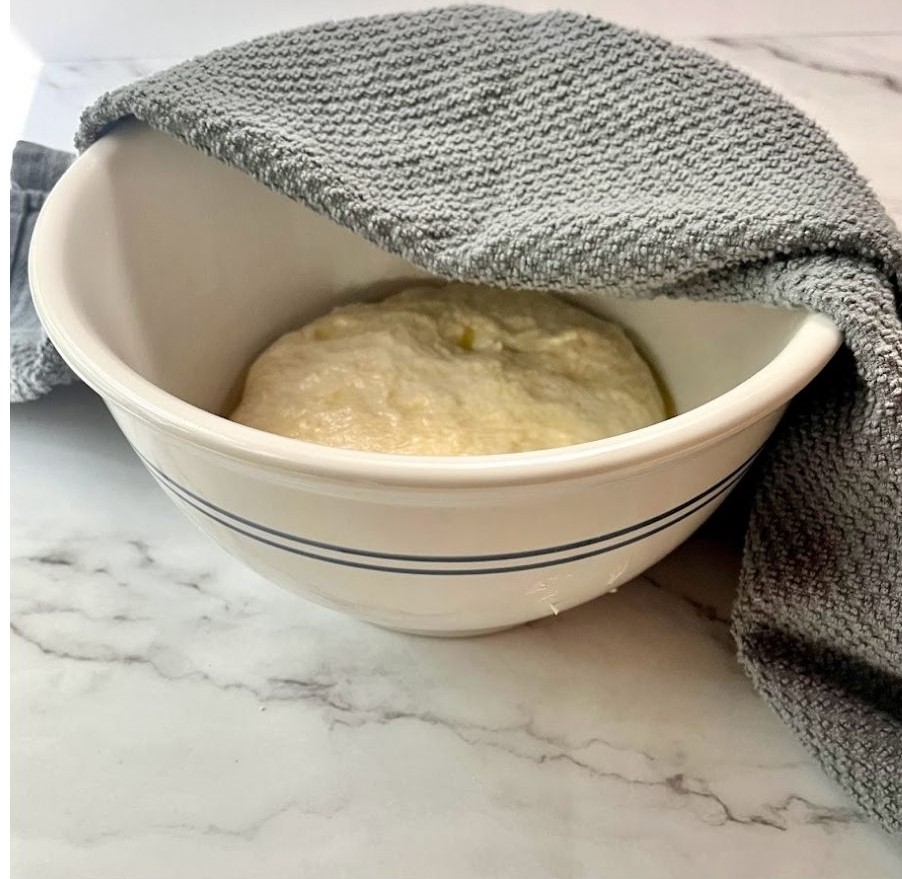
- After about 30 minutes, gently deflate and re-round the dough
- Cover and continue to let the dough rise
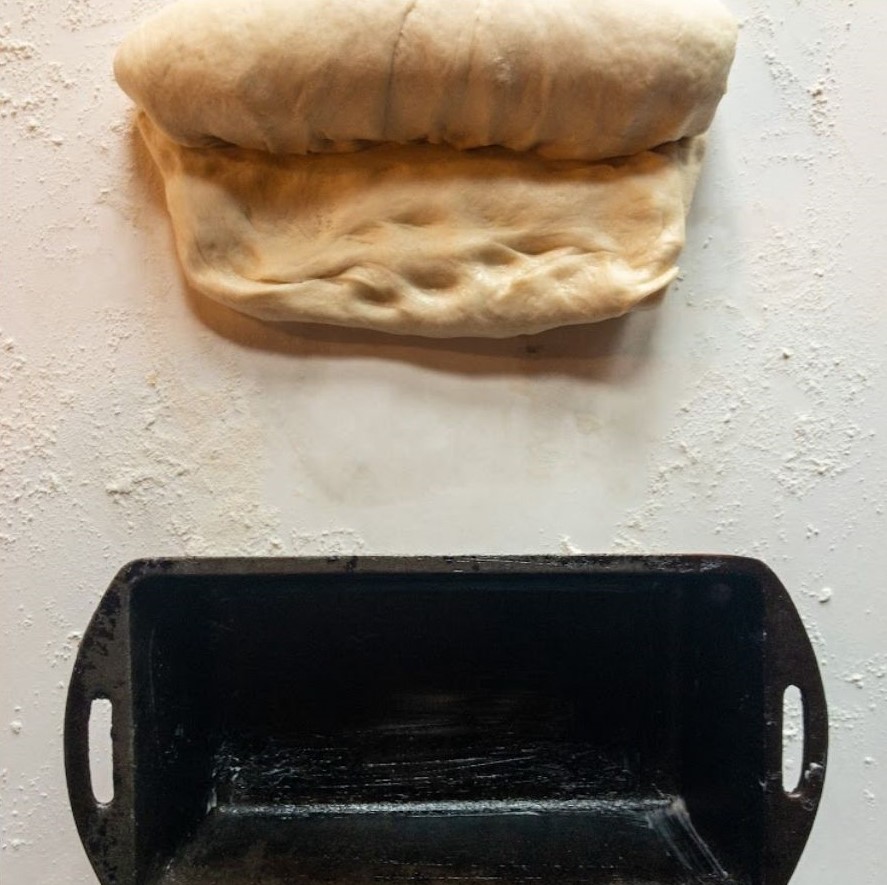
7: Shape and proof loaves
- Turn the dough out onto a lightly floured surface
- Divide into two equal size pieces
- Roll the dough into a loaf and pinch the seam closed
- Place seam side down into an oiled 9-inch loaf pan and cover lightly with plastic wrap. Then, allow them to rise a second time before baking in a preheated oven.
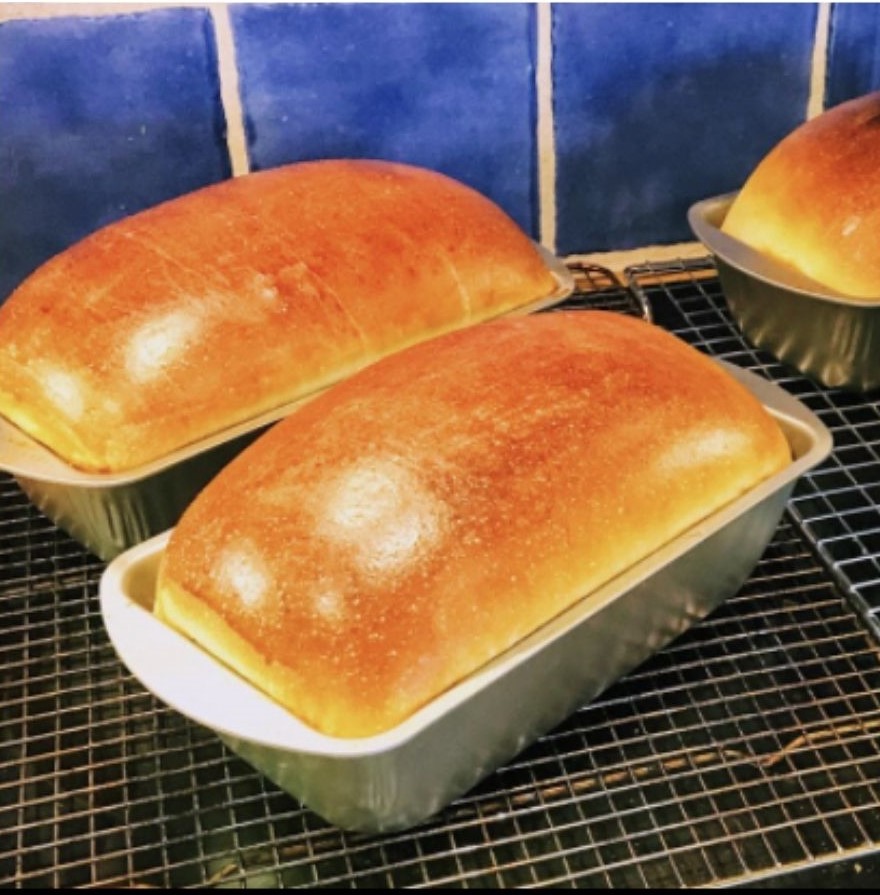
8: Bake
- Let the loaves proof until the dough rises over the top of the loaf pan
- Brush the top of the loaves with egg wash for a golden brown color
- Slice the dough to allow for a high rise in the oven
- Bake in a pre-heated oven for 30 minutes at 350 degrees F
9: Slice and enjoy
- Allow the bread to cool on a wire rack tipped on its side
- Enjoy within 5 days for maximum freshness, or slice and freeze to enjoy later.
The full recipe and step-by-step instructions for this homemade white bread recipe can be found on the recipe card at the bottom of this post.
5 Ingredient White Bread
Equipment
- Stand mixer with dough hook attachment
Ingredients
Poolish Ingredients
- ⅓ cup Water 66g
- ½ cup Bread flour 66g
- ⅛ teaspoon Active dry yeast pinch
Dough Ingredients
- 1 cup Warm Water 226g
- 1 cup Warm Milk 226g
- 1 ½ teaspoon Salt 17g
- ⅓ cup Granulated Sugar 70g
- ¼ cup Vegetable Oil 57g
- 1 ½ tablespoon Active Dry Yeast 17g (2 packets)
- 7 cup Unbleached Flour 900g
- 1 egg plus 2 tablespoon water for brushing on top
Instructions
- The night before: In a small mixing bowl, combine ⅓ cup of water (or weigh out 66 grams) with ½ cup of bread flour (or weigh out 66 grams). Sprinkle in ⅛ teaspoon of yeast.Stir the mixture until well combined and there are no lumps. Cover the bowl with plastic wrap. Let the starter rest at room temperature overnight or for at least 8-12 hours.
- Scald the milk: Pour the milk into a microwave-safe container and heat it in the microwave for about 90 seconds until it's hot but not boiling. Allow the milk to cool slightly. Add the sugar to the warm milk and stir until it's completely dissolved. Sprinkle the yeast over the warm milk mixture and gently stir to combine. After the yeast has activated, add the cold water to the mixture and stir until well combined.
- Mix the dough by adding the yeast mixture and starter to the bowl of your mixer along with the salt, oil and flour. With your mixer on low begin mixing. When all of the flour is incorporated, turn the mixer up to a medium speed. Kneed for about three minutes. Watch for the dough to come together as one mass and stop sticking to the sides of the bowl. Add a little extra flour if it still looks sticky after 5 minutes of mixing.
- The dough is done when it is smooth and elasticy. It should not be sticking to the sides.
- Let the dough rest by placing in in an oiled bowl and covering it with either plastic wrap or a towel. After 30 minutes, gently deflate the dough and re-form into a round ball again. Let rest an additional 30 minutes.
- Shape and divide the dough by inverting the dough onto a floured surface. Press the air out of the dough and divide into two equal portions. Gently press each portion into a rectangle approx the same width as the pan. Firmly roll the dough into a loaf shape. Pinch the seam to seal.
- Proof the loaf by placing the dough seam down into an oiled loaf pan. Cover with plastic wrap or a towel. Allow the loaf to proof for about 45 minutes to 1 hour. Use the poke test to see if the dough is ready to bake. When it is ready it will leave a small impression when touched.
- Bake the loaf by placing it into the center of a 350° preheated oven. Make sure there is no rack above the bread loaf. It will need room to rise. Bake for approx. 30 minutes or until the dough sounds hollow when thumped and smells aromatic like fresh bread.
Tips for selling bread at the farmers market
If you run a home-based bakery, and you want to add fresh bread to your menu, then here are some tips for how to do it.

- Prep- Weighing your flour in advance helps speed up the process on baking day.
- Bake fresh- The day before the market, do your baking.
- Attractive packaging- Display your bread attractively. Baskets and wooden crates work perfectly.
- Sampling- Provide samples to allow customers to taste before they buy. Sampling can help encourage purchases!
Be sure and check out The Complete Guide to Selling at Farmers Markets to learn more tips for getting started. It covers everything you need to know about getting started selling baked goods at the farmer’s market like how to start selling, how much money you can make, planning your display, setting up your payment systems, and links to my favorite supplies.
The best homemade bread recipe
This basic white bread recipe is a great starting point for beginners, and it's my favorite way to enjoy freshly baked bread with peanut butter!
With just a handful of ingredients and a bit of patience, you can create the best homemade white bread that's perfect for sandwiches, toast, or simply enjoyed on its own.
I hope you enjoyed this easy 5-ingredient white bread recipe! If you have any questions or comments, feel free to share them below. I'd love to hear about your baking experience and any variations you tried with this recipe.
Looking for more bread recipes to try? Check out these links for some of my other favorite bread recipes:

Kim says
So good!
PJR says
I gave this a five, because, I've made your oat bread recipe and loved it. Just wondering why the poolish has bread flour and the rest of the recipe uses AP flour?