


Are you searching for the perfect extra sour sourdough bread recipe? Become a sourdough pro with this easy-to-follow guide—no complicated steps, just simple tips for baking the perfect tangy loaf!
Why You’ll Love Making Extra Sour Sourdough
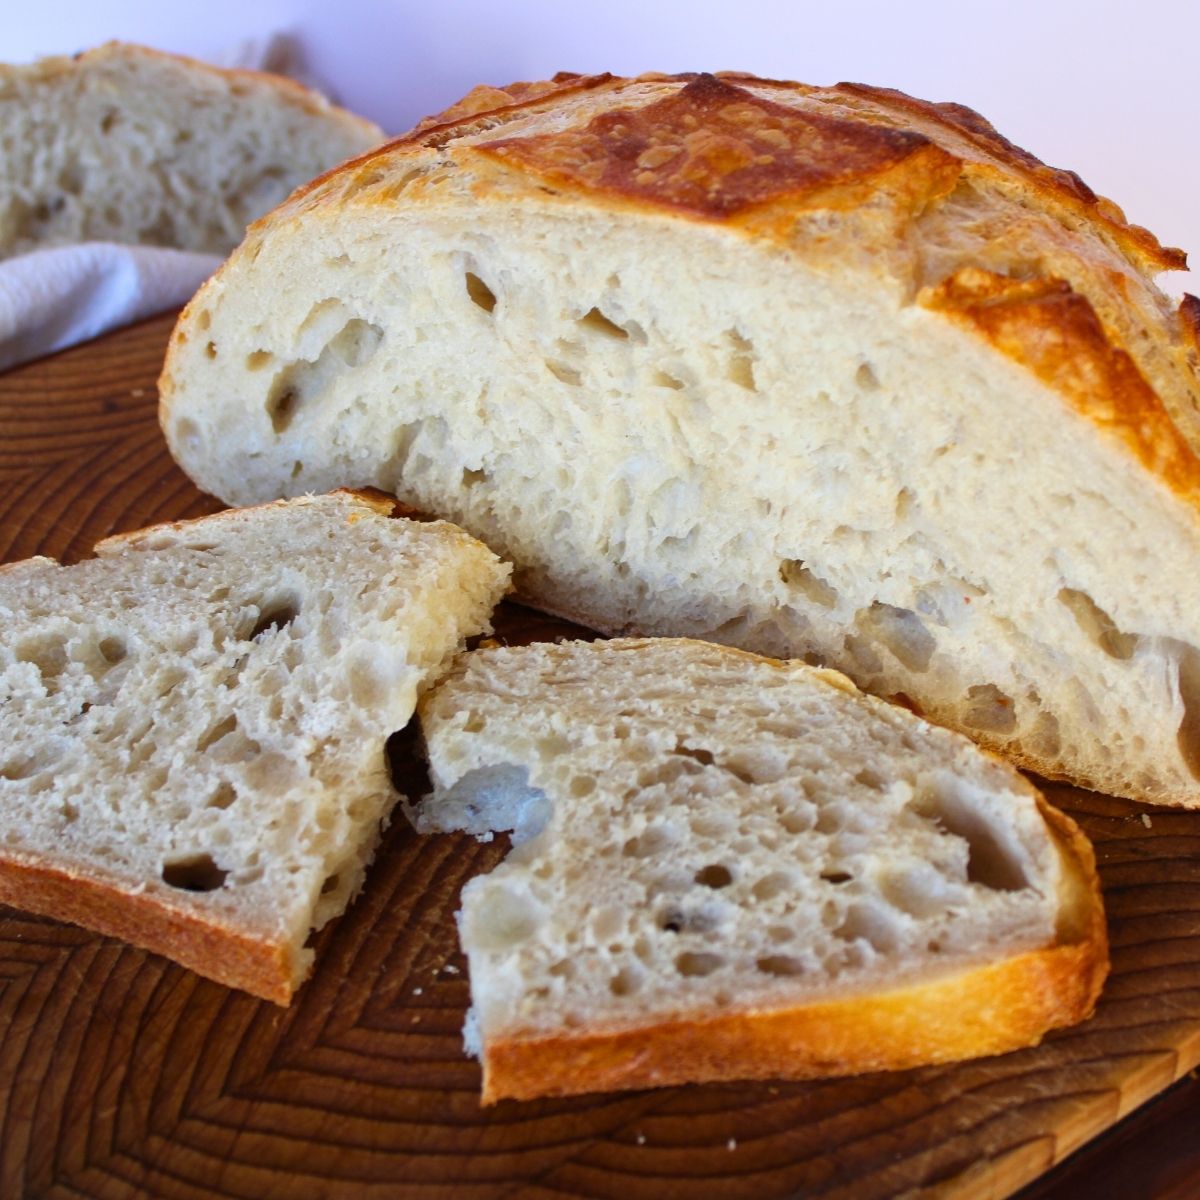
My love for sourdough goes way back to my culinary school days in San Francisco. Nothing beats the bold flavor and delicious crust of true San Francisco sourdough. That’s exactly what we’re creating with this Extra Sour Sourdough Bread recipe—big, bold and tangy with more sourdough flavor than your average loaf, right from your kitchen!
In this post, I’ll show you how to:
- Fed your starter to increase the sourness.
- Do a longer cold ferment for a tangier flavor.
- Bake a classic San Francisco sourdough loaf.
This recipe uses a Dutch oven to get the perfect San Francisco sourdough-style crust. If you don’t have a Dutch oven, check out this guide on baking sourdough without a Dutch oven.
What Makes This Extra Sour Sourdough Bread Recipe So Tangy?
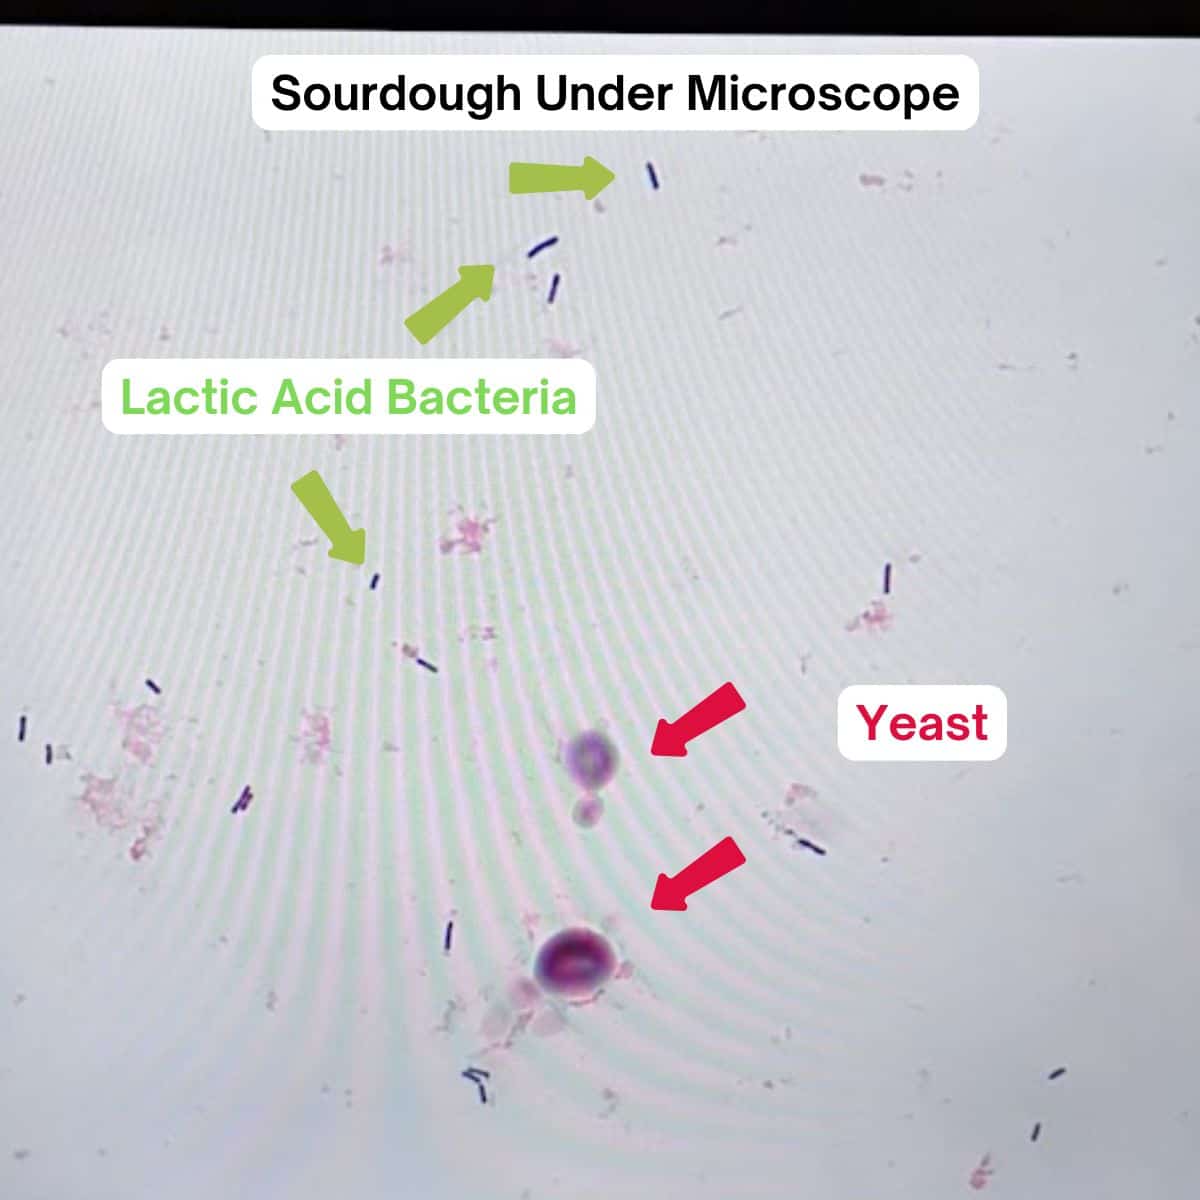
The signature sourness of sourdough comes from the wild yeast and lactic acid bacteria (LAB) in your sourdough starter. These microbes produce two primary acids during the fermentation process:
- Lactic acid: Provides a mild, yogurt-like tang.
- Acetic acid: Contributes a sharp, vinegar-like sourness.
The goal is to encourage more acetic acid production to increase the sourness of your bread.
Keep reading to learn how to feed your starter for a more sour loaf.
How to Feed Your Sourdough Starter for a Tangier Loaf
If you’re aiming for a more sour flavor in your sourdough bread, it starts with how you feed your starter. The type of flour, feeding ratios, and even the water temperature can all play a role in the tanginess of your loaves. Here are three beginner-friendly tips to help you get that classic sourdough tang!
1. Use Wholegrain or Rye Flour for Feedings
To encourage the growth of lactic acid bacteria (the key to sourness), use wholegrain or rye flour when feeding your starter. These flours are packed with nutrients that help create the acids that make your sourdough tangy.
2. Adjust the Feeding Ratio for a Stiffer Starter
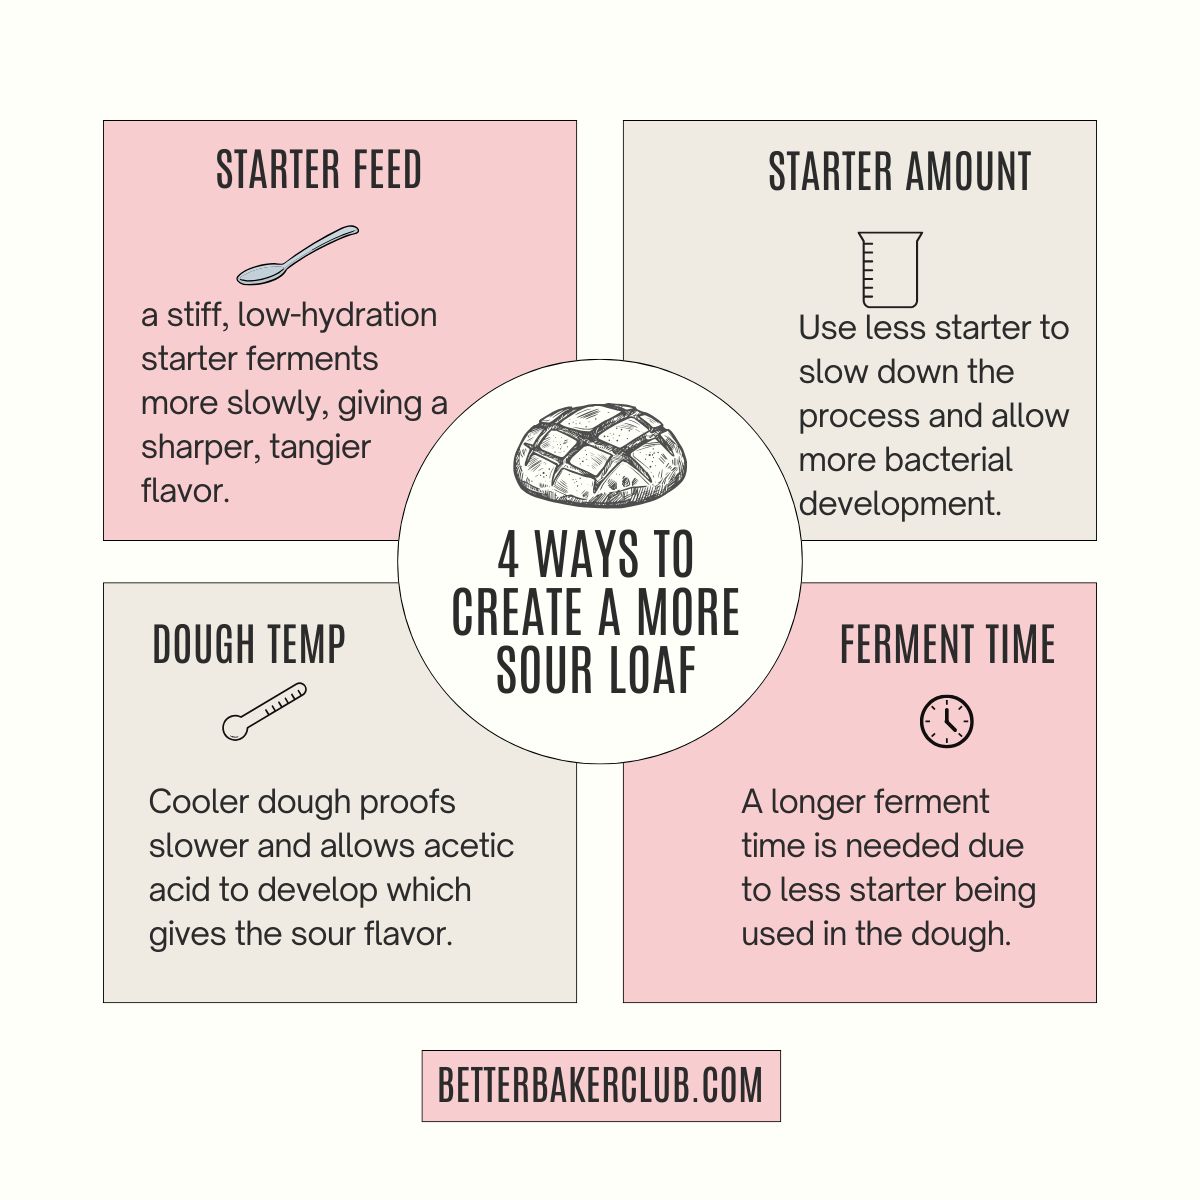
A stiffer starter ferments more slowly and produces more acetic acid, which gives sourdough its sharper tang.
Want a tangier sourdough? Switch to a 1:2:1 feeding ratio instead of 1:1:1—a thicker starter means a bold, sour flavor.
3. Use Cooler Water for Feedings
Temperature is key! Using cooler water slows down yeast activity, giving lactic acid bacteria more time to work their magic.
💡 Tip: Use water that’s 60–70°F (16–21°C) when feeding your starter, and store it in a cooler spot (around 68°F or 20°C). This slower fermentation enhances the sour flavor without making the process too complicated.
How a Stiffer Dough Makes Your Sourdough More Sour
If you want extra tang in your sourdough bread, try using a stiffer dough (lower hydration). A stiffer dough changes how your starter and dough ferment, creating more sour flavors.
Produces More Tangy Acids
- A stiffer dough has less water, which slows fermentation and helps bacteria create acetic acid. Acetic acid gives your bread a sharp, tangy flavor—perfect for a sour loaf!
Slows Down the Yeast
- With less water, the yeast works more slowly, giving the bacteria more time to create sour flavors. This slower process also gives your bread a deeper, more complex taste.
Helps Balance the Flavors
- A stiffer dough ferments more slowly, giving you a better balance between sharp (acetic acid) and mild (lactic acid) flavors. This helps create a loaf with great texture and sourness.
How a Longer, Cooler Fermentation Makes Sourdough More Sour
If you want your sourdough bread to have a stronger sour flavor, letting it ferment longer at cooler temperatures is a great way to do it. This method slows everything down and gives the sour flavors time to develop. Here’s how it works:
Boosts Tangy Acids
- Cooler temperatures (around 65–70°F) slow down the yeast, which allows the bacteria to produce more acetic acid. Acetic acid is what gives sourdough its sharp, tangy flavor.
Gives the Dough More Time
- A longer rise—up to 12–24 hours—gives the dough plenty of time to develop sour flavors. This can be done during the first rise (bulk fermentation) or the final rise (proof).
- Tip: Let the dough rise overnight in the fridge or in a cool room. This slow fermentation builds more flavor without over-proofing.
Creates a Balanced Flavor
The long, cool fermentation creates a mix of sharp (acetic acid) and mild (lactic acid) flavors. This gives you bread that’s tangy but still well-rounded and delicious.
Ingredients and Substitutions
- Bread Flour – Don't substitute all-purpose flour. This King Arthur bread flour gives a more defined shape and a better rise.
- Salt – I always use sea salt, but a non-iodized table salt will work fine too.
- Water – Use cool water (60-65 degrees)
- Starter- Feed your starter the day before, using a 1:2:1 ratio.
Tools You May Need
- Large Mixing Bowl – A big sturdy bowl or large food storage container makes it easy to mix and knead the dough.
- Dutch Whisk – This tool makes the process of mixing sticky dough so much easier!
- Kitchen Scale – Using a scale gives the most precise results. I love this scale because the pull-out display makes it so easy to read.
- Banneton– Perfect for shaping oval loaves and creating a nice ribbed pattern. (optional)
- Razor/Lame– This retractable blade is nice and makes scoring dough easier.
- Dough Sling– I just started using these reusable silicone dough mats and they make it so easy to transfer the dough into a hot Dutch oven.
- Dutch Oven- I've had this 6 qt. Dutch oven for years, and love it.
How to Make This Extra Sour Sourdough Bread Recipe
Making extra sour sourdough bread is easier than you think! Follow these simple steps, and you'll have a delicious San Francisco-style sourdough loaf!
The full detailed instructions and measurements can be found in the recipe card at the bottom of this post.
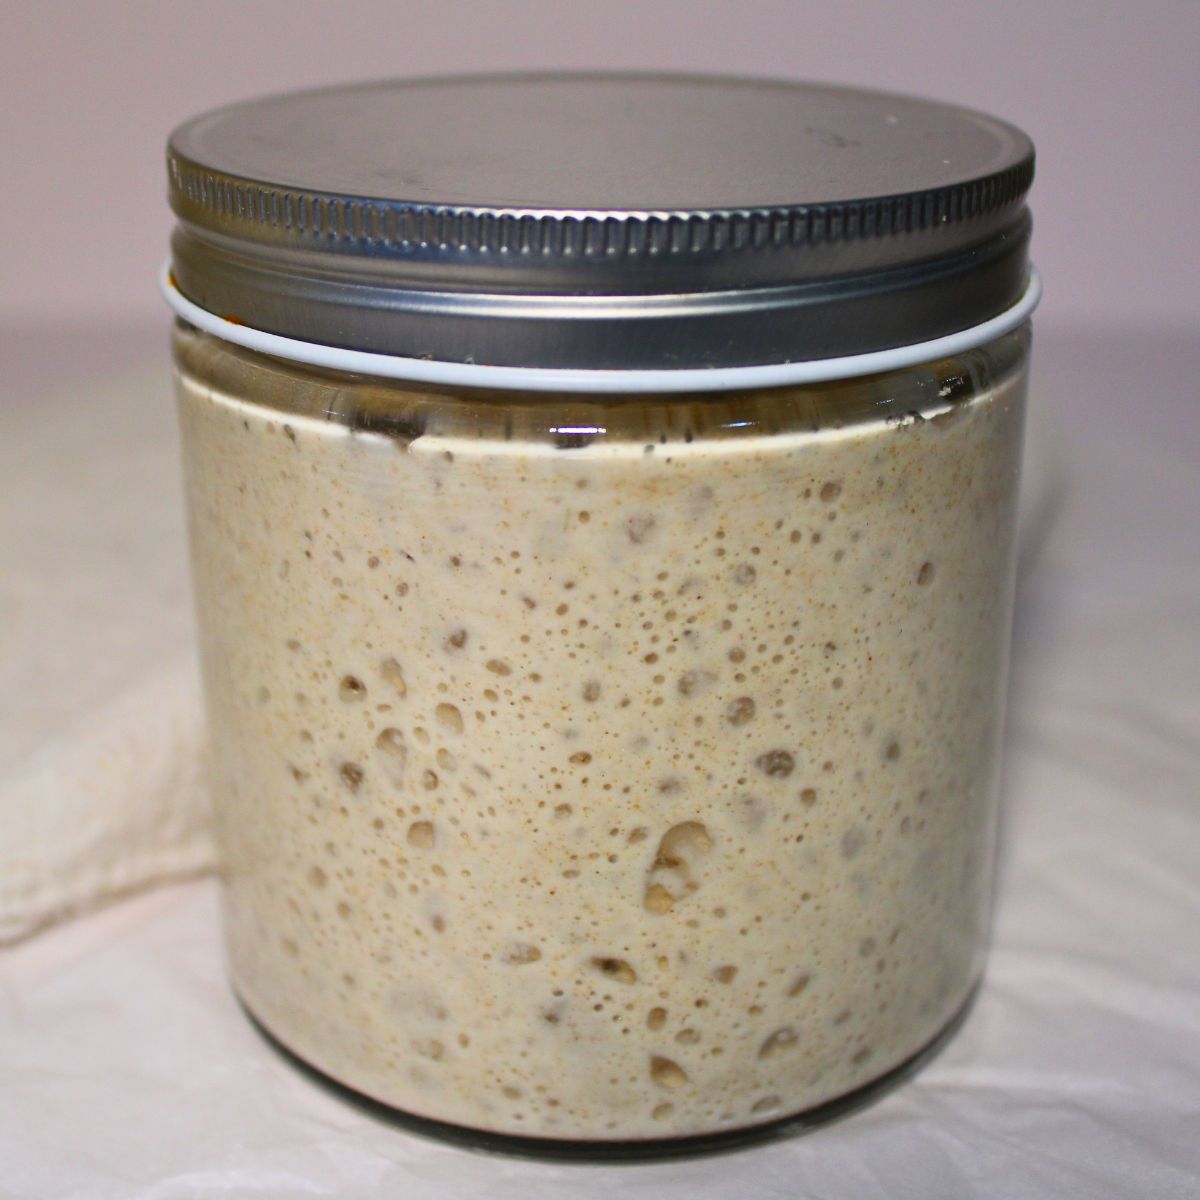
Feed Your Starter
For a stronger, tangier sourdough, use a 1:2:1 starter ratio. A 1:2:1 feeding ratio means using 1 part starter, 2 parts flour, and 1 parts water by weight. Mix the starter, flour, and water in a clean jar or bowl until smooth. Cover loosely with a lid or plastic wrap. Store at room-temperature or in a cool spot. The time it takes to peak depends on the temperature of your room:
- Cooler Room (65–68°F): It peaks in 12–16 hours
- Warmer Room (70–75°F): It peaks in 8–12 hours
I like to feed my starter the evening before, so it's ready to mix into dough in the morning.
Mix the Dough
- In a large bowl, combine the bread flour and water. Mix until a shaggy dough forms. Let it rest for 30 minutes (This process is called autolyze).
- After 30 minutes, add the sourdough starter and salt. Mix thoroughly until a smooth dough begins to form.
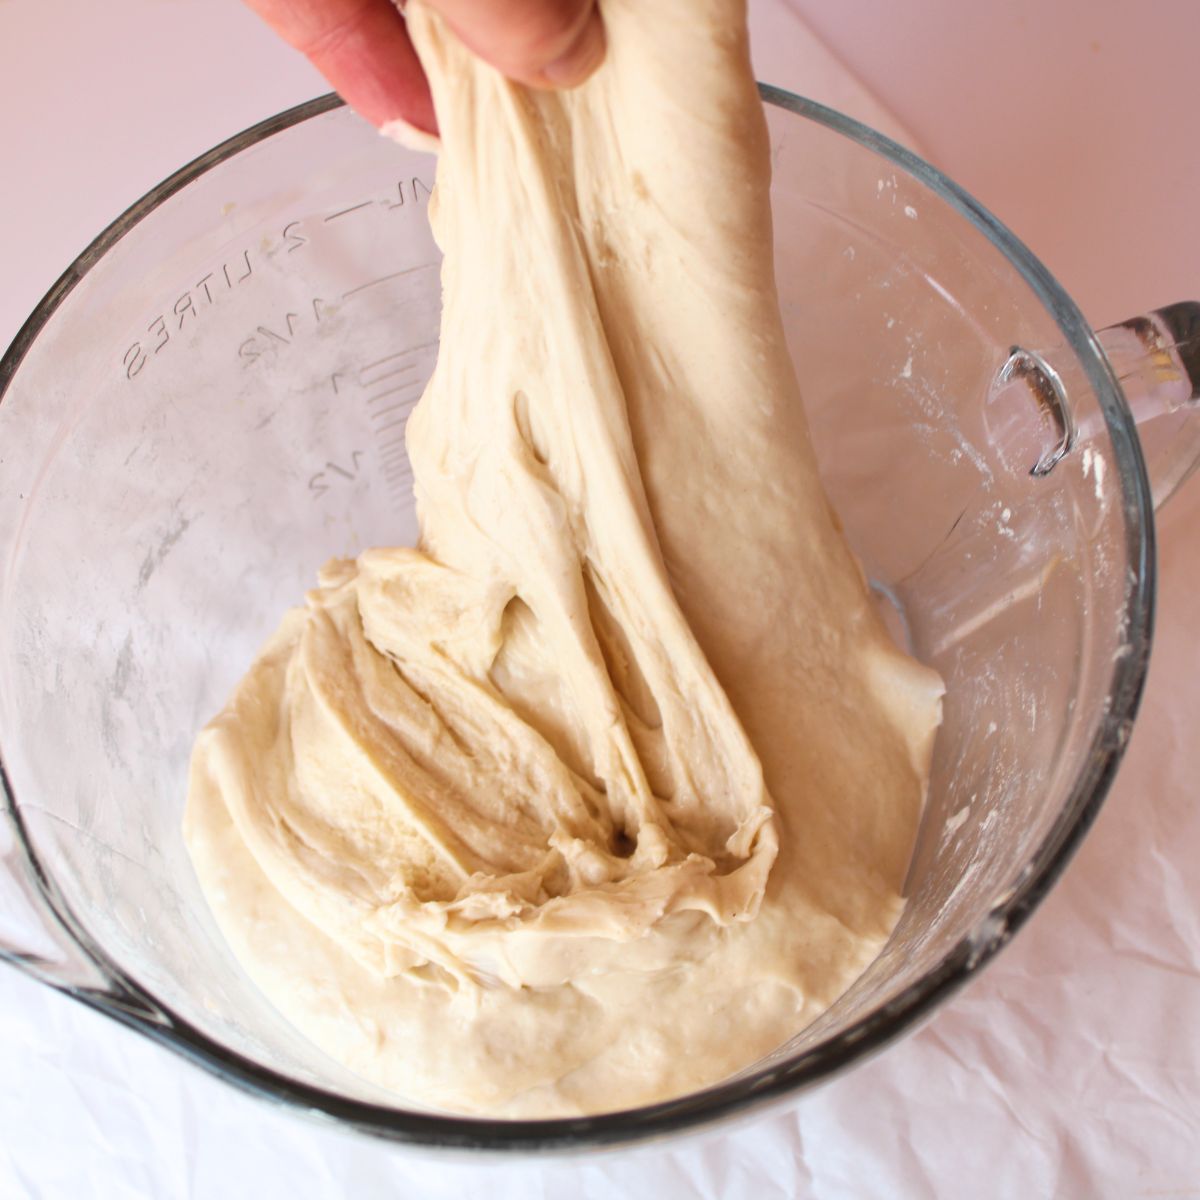
Stretch and Fold
After mixing the dough, perform three sets of stretch and folds every 30 minutes to build strength and structure.
- Gently stretch one side of the dough upward and fold it over the center.
- Rotate the bowl and repeat on all four sides.
This helps develop gluten, giving your bread a better rise and texture. Keep the dough covered between sets to prevent drying out.
Bulk Fermentation
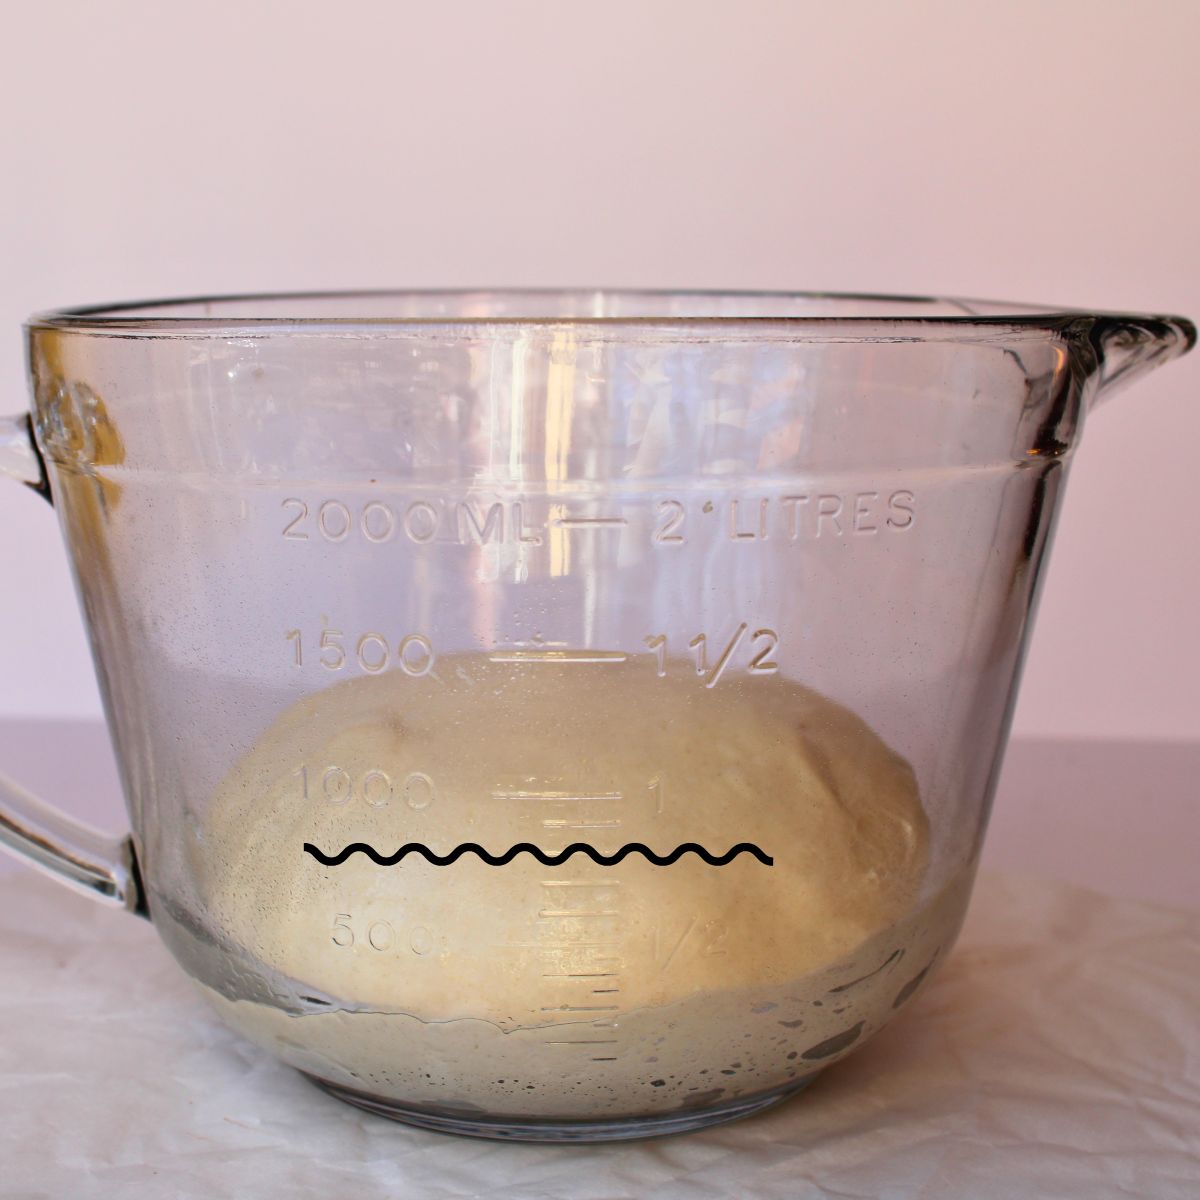
- Cover the dough with plastic wrap or a damp towel.
- Let it bulk ferment in a cooler spot (65–68°F) for 4-6 hours.
- The dough should be roughly doubled in size when it's done.
Here's How: What’s Happening Inside Your Dough
During bulk fermentation, yeast produces gas to make the dough rise, while bacteria create the tangy sourdough flavor. Stretch and folds strengthen the gluten, helping the dough hold its shape. When the dough looks puffy, airy, and passes the poke test, it’s ready for shaping.

Shape the Dough
- Turn the dough onto a lightly floured work surface. Loosely shape it into a round and let it rest for 20 minutes.
- Shape the dough, applying more tension this time, and place it in a proofing basket dusted with rice flour.
I like to use rice flour because it doesn’t absorb moisture like regular flour. It also keeps the dough from sticking to the basket during proofing.
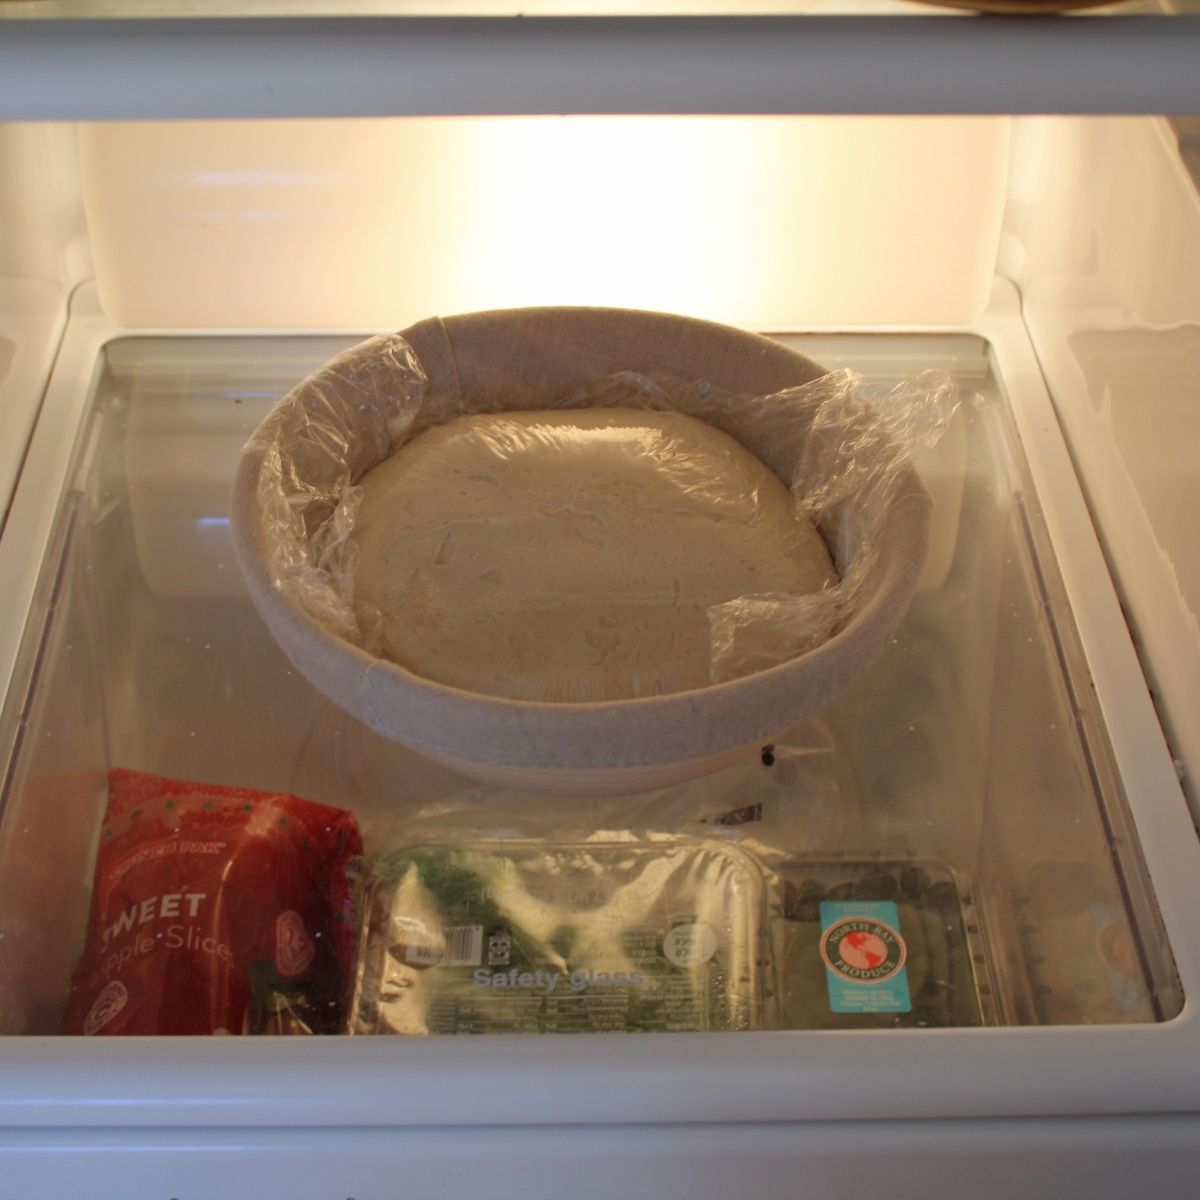
Cold Ferment
- Cover the dough and refrigerate it overnight (8-12 hours). This cold ferment slows fermentation, allowing more acetic acid to develop, and enhancing the tangy sourdough flavor.
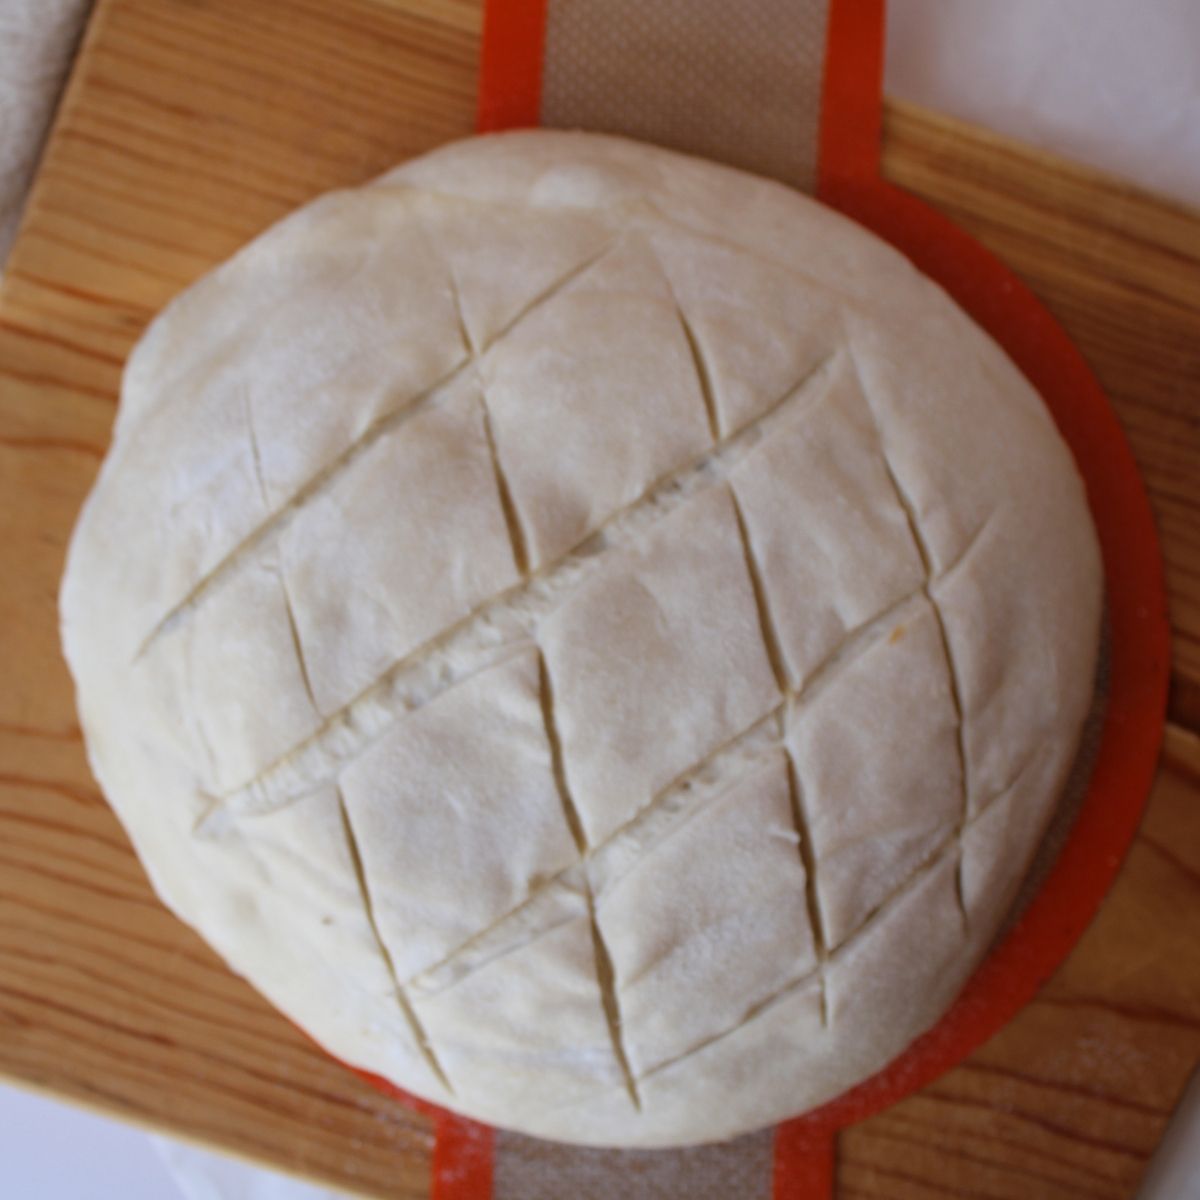
Get Ready to Bake
- Preheat your oven with your Dutch oven and lid inside.
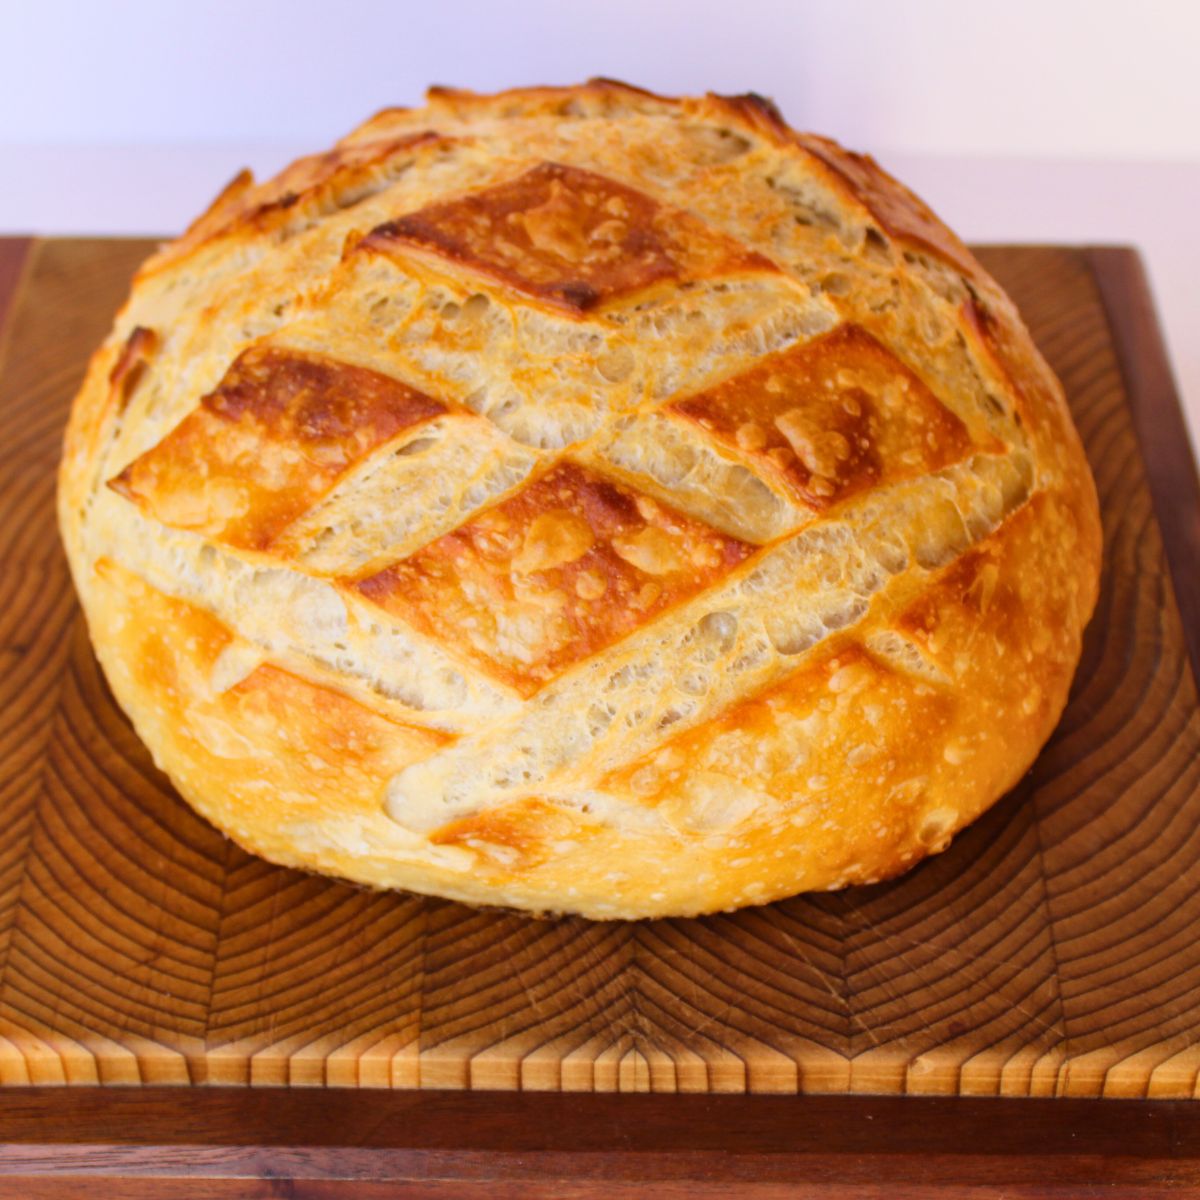
- Turn the dough onto a piece of parchment paper. Score the top with a razor blade to allow expansion. Place inside the Dutch oven and cover with the lid.
- Bake for 20 minutes with the lid on, then 20-25 minutes uncovered until golden brown.
Extra Sour Sourdough Bread Recipe
Ingredients
- 500 g 4 cups bread flour
- 360 g 1 ½ cups + 1 tablespoon water
- 20 g 1 tablespoon sourdough starter
- 10 g 2 teaspoon salt
Instructions
Mix the Dough (Autolyse)
- In a large bowl, mix the flour and water until no dry spots remain.
- Cover and let rest for 30 minutes to allow the flour to fully absorb the water.
Add the Starter and Salt
- Add the sourdough starter to the dough and use your hands to pinch and mix it in until fully incorporated.
- Sprinkle the salt evenly over the dough and mix thoroughly, squeezing the dough between your fingers to ensure there are no lumps.
Bulk Fermentation & Stretch and Folds
- Perform 3 sets of Stretch and Folds every 30 minutes, to develop gluten strength:
- To do this, wet your hand slightly to prevent sticking.
- Grab one side of the dough, gently stretch it upward without tearing, and fold it over the center.
- Rotate the bowl and repeat this on all four sides.
- Cover the dough and let rest for 30 minutes. Repeat until you have completed 3 sets of stretch and folds.
- After the last stretch and fold, let the dough rest undisturbed until it has risen and looks puffy.
- Cover the dough and let it bulk ferment at 68–72°F (20–22°C) for 4–6 hours.
- Check for Readiness: The dough is ready when it has risen 50–75% in volume, looks puffy, and has small bubbles on the surface. It should feel light and airy, with a slight jiggle when you move the bowl. Gently press the dough with a floured fingertip—if the indentation slowly springs back but leaves a slight dent, it's ready for shaping. If it springs back too quickly, let it ferment longer, checking every 30 minutes.
Pre-Shape and Rest
- Lightly flour a work surface and turn out the dough.
- Gently shape it into a round ball by folding the edges toward the center, then flipping it over and using your hands to tighten the shape by pulling it toward you on the counter.
- Let the dough rest for 20 minutes to relax. Cover with a damp towel or plastic wrap.
Final Shaping & Cold Ferment
- For a round loaf (boule): Flip the dough over, gently stretch it into a rectangle, and fold the sides toward the center. Roll the dough up and use your hands to create surface tension by pulling it in circular motions.
- For an oval loaf (batard): Shape the dough into a rectangle, fold the top third down, the bottom third up, then roll it into a tight oval.
- Place the shaped dough seam-side up into a banneton dusted with rice flour.
- Cover tightly to prevent drying out.
- Refrigerate for 8–12 hours at 38–42°F (3–6°C) for a deeper sour flavor.
Preheat & Score
- Preheat the oven to 475°F (245°C) with a Dutch oven or baking stone inside for at least 45 minutes.
- Turn the dough onto parchment paper, score the top with a razor or lame, and carefully transfer it to the preheated Dutch oven.
Bake
- Covered: 20 minutes to trap steam for a crisp crust.
- Uncovered: 20–25 minutes until golden brown.
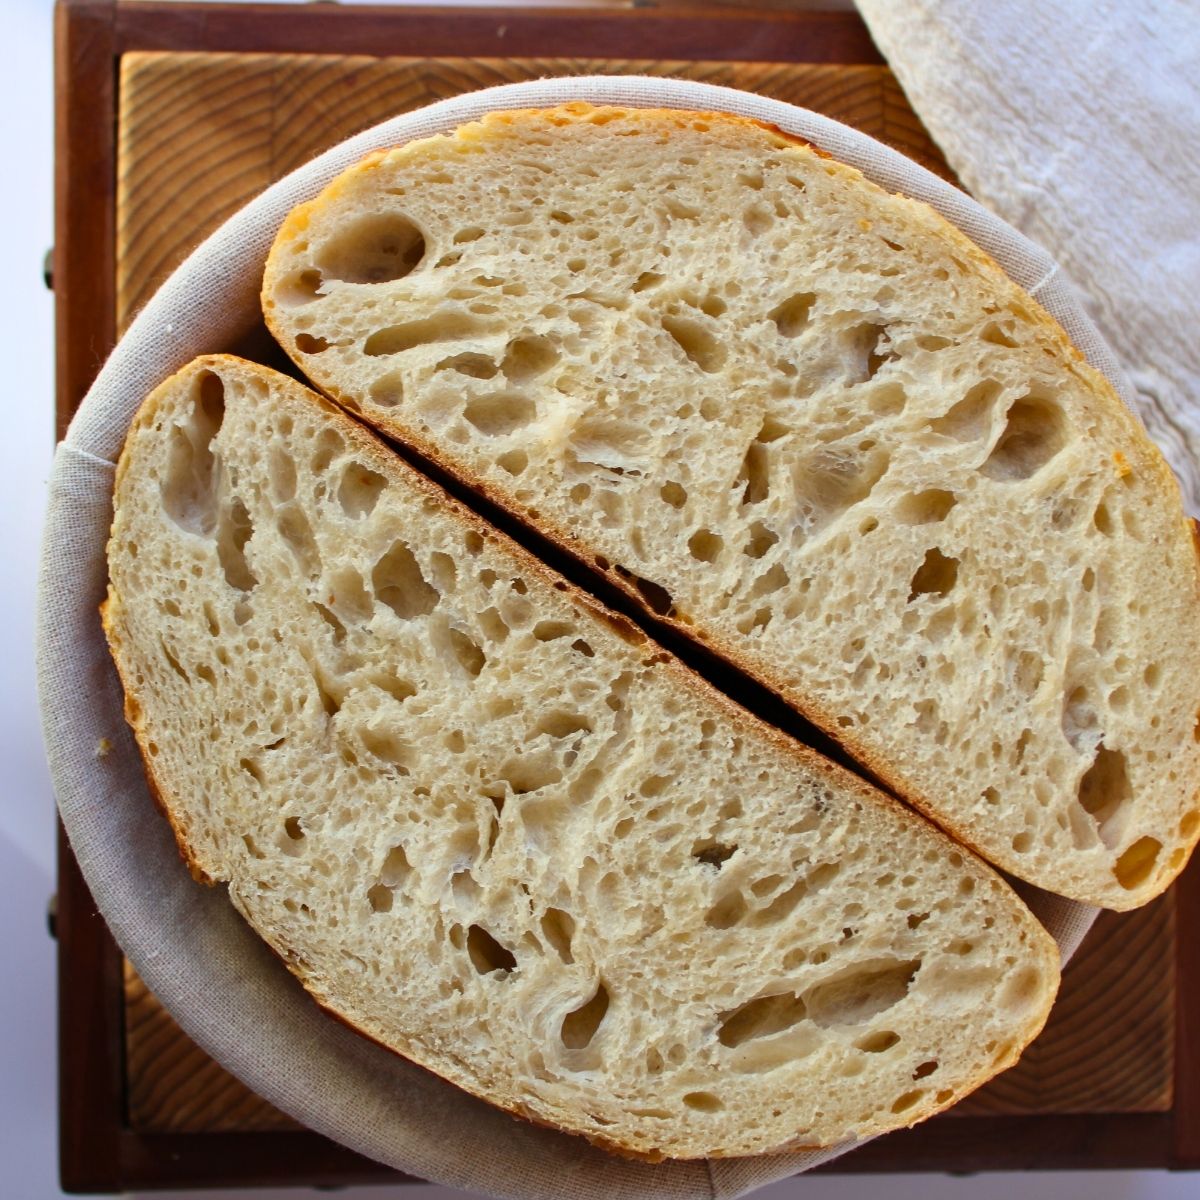
Cool & Enjoy
- Transfer the loaf to a wire rack and let it cool completely before slicing—this helps set the crumb and prevents it from being gummy.
Notes
Troubleshooting Common Issues
- Not sour enough? Try extending the cold ferment by leaving in refrigerated for 4-8 hours longer.
- Flat loaf? Make sure your starter is active and your dough had enough time to bulk ferment.
- Overproofed dough? Keep an eye on the dough temperature during the bulk fermentation stage.
This extra sour sourdough bread recipe is perfect for anyone seeking that bold, tangy flavor. With the right techniques and a little patience, you can create a loaf that rivals the best San Francisco sourdough. Share your success stories in the comments, and don’t forget to tag your sourdough love on social media!

Rylee says
simple and effective!! my go to recipe for sourdough. easy for beginners (which i am😅) ive made two loaves with this recipe and theyve both turned out amazing. 10/10 recommends!!
Samantha says
I'm confused. In one section it says to use a 1:2:1 ratio, but later it says to use a 1:5:5 ratio. Which is it?
Better Baker says
Thank you for catching that typo. It's been fixed in the blog post. The feeding should be 1:2:1.
Stephanie says
What is the best way to store the sourdough bread?