


Feeding a sourdough starter is one of the most important parts of baking great bread. It can also be one of the most intimidating parts for beginners! But don’t worry—this guide will walk you through every step of the process so you can confidently care for your starter.

Whether you’ve just received a starter from a friend, made your own from scratch, or ordered one online, the feeding method is the same.
This post will teach you how to feed your sourdough starter, how long a starter can last, how to store it, and how to revive it if it’s been neglected. We’ll also break down feeding ratios, flour choices, storage methods, and common troubleshooting tips.
New to Sourdough? These Posts Will Help
If you're just starting your sourdough journey, these beginner-friendly guides will help you feel more confident as you learn the process. Feel free to open these in a new tab and come back to them anytime:
-
How Long to Proof Sourdough Bread Before Baking
Not sure when your dough is ready? Learn how to tell if it’s fully proofed and ready for the oven. -
Easy Sourdough Bread Recipe Without a Dutch Oven
Yes—you can bake great sourdough without special equipment. This beginner-friendly recipe walks you through it step by step. -
How to Freeze Sourdough Starter: Easy Storage Tips
Need a break from baking? Learn how to safely freeze your starter for later use (without killing it!).
What’s the Best Way to Start a New Sourdough Starter?
Creating your own sourdough starter from scratch is simple and only takes flour, water, and a bit of patience. Here’s a basic day-by-day guide:
Day-by-Day Timeline:
This is a quick overview of the recipe process. To get the full starter feeding recipe, scroll down to the recipe printable at the bottom of this post.
- Day 1: Mix 25g whole wheat flour with 25g water in a clean jar. Stir well and cover loosely. Let sit at room temp.
- Days 2–3: You may start to see a few bubbles and smell something slightly sour. Discard all but 25g and feed with 25g flour and 25g water twice daily.
- Days 4–5: Starter should begin to rise and fall predictably. The smell may change to something fruity or yeasty.
- Days 6–8: If the starter consistently doubles within 4–8 hours, it's active and ready to use.

Signs of Progress:
- Bubbles throughout the jar
- Pleasant smell (tangy, fruity, slightly sweet)
- Consistent rise and fall after feedings
Signs of Trouble:
- No activity after several days (may need warmer environment or whole wheat flour)
- Pink or orange tint (discard immediately—this means contamination)
- Sharp rotten smell (start over or revive with careful feedings)

How Much Time Does It Take to Build an Active Starter?
Most starters are ready in 7 to 14 days, but this can vary depending on conditions.
What Slows It Down:
- A cold kitchen (ideal temp is 70–75°F)
- Not feeding regularly (at least once daily, ideally twice)
- Using only white flour from the beginning
How to Speed Things Up:
- Start with whole wheat or rye flour for the first few days
- Keep the starter warm by placing it in the oven with the light on or using a proofing box
- Stir your starter once or twice between feedings to oxygenate it
What’s the Best Feeding Process for the Best Results?
For most beginners, feeding your starter with equal parts flour and water by weight (1:1:1 ratio) is the most reliable method.
Daily Maintenance Tips:
- Room Temp: Feed every 12–24 hours
- Refrigerated: Feed once per week and let warm up before baking
Why Equal Parts Work:
- Easy to remember
- Balances yeast and bacteria growth
- Fast rise and reliable fermentation window
When to Adjust Hydration:
- High hydration (1:2:2 or more): Great for prepping for focaccia or longer fermentation
- Stiff starter (1:2:1): Ideal for bagels, long-term fridge storage, and warm weather conditions

How Much Starter Should I Keep on a Regular Basis?
Keeping a smaller amount of starter is ideal unless you're baking frequently.
Ideal Amount by Baking Frequency:
- Frequent Bakers: Keep 100g or more for quick access
- Occasional Bakers: Keep 25–50g and scale up before baking
Why a Small Starter is Smart:
- Less waste (less discard)
- Easier to manage and feed
- Reduces cost of flour over time
How to Scale Without Waste:
- Feed your small starter with a 1:2:2 or 1:5:5 ratio the night before baking
- Build only as much as your recipe requires (usually 100–200g)
How Long Does Sourdough Starter Last in Storage?
If you need a break from baking, you have several storage options:
Refrigeration (Short Term):
- Feed and store in a loosely covered jar
- Feed once a week to maintain health
Dry Starter (Backup):
- Spread thin on parchment paper
- Let dry completely and store in airtight container
- Rehydrate with water and flour over a few days when needed
Freezing (Travel or Emergency Use):
- Portion into an ice cube tray
- Thaw and feed over a couple of days
Understanding Your Starter’s Behavior (Starter Science Simplified)
Knowing what’s happening inside your jar helps you become a better baker.
Lactic Acid Bacteria vs Wild Yeast:
- Yeast makes the bubbles and rise
- Lactic acid bacteria add flavor and preserve your starter
What Causes a Thin Layer of Hooch?
- Hooch is a sign your starter is hungry
- Pour it off or stir it in before feeding
Signs of a Healthy Sourdough Starter:
- Bubbles throughout
- Rises and falls predictably
- Smells pleasant (tangy, sweet, slightly alcoholic)
- Doubles in 4–8 hours
Tip: Take photos or use a rubber band to track rise. Seeing it double builds your confidence!
Quick Start: How to Feed a Sourdough Starter
If you’re just getting started, here’s the basic process:
- Weigh out 25 grams of starter into a clean jar.
- Add 25 grams flour (bread flour or whole wheat).
- Add 25 grams warm water.
- Stir until smooth.
- Cover loosely (cloth, lid, or plastic wrap).
- Let sit at room temperature until it doubles (usually 4–8 hours).
- Discard the rest of the old starter.
Repeat every 24 hours (or sooner if very bubbly and hungry).
What You Need to Feed Your Starter
- Digital kitchen scale (for accurate ratios)
- 3 jars:
- Feeding jar
- Discard jar (to store leftover starter for recipes)
- Clean jar (for rotating clean feedings)
- Flour (bread flour or whole wheat)
- Room temperature water (filtered or tap)
Feeding Ratios Explained (What They Are and Why They Matter)
Feeding ratios refer to how much starter, flour, and water you use. Here are the most common ones:
1:1:1 Ratio (Starter : Flour : Water)
- Example: 50g starter + 50g flour + 50g water
- Fermentation time: 4–6 hours
- Best for: Daily maintenance at room temperature
1:2:2 Ratio
- Example: 50g starter + 100g flour + 100g water
- Fermentation time: 6–8 hours
- Best for: Slower feedings, building a stronger starter
1:5:5 Ratio
- Example: 50g starter + 250g flour + 250g water
- Fermentation time: 12–16 hours
- Best for: Prepping for a bake, building volume
1:2:1 Ratio (Stiff Starter)
- Example: 50g starter + 100g flour + 50g water
- Fermentation time: 12–24 hours
- Best for: Long fermentation, better structure, slower activity
Why does this matter? The more fresh flour and water you add, the longer it takes to ferment—but the stronger your starter becomes.
Best Flour for Feeding Your Sourdough Starter
Choosing the right flour affects your starter’s health. Here’s a breakdown:
- Bread flour: High protein, great structure, consistent results
- Whole wheat flour: Higher nutrients, jumpstarts fermentation
- Rye flour: Encourages wild yeast, excellent for building strength
- All-purpose flour: Okay for maintenance, especially if unbleached
Tip: Avoid bleached flour. It can harm the natural yeast and bacteria in your starter.

How to Make a Starter from Scratch
Want to build your own? Here’s the process:
Day 1:
- Mix 25g whole wheat flour + 25g water in a jar.
- Cover loosely. Let sit at room temp.
Days 2–7 (or longer):
- Feed twice daily.
- Each time: discard all but 25g. Add 25g flour + 25g water.
- Switch to bread flour after Day 3 if desired.
- When it doubles in size between feedings and smells fresh, it’s ready.
How to Know When Your Starter is Ready to Use
A healthy starter will:
- Double in size within 4–6 hours
- Be bubbly on top and throughout
- Smell fresh and tangy (not sour or rotten)
- Pass the float test (a spoonful floats in water)
Use a rubber band or marker to track growth after each feeding.

How Long Does Sourdough Starter Last?
A sourdough starter can last a lifetime—literally. Some bakers maintain starters that are over 100 years old!
At Room Temperature:
- Feed every 12–24 hours
- Track growth and smell
- Discard hooch if it develops (a thin liquid on top)
In the Fridge:
- Feed once per week
- Let it warm up and feed twice before baking
- Store in a clean jar with a loose lid (not airtight)
Dried Starter:
- Spread thin on parchment, dry completely, store in airtight container
- Can last for years
Frozen Starter:
- Freeze in ice cube trays or bags
- Revive with multiple feedings over a few days
Reviving a Neglected Starter
If your starter smells sharp, has hooch, or hasn’t been fed in a while:
- Discard most of it
- Keep 25g and feed 1:1:1
- Keep in a warm spot
- Feed daily until it becomes active again
Sometimes it takes 2–3 days of feedings to come back to life.
Scaling Your Starter for Recipes
Most recipes call for 100g–200g of starter. Here’s how to scale up:
- Feed 50g starter with 50g flour + 50g water = 150g total
- Need more? Use a larger ratio (1:2:2 or 1:5:5)
- Feed the night before or early morning so it’s active when you bake
Tip: Only scale up when you’re planning to bake. Maintain a small amount to reduce waste.
Sourdough Discard: What to Do With It
You don’t need to throw discard away. Try these recipes:
Store discard in the fridge for up to 2 weeks. If it smells bad or turns orange/pink, toss it.

Frequently Asked Questions (FAQ)
Q: What if I forget to feed my starter?A: Feed it as soon as you remember. If it’s been more than a few days, revive it with a few consecutive feedings.
Q: Do I have to feed it every day?A: Only if it’s kept at room temp. If you refrigerate it, feed once a week.
Q: Can I switch flours?A: Yes. Transition slowly if switching from whole wheat to white.
Q: Why do I have to discard?A: To keep the balance of wild yeast healthy and prevent overgrowth.
Q: What’s the hooch on top?A: It’s alcohol from fermentation. Pour it off or stir it in before feeding.
More Sourdough Tips for Beginners
- Keep jars clean
- Label with dates/times
- Don’t panic if it’s slow—just feed consistently
- Whole wheat can speed things up
- Watch for doubling and bubbles as your best indicators
Tools I Recommend for Sourdough Success (Affiliate Links)
If you're just getting started on your sourdough journey, having the right tools can make the process easier, more consistent, and way less messy. Here are a few of my favorite sourdough tools that I use in my own kitchen. These are affiliate links, which means I may earn a small commission (at no extra cost to you) if you make a purchase.
Digital Kitchen Scale
Measuring by weight is a game-changer for sourdough baking. You’ll get more accurate results when feeding your starter and mixing dough.
👉 Shop my favorite digital scale here
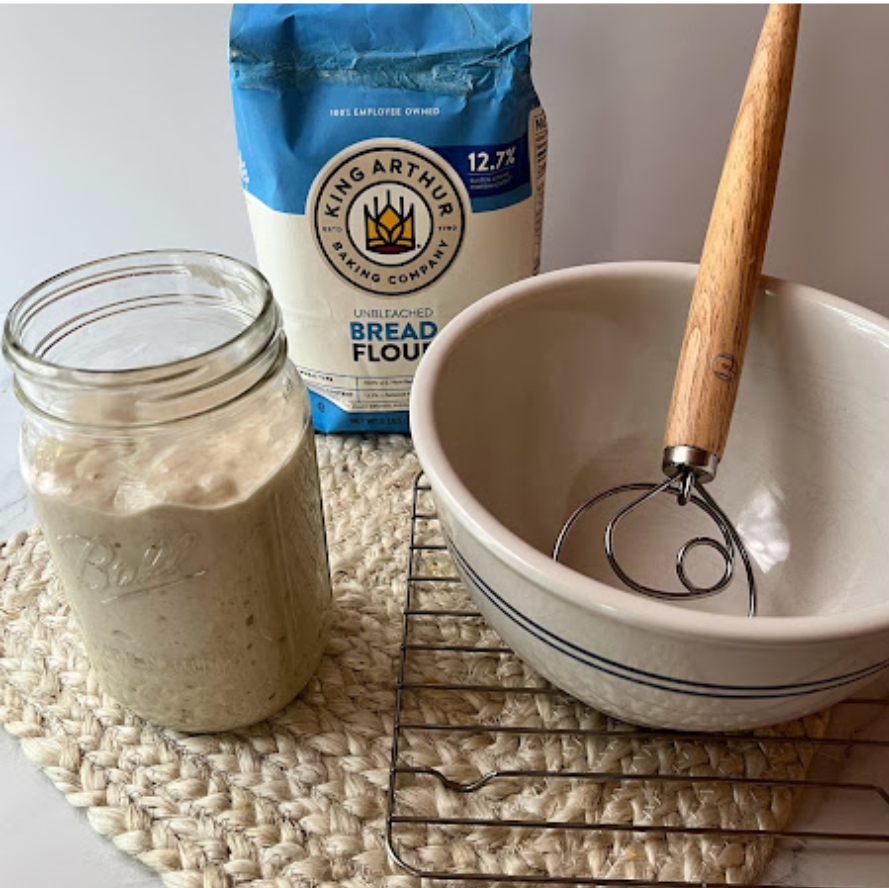
Wide-Mouth Glass Jars
Perfect for feeding and storing your starter. They’re easy to clean, and you can use a rubber band to track the rise.
👉 Check out these jars
Dough Whisk
For mixing your dough, this tools help reduce sticking and mess. A dough whisk is great for mixing by hand without a stand mixer.
👉 Find one here
These tools aren’t required to get started—but they’ll definitely help you feel more confident and keep your sourdough routine stress-free.
Homemade Sourdough Starter
Equipment
- glass quart jars, cheesecloth, food scale
Ingredients
- 25 grams whole wheat or rye flour 3 Tbsp
- 25 grams room temperature water 2 Tbsp
Instructions
Day One
- In a clean glass jar, combine 25g flour and 25g water (or ¼ cup flour and 2 tablespoon water).
- Stir well until smooth.
- Cover loosely and let sit at room temperature for 24 hours.
Day Two
- Discard half the mixture (about 25g or 1½ tbsp).
- Add 25g flour + 25g water (or ¼ cup flour + 2 tablespoon water).
- Stir and cover loosely. Let sit at room temp.
Days 3-7+
- Continue feeding once or twice daily:
- Discard all but 25g starter (or 1½ tbsp).
- Add 25g flour + 25g water (or ¼ cup + 2 tbsp).
- Switch to white or bread flour after Day 3 if you prefer a milder flavor.
- Wait for consistent bubbling, rise, and a pleasant smell.
How to Know It's Ready
- Starter doubles in size within 4–6 hours of feeding
- Bubbly on the surface and throughout
- Smells tangy and slightly sweet (not sharp or rotten)
- Passes the float test: a spoonful floats in water
Notes
- Aim for a thick pancake batter consistency
- Use the same jar and a rubber band to track rise
- Adjust flour or water slightly as needed. This doesn’t need to be exact!
- Consistency and warmth help. Keep it around 70–75°F for best results
Try This First: My Favorite Sourdough Discard Recipe
While your starter matures, use your discard in something simple and satisfying like these sourdough breadsticks—they're perfect for first-timers and don’t require rising or shaping skills.

Sourdough Starter Simplified!
Feeding your sourdough starter doesn’t have to be confusing. Once you understand feeding ratios, storage methods, and how to read the signs of a healthy culture, everything clicks into place.
Whether you bake weekly or once a month, this guide gives you everything you need to keep your starter strong. Refer back here anytime you have a question about feeding, storing, reviving, or baking with sourdough.

Leave a Reply