


When I first started selling at farmers markets, I thought great flavor would sell itself. I baked all day, packed everything neatly, and waited for the crowds. But what really caught people’s attention wasn’t just my cookies, it was my branding.
At my latest vendor event, I got compliment after compliment on my packaging, labels, and overall booth design. Customers literally stopped mid-walk to say, “Your setup is beautiful!” That’s when I realized a strong brand isn’t about being fancy, it’s about being consistent and memorable.
What you’ll learn in this post
• Who this post is for: home bakers and small creators who want their packaging and presentation to look professional.
• What you’ll learn: how to build a simple brand kit, create labels and packaging that match, and keep your visuals consistent across every platform.
• How to do it: step-by-step ideas and tools, including how I use my Munbyn Printer to design and print everything right from home.
If you’re a small business or first-time pop-up vendor, Munbyn makes it easy and affordable to create professional packaging and marketing materials right from home, no expensive software, no complicated setup, and no stress.
What’s a Branding Kit
If you’ve ever felt like your labels, packaging, and booth don’t quite match, you need a brand kit.
Why every home bakery needs their own brand kit
For a home bakery, your branding kit is simply the handful of elements that make your business recognizable to your target audience, your brand colors, fonts, visuals, and tone.

Your branding kit
Logo – The name of your bakery and the design that represents it.
Colors – A cohesive color palette of 2–3 shades you’ll use on packaging, social media, and marketing materials.
Fonts – The same font styles for your labels, price lists, and social posts.
Graphic elements – The little touches that tie your brand’s visual identity together (icons, borders, or illustrations).
Templates – Ready-to-go design templates for your labels, thank-you cards, flyers, or social media assets.
You don’t need fancy software or a marketing team, just a few consistent choices that make your business feel intentional and professional.
If you’re just getting started, tools like Canva offer free style templates that make the design process easy.
If you want to make sure your label meets all the legal requirements, read my post on what to include on your cottage food labels.

My Market-Day Experience: Turning a Table Into a Brand
Let’s talk about how this works in real life.
How I used my Munbyn Printer to brand my booth
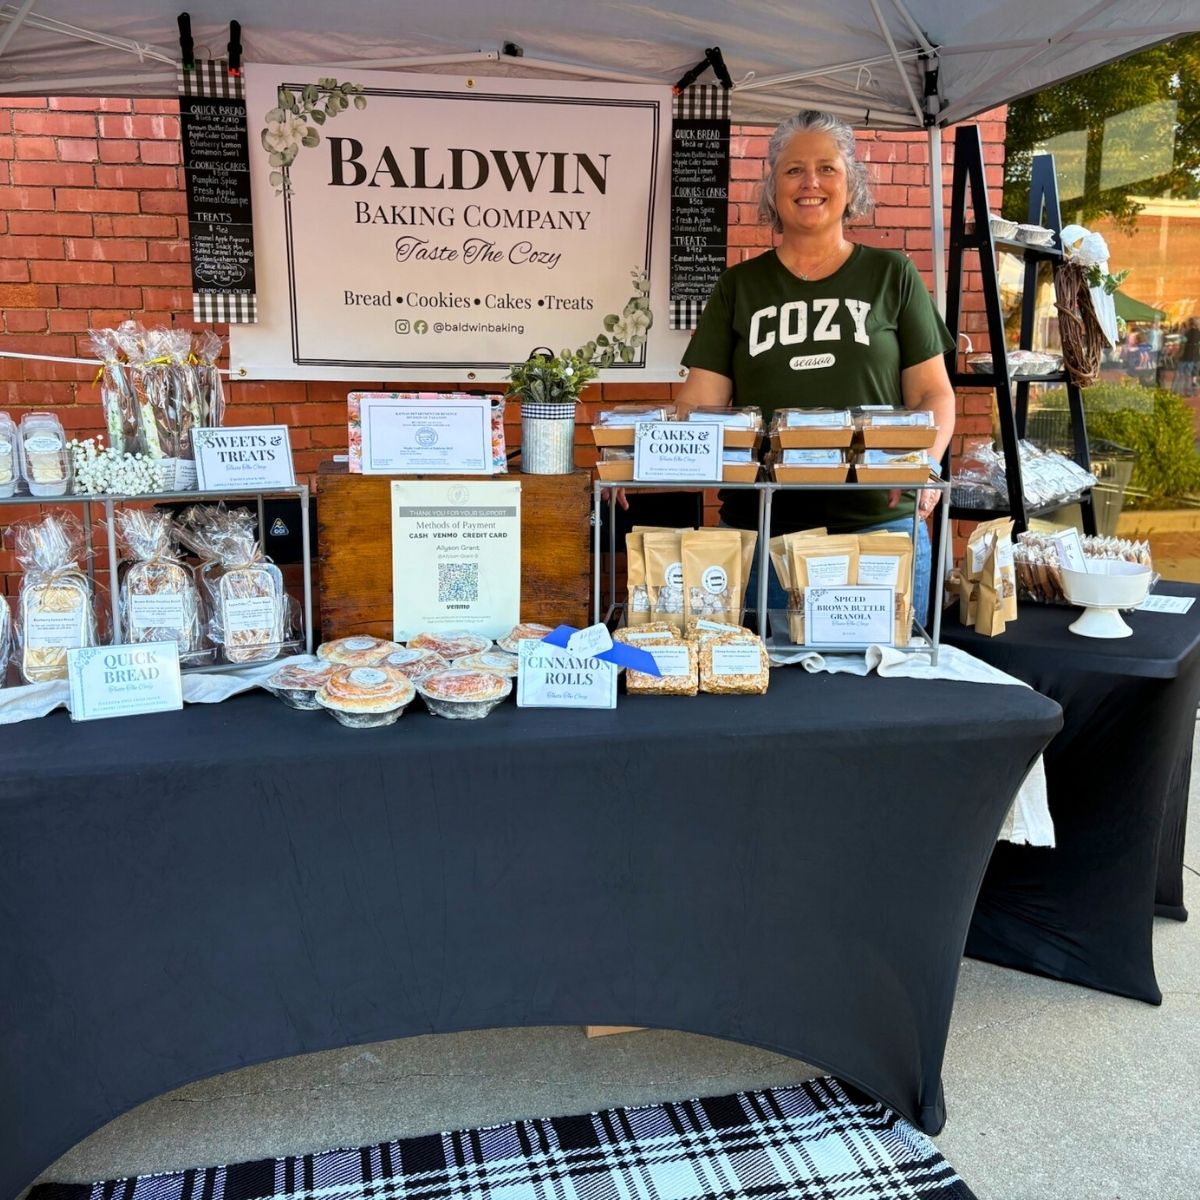
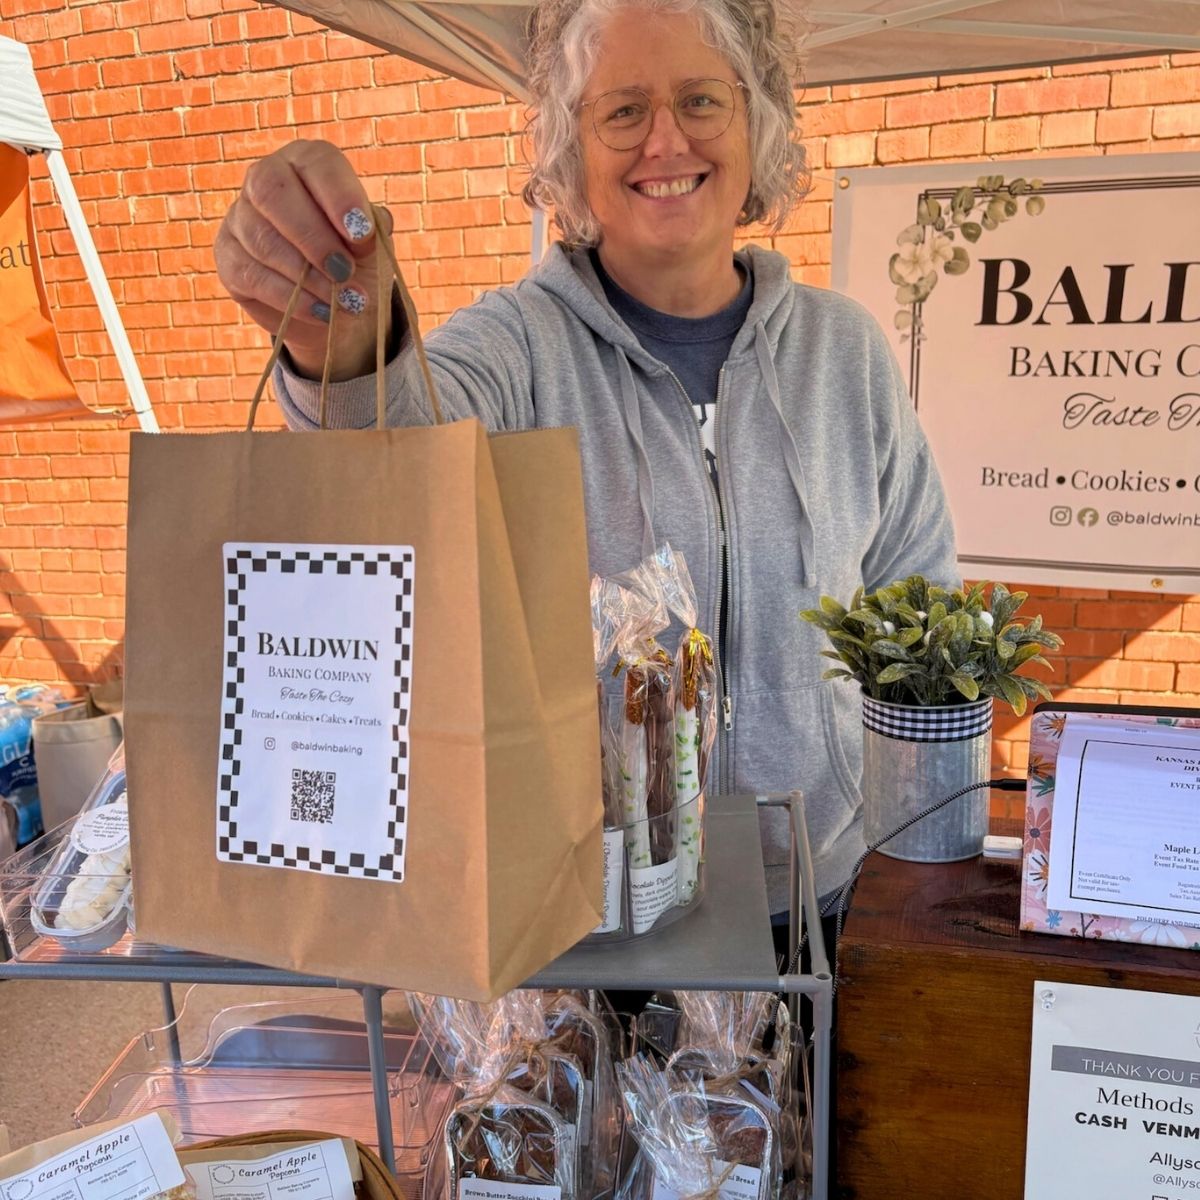
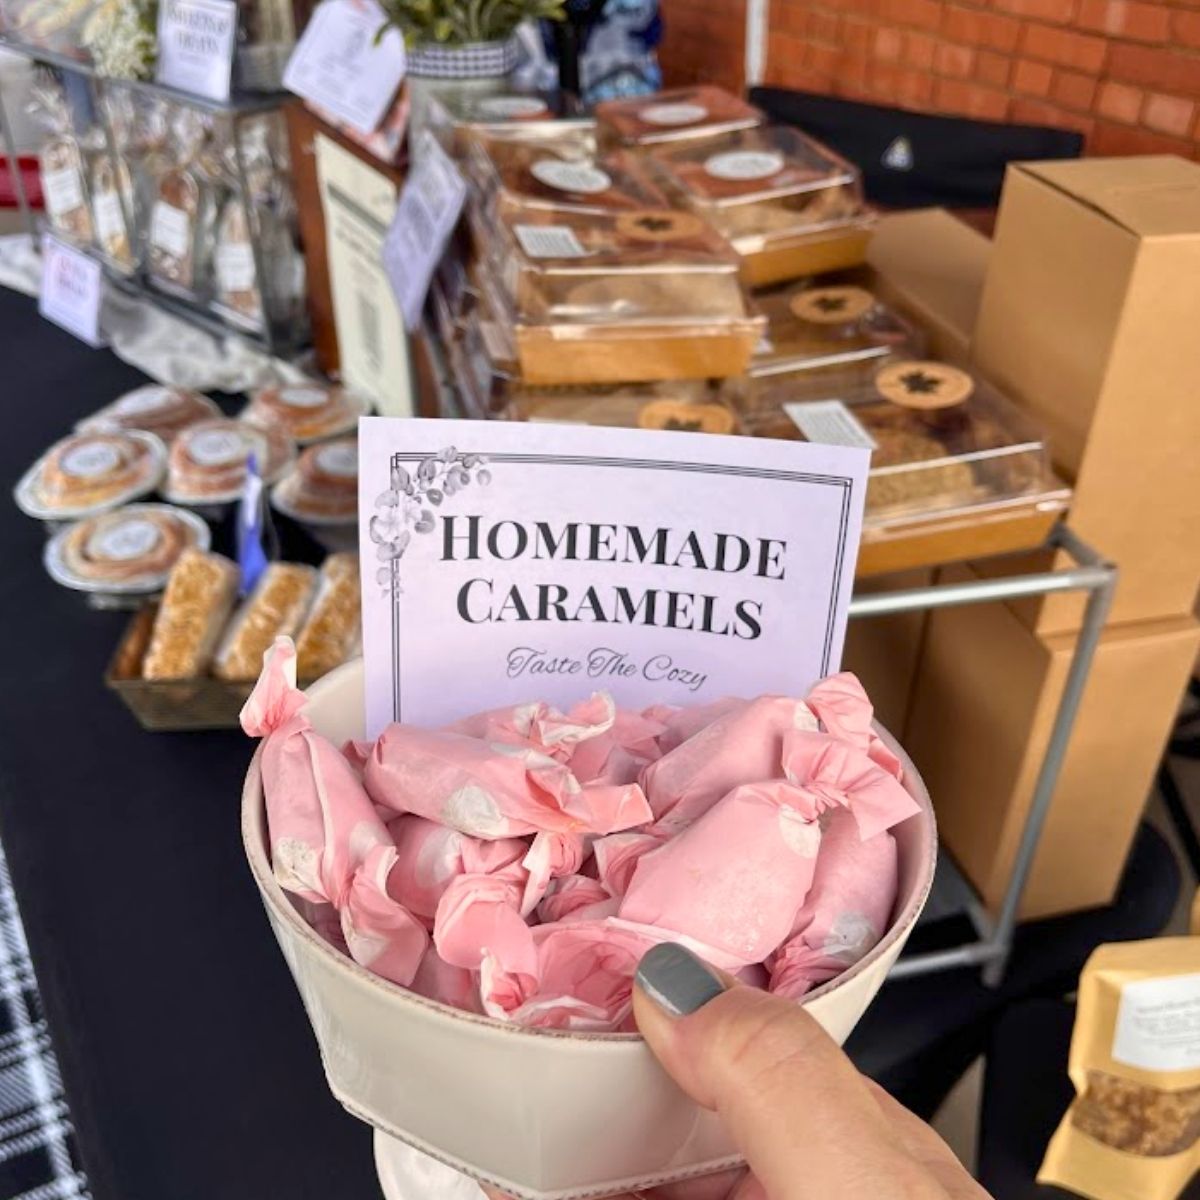
Last weekend, I used my Munbyn 405B Dual-Color Label Printer to bring my brand to life at a local farmers market. It is the first and only thermal label printer on the market that prints in multiple colors.
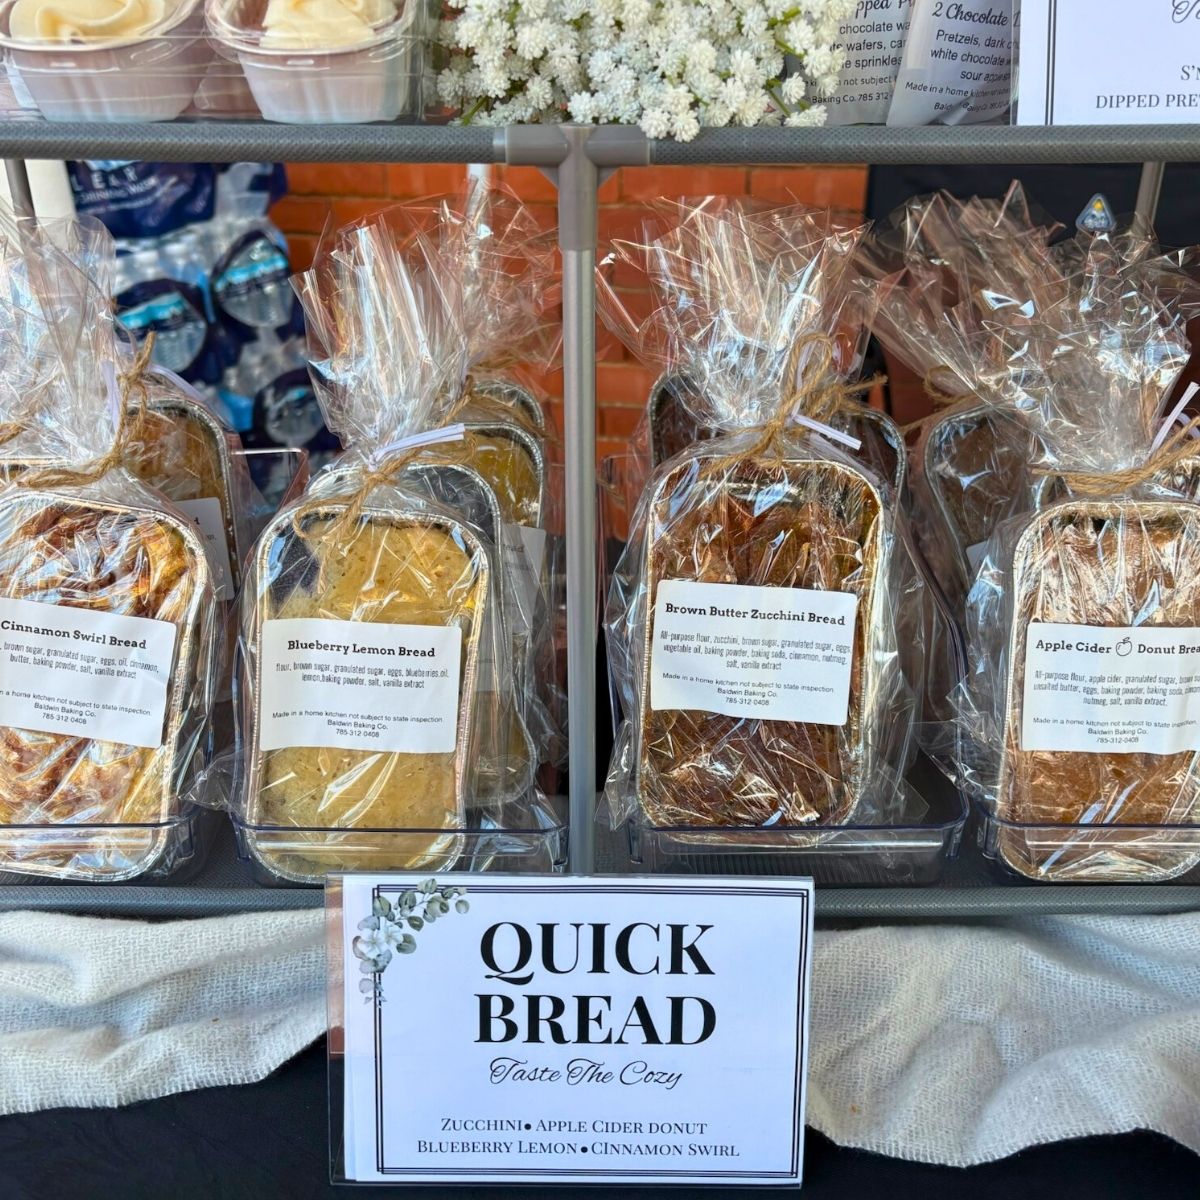
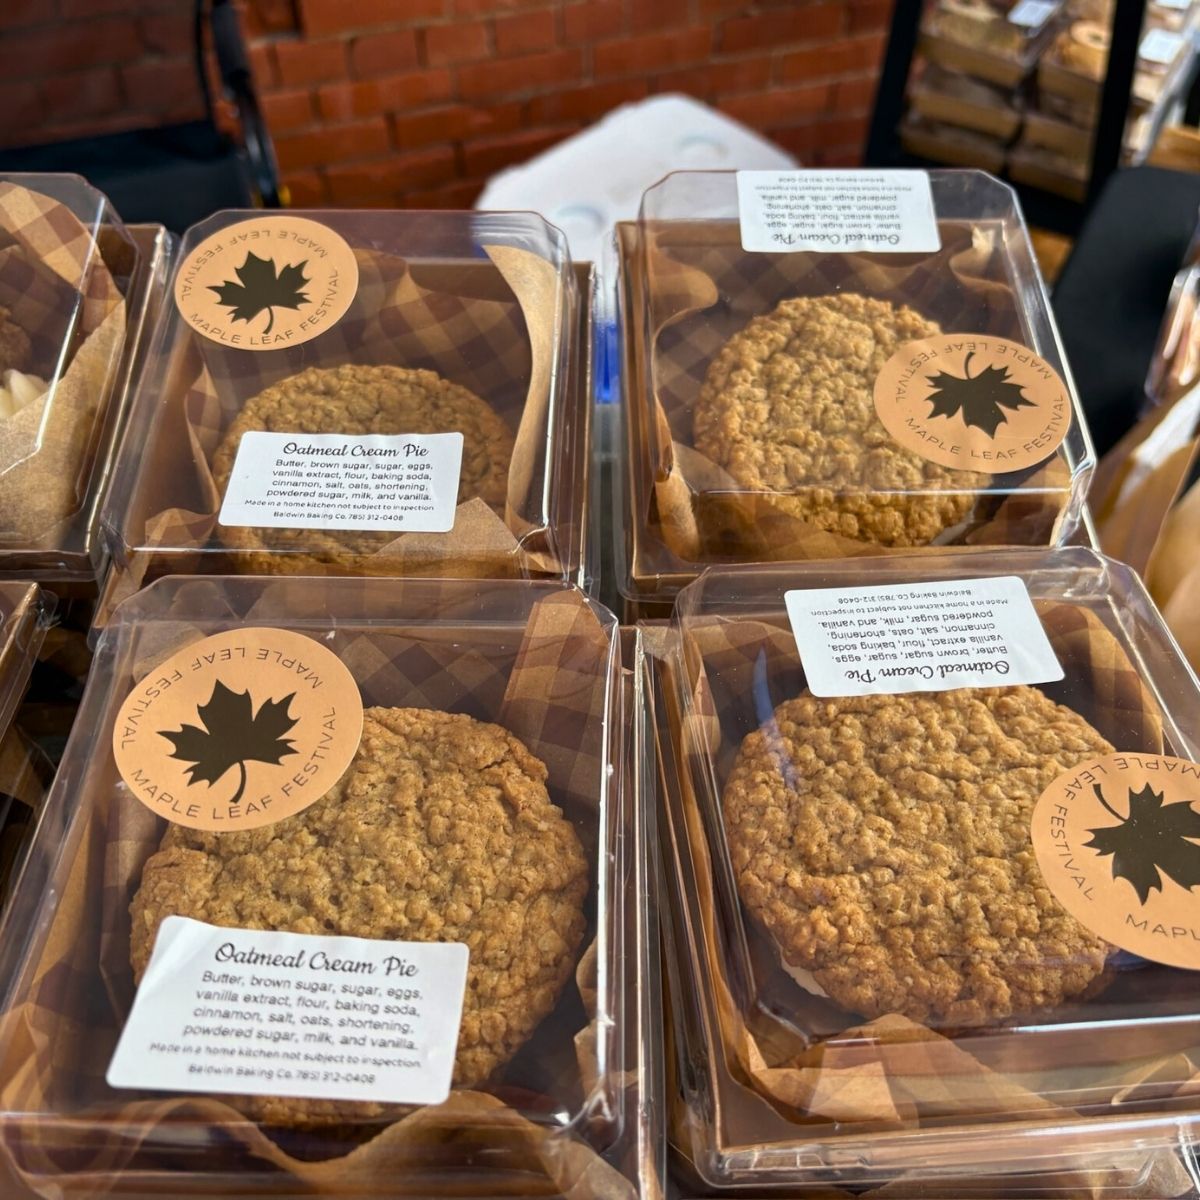
Here’s what I created using my homemade brand identity kit: custom logo stickers printed on Munbyn’s dual-color label rolls, paper handle bags stickered with 4x6 branded shipping labels, and coordinating signage and ingredient labels featuring the same graphic elements.
The results were instant compliments
I designed everything in the Munbyn Print App, which has built-in design templates, customizable fonts, and creative inspo, no Adobe Illustrator required.
I even designed a checkerboard pattern that perfectly tied my visuals together. The results were instant compliments. Customers took photos of my booth, several said they recognized my brand from Instagram, and one even told me, “I found your booth because of those checkered labels.”
That’s when I realized this wasn’t just a cute display, it was a successful brand identity in action.

If you’re curious about how I use Munbyn printers for product labels and pricing, check out my guide to creating custom bakery labels.
Why Branding Matters for Home Bakers
If you’re a home baker wondering if branding really matters, it does.
What a strong brand can do for you
Build trust. A cohesive visual brand identity tells customers you’re serious about your business.
Increase perceived value. Products with clear branding look premium and feel gift-worthy.
Create recognition. Consistent brand visuals help customers remember you at markets and online.
Simplify marketing projects. Once your templates are set, you can create new marketing materials in minutes.
In short, branding transforms your kitchen hobby into a professional, recognizable bakery brand.
Step 1: Build Your Own Bakery Brand Kit
You don’t need a designer to create your own brand identity kit, just a few key elements to keep your marketing materials and brand assets cohesive.
What to include in your brand kit
Logo and logo variations – Your full logo, plus simplified versions for small stickers or profile icons.
Color palette – 2–3 core brand colors (pro tip: take note of your color’s hex codes for exact matches).
Typography – A font that captures your brand personality.
Brand assets – Icons, patterns, or illustrations that express your style.
Photo style – Consistent lighting or tone for your product photos.
Brand guidelines template – A quick reference page for how to use your logo and colors.
Canva offers free style guide templates that you can find by searching “style guide” or “brand guidelines” on its website. These templates are available for both free and paid accounts and can be customized with your brand’s colors, fonts, and logos. If you use Canva’s brand kit tool (available in the paid level), you can save everything for future use.
Step 2: Choose a Cohesive Color Scheme and Font
Your color palette sets the tone for your bakery’s visual brand identity, but here’s the truth: you don’t need a dozen colors to look professional.
Why less is more
When you’re designing labels, signs, and packaging, less is more. If you go overboard on color, you’ll end up locking yourself into expensive full-color printing or needing to reorder matching supplies for every new shade.
How to make your colors work
Instead, keep it simple. Use a single-color logo and print it on a colored label for contrast. Or, choose one pop of color that represents your brand and use it consistently across your designs. That way, you still get a branded, cohesive look without paying for full-color printing on everything.
The great news is that the new Munbyn thermal printer makes this process easier than ever. It prints in red and blue, which means you can add a touch of color to your logo or product labels, even if your original designs were black and white. I used to print everything in black and rely on colored label rolls for that extra pop. But now that I can add color directly, my packaging feels more customized.
Step 3: Design Your Packaging and Marketing Materials
Now your brand visuals are ready, it’s time to apply them to your products and booth setup.
Where to share your branded materials
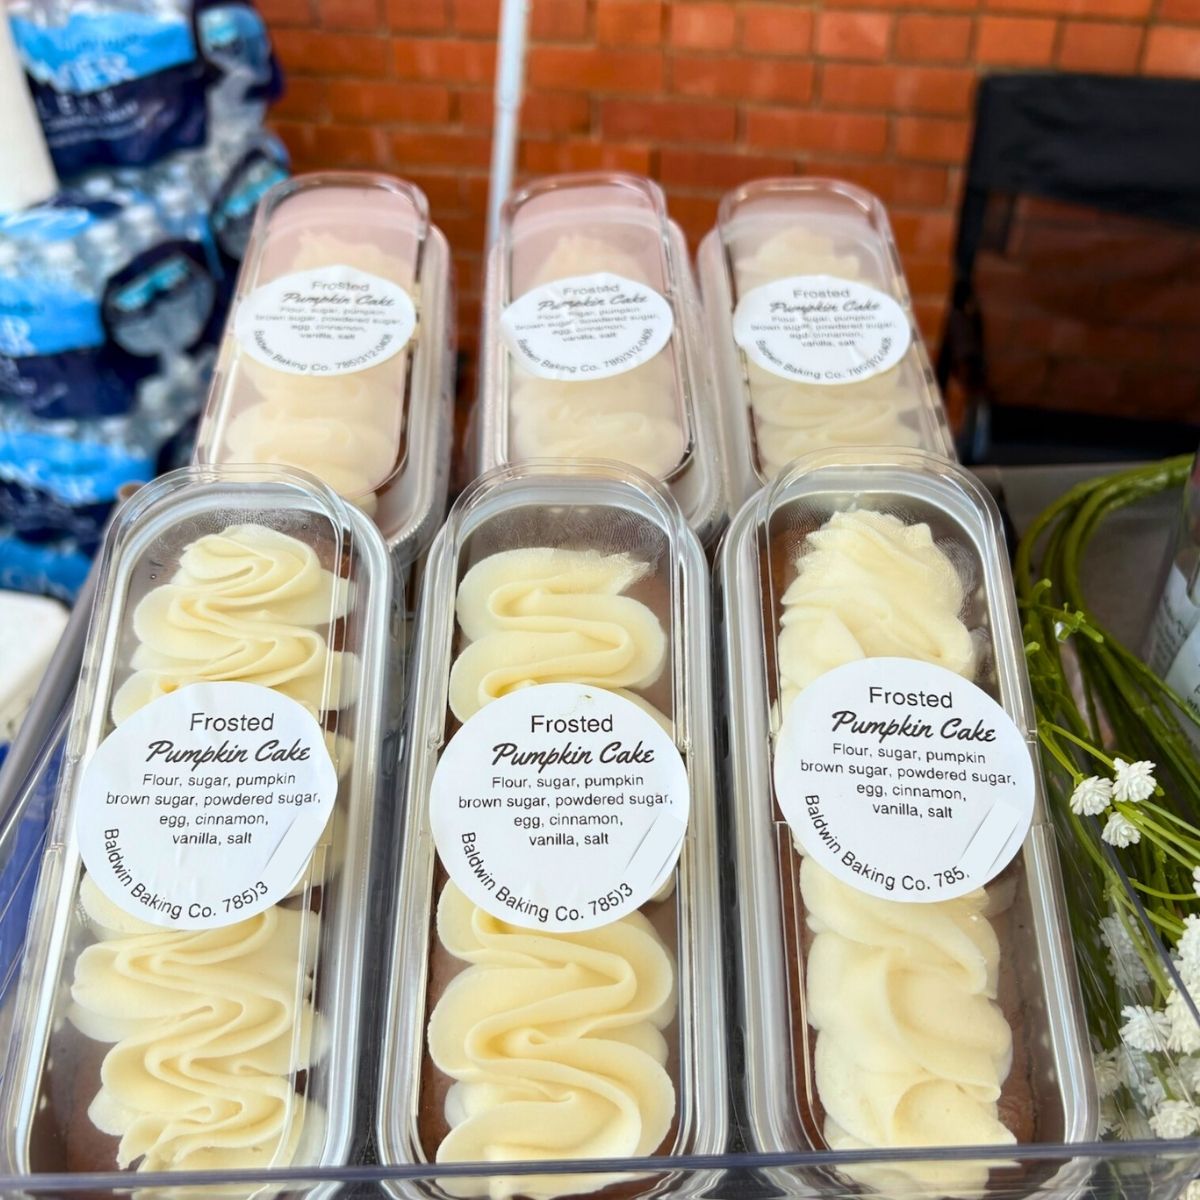
Product labels: Include your logo, flavor, and ingredients.
Paper handle bags: Print a 4x6 label template using your Munbyn printer for a clean, professional look.
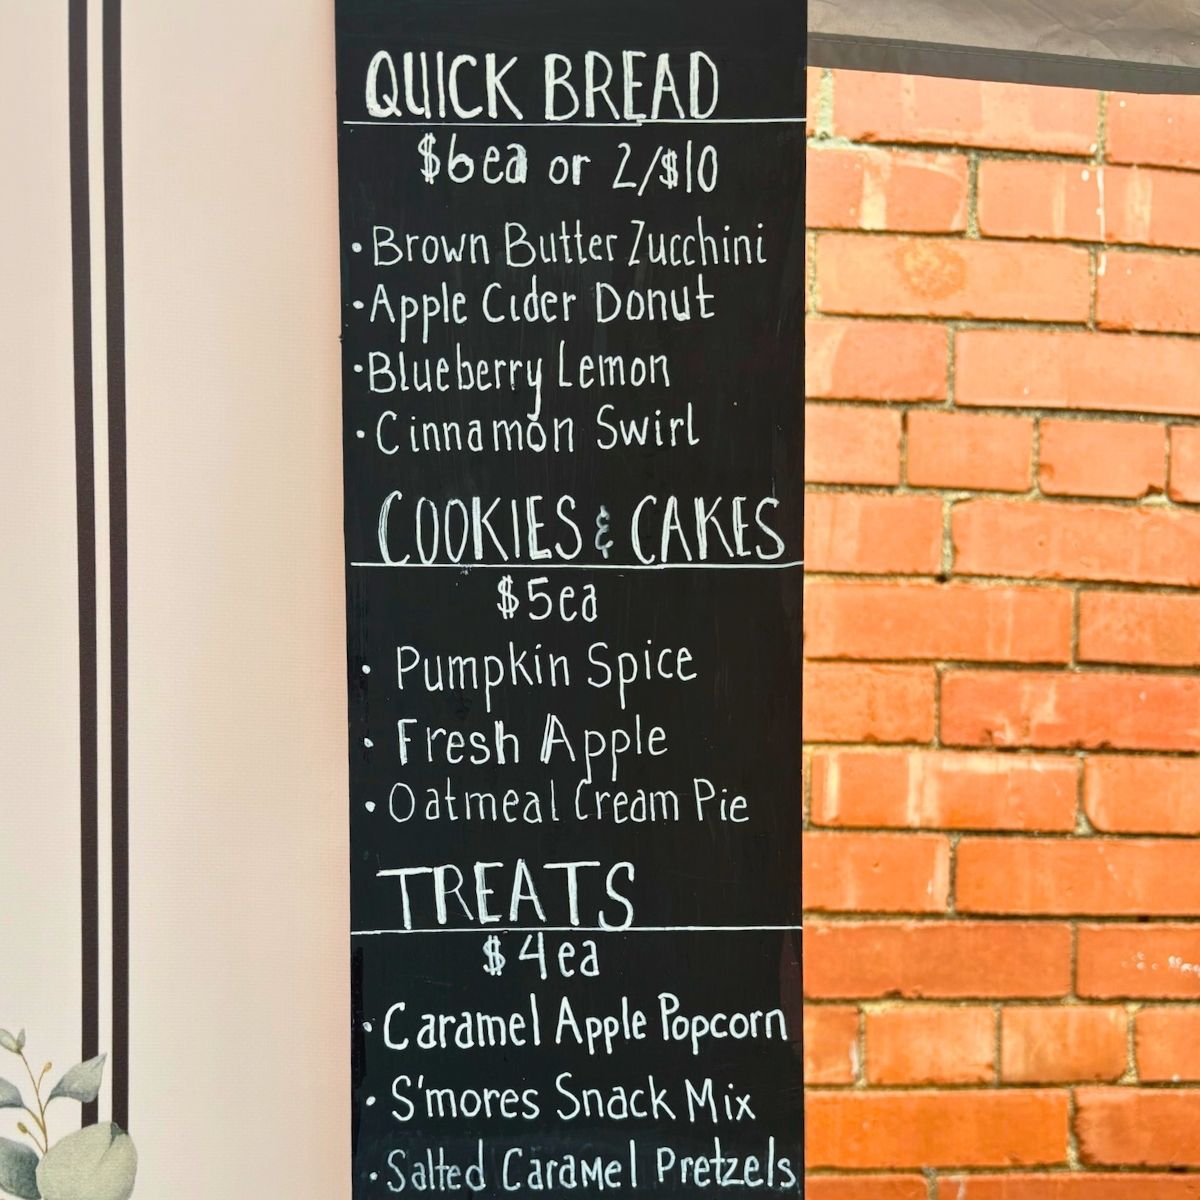
Booth signage: Match your signage and menus to your color palette.
Business cards: Use your brand fonts and consistent color scheme.
The Munbyn 405B makes this entire process effortless. It prints in two colors (red and blue), so your logo stands out beautifully, especially if you have a pop of color in your design. It’s affordable, beginner-friendly, and perfect for small-business owners on a budget.
Step 4: Maintain Brand Consistency Across Every Platform
Once you have your collection of visual elements, make sure they look the same across every touchpoint.
How to stay consistent
- Your social media posts should have a branded look.
- Your packaging and marketing materials should reflect your brand as well.
- Your booth setup at markets and events should have a touch of your brand.
Keep your brand assets organized in one folder labeled “Bakery Brand Kit.” Include your logos, color palette, and templates. That consistency creates brand recognition, customers see your logo or pattern and instantly associate it with your business.
Step 5: Use the Right Tools to Keep It Simple
This is where Munbyn truly shines.
How Munbyn makes it easy
I was so excited to find that the Munbyn 405C Dual-Color Printer and Print App eliminated the need for separate tools. You can design, preview, and print right from your phone. Whether you’re printing thank-you stickers, price tags, or custom product labels, you can do it all from your kitchen counter. Munbyn makes professional branding accessible for small businesses, providing high-quality tools for bakers who want to look polished without spending a fortune.
A brand that supports small creators
What I love most about Munbyn is that they truly get small creators. Their printers are made for people like us, home bakers, pop-up vendors, and creators who want to look professional without the huge price tag. They make branding simple, affordable, and accessible, even if you’re just getting started.

I was lucky enough to attend their launch event in New York recently, and it confirmed everything I already felt about the brand. The Munbyn team was so fun, down-to-earth, and genuinely supportive of small creators. Choosing to use a Munbyn printer means connecting with a company that understands your needs and designs tools that make your business life easier.
If you want to dive deeper into product presentation, check out my guide to packaging baked goods for farmers markets.
Step 6: Bring Your Brand to Life at Your Next Market
Now that your visual brand identity is in place, it’s time to show it off. Here are a few ways to bring your brand to life:
- Use packaging that matches your brand colors.
- Print custom labels and stickers using your Munbyn printer.
- Add signage and menus that use your fonts and colors.
- Keep your booth neat and consistent from every angle.
When your setup feels cohesive, customers notice. You’re no longer “just another booth”, you’re a recognizable brand.
Next Steps: Build and Use Your Visual Brand Identity
You’ve learned the foundation. Now it’s time to make it your own.
Create your basic brand kit
Combine your logo, fonts, and colors. Save them in a brand guidelines kit template.
Explore free templates
Use free brand rules templates and style guide templates on Canva to start designing quickly.
Save logo variations
Keep different logo sizes and color options for different purposes (dark vs. light backgrounds).
Reuse your brand kit everywhere
- Social media: Keep your post colors and fonts consistent.
- Packaging: Print matching labels and inserts using your Munbyn printer.
- Booth displays: Carry your color palette into your signage and product layout.
Keep it consistent
Repetition builds brand recognition, and that’s how customers remember you.

Reusing Your Branding for Future Marketing Projects
Once you’ve created your brand identity kit, reuse it for social media templates, seasonal packaging, and menu templates. This saves time and helps your look stay unified across different mediums, online, offline, and at events.
Creating a Strong Bakery Brand
Creating a strong bakery brand doesn’t require a marketing degree or a big budget. It just takes consistency, creativity, and the right tools. With your brand kit template, a cohesive color palette, and the Munbyn Printer, you can design professional marketing materials that make your bakery look as good as it tastes.
Munbyn is an incredibly supportive brand for small businesses, especially home bakers building their first booth or pop-up. They make branding approachable, affordable, and fun.
Your packaging will look elevated. Your booth will feel intentional. And most importantly, your brand will stick in customers’ minds long after they finish the last cookie.
Leave a Reply