


This overnight bagel recipe is easier than you think—just mix it up the night before, and by morning you’re only about an hour away from crisp, chewy, New York-style bagels fresh from your own oven.
Why You’ll Love This Recipe
- So easy to time: Just mix it up before bed—no kneading required—and you’ll have fresh bagels by mid-morning.
- Fun way to use your sourdough starter: If you’ve been looking for a new sourdough recipe to try, this one’s a keeper.
- That classic New York chew: A stiff dough and quick water bath give you that irresistible chewy texture.
- Incredible flavor: The overnight rise brings out the best in your starter for a rich, tangy bagel.
Similar Recipes on the Blog
What Makes a Bagel a New York-Style Bagel?
Not all bagels are created equal—New York-style bagels stand out for their perfect balance of chew, crust, and flavor. Here’s what makes them special (and why this overnight bagel recipe delivers that classic bite):
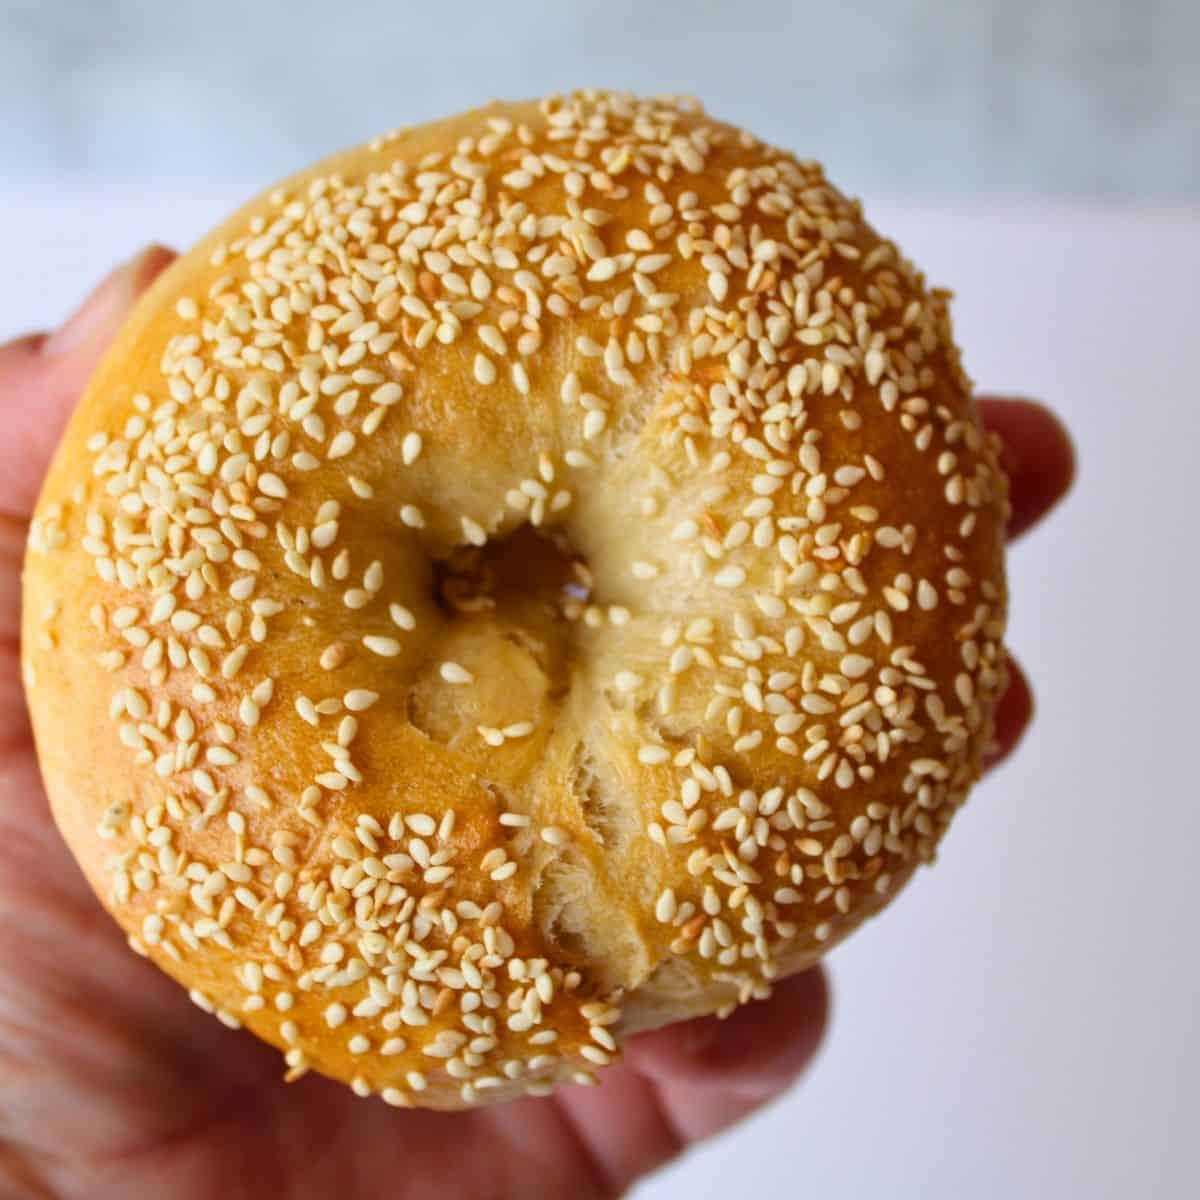
- Shaped by hand with a smaller center hole and a bigger, heartier size—just like you’d find in New York City. I’ll show you my favorite shaping method below!
- Boiled, then baked for that shiny crust and signature chewy texture. Skipping the water bath? Not an option for a good bagel!
- Made with a special dough that’s stiff and strong. This isn’t your typical bread dough—it’s low hydration and perfect for chewy bagels with structure and bite.
That’s the magic behind a true New York-style bagel—and yes, you can absolutely make them in your own kitchen!
Haven’t Tried Bagels Yet? Let’s Fix That.
Making bagels at home might sound tricky, but this recipe keeps it simple and fun. There’s no kneading, no fancy equipment, and no complicated timing. You just mix the dough before bed, let it rise overnight, and in the morning you’re only about an hour away from warm, fresh bagels.
If you’ve got an active sourdough starter, you’re ready to go. So whether this is your first time or your fiftieth—this is the easy bagel recipe that anyone can pull off.
What You’ll Need for the Dough (and Toppings, Too!)
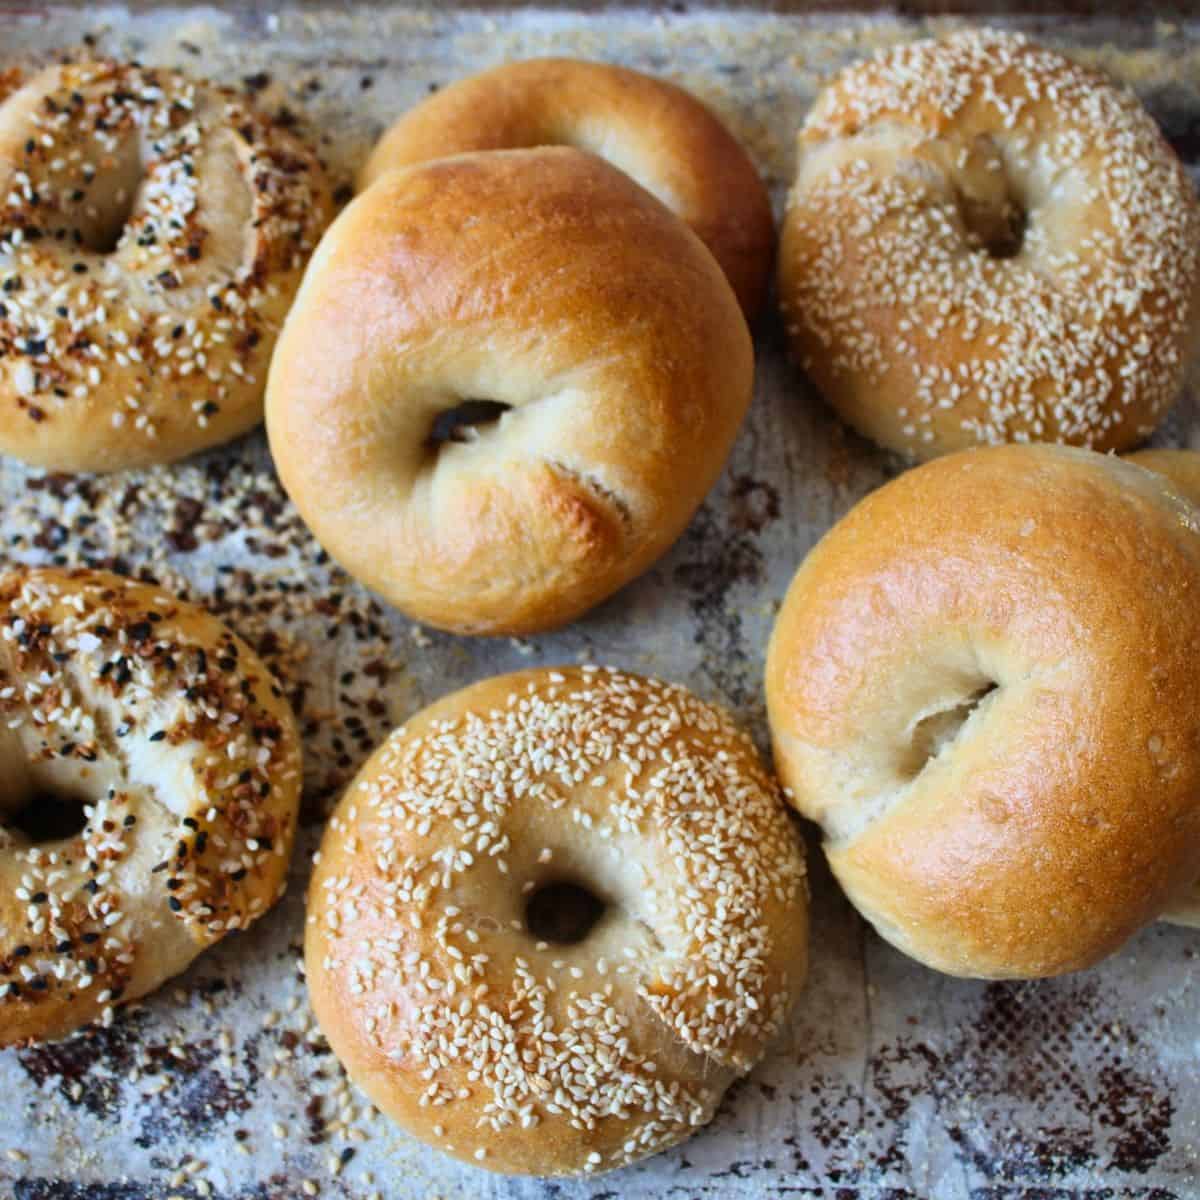
The ingredients for these homemade sourdough bagels are simple and pantry-friendly—no fancy add-ins required. Once your dough is mixed, you can get creative with your favorite bagel toppings like sesame seeds, poppy seeds, or everything seasoning!
- Bread Flour: Use high-gluten or bread flour for chewy bagels. All-purpose flour won’t give the same texture.
- Sourdough Starter: Active and bubbly; use at peak ripeness.
- Sugar: Adds just a touch of sweetness to balance the sour.
- Salt: Essential for flavor.
- Warm Water: Use room temperature water, not hot.
Tools You’ll Need (Just the Basics!)
You don’t need any special equipment to make these sourdough bagels—just a few kitchen staples and a little counter space.
- Kitchen Scale: For accurate measurements and consistent results.
- Large Mixing Bowl: To mix and ferment your dough.
- Dutch Whisk (Optional): Helps combine ingredients quickly and evenly.
- Parchment Paper & Sheet Pan: For proofing and baking.
- Slotted Spoon: Makes it easy to transfer bagels in and out of the boiling water.
- Large Pot of Water: A stockpot works great for the water bath.
- Wire Rack: To cool your bagels without making the bottoms soggy.
How to Make This Overnight Bagel Recipe (Step-by-Step)
This recipe comes together with just a few simple steps—and your hands do most of the work. Each part of the process is shown in the photos below so you can follow along with confidence!

- Step 1: Mix the Dough and Let It Rest Overnight
Start by mixing your dough until everything is fully combined and no dry bits remain. You can use a Dutch whisk or wooden spoon—whatever you have on hand. Once mixed, cover the bowl and let the dough rest at room temperature for several hours. Then, pop it into the fridge to ferment overnight.
- Step 2: Step 2: Divide Into 8 Equal Pieces
The next morning, bring the dough out and let it warm up for a bit. Then turn it out onto a clean surface and divide it into 8 equal pieces. If you have a kitchen scale, this is a great time to use it for even bagels.
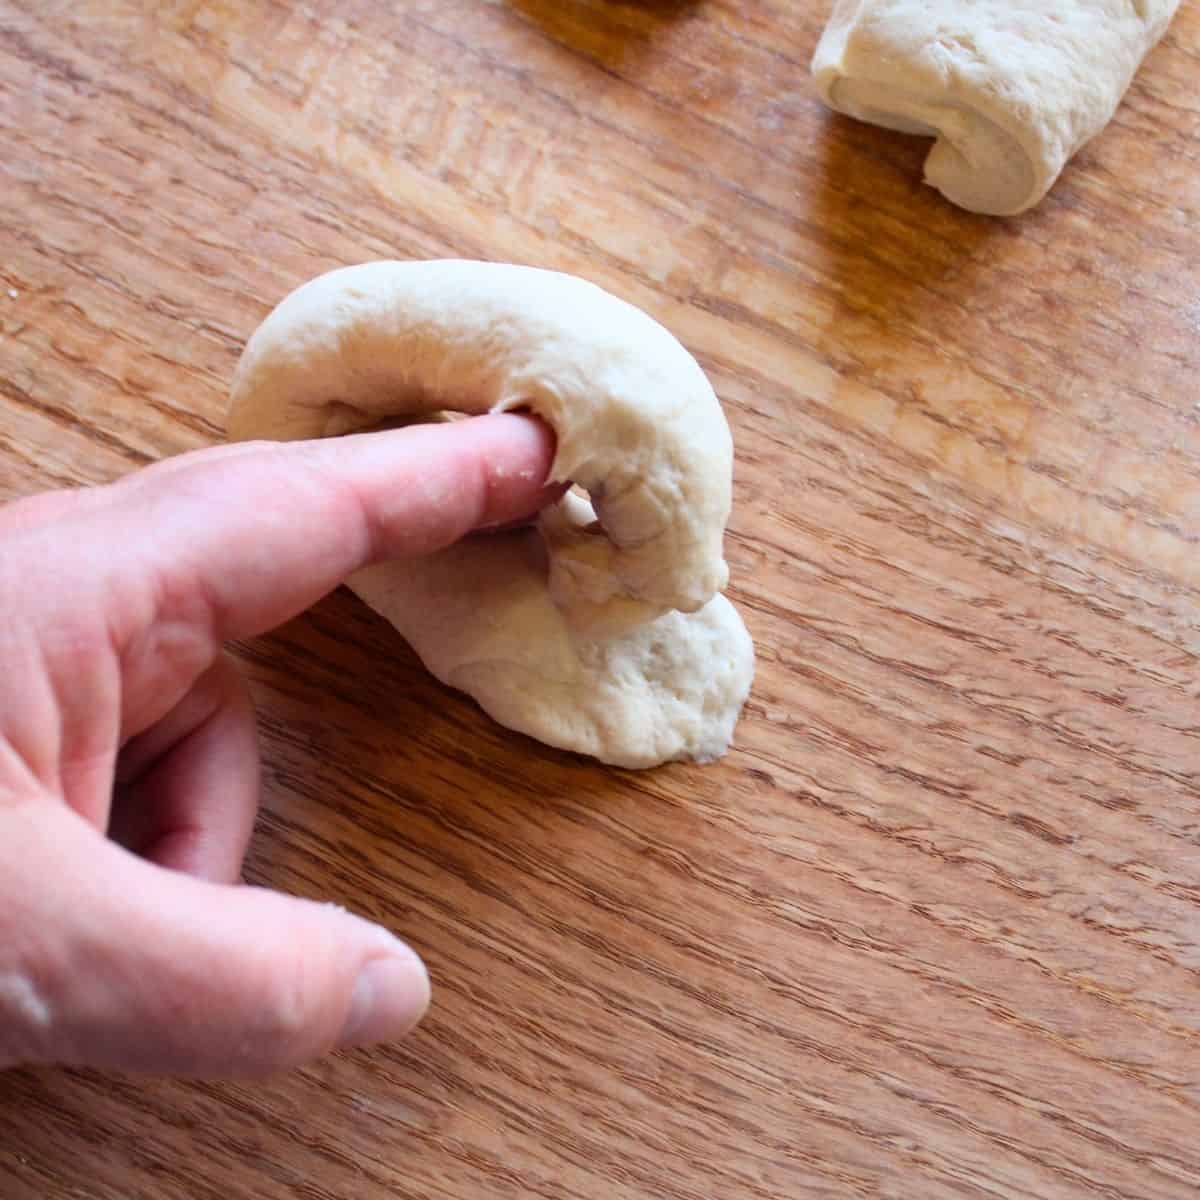
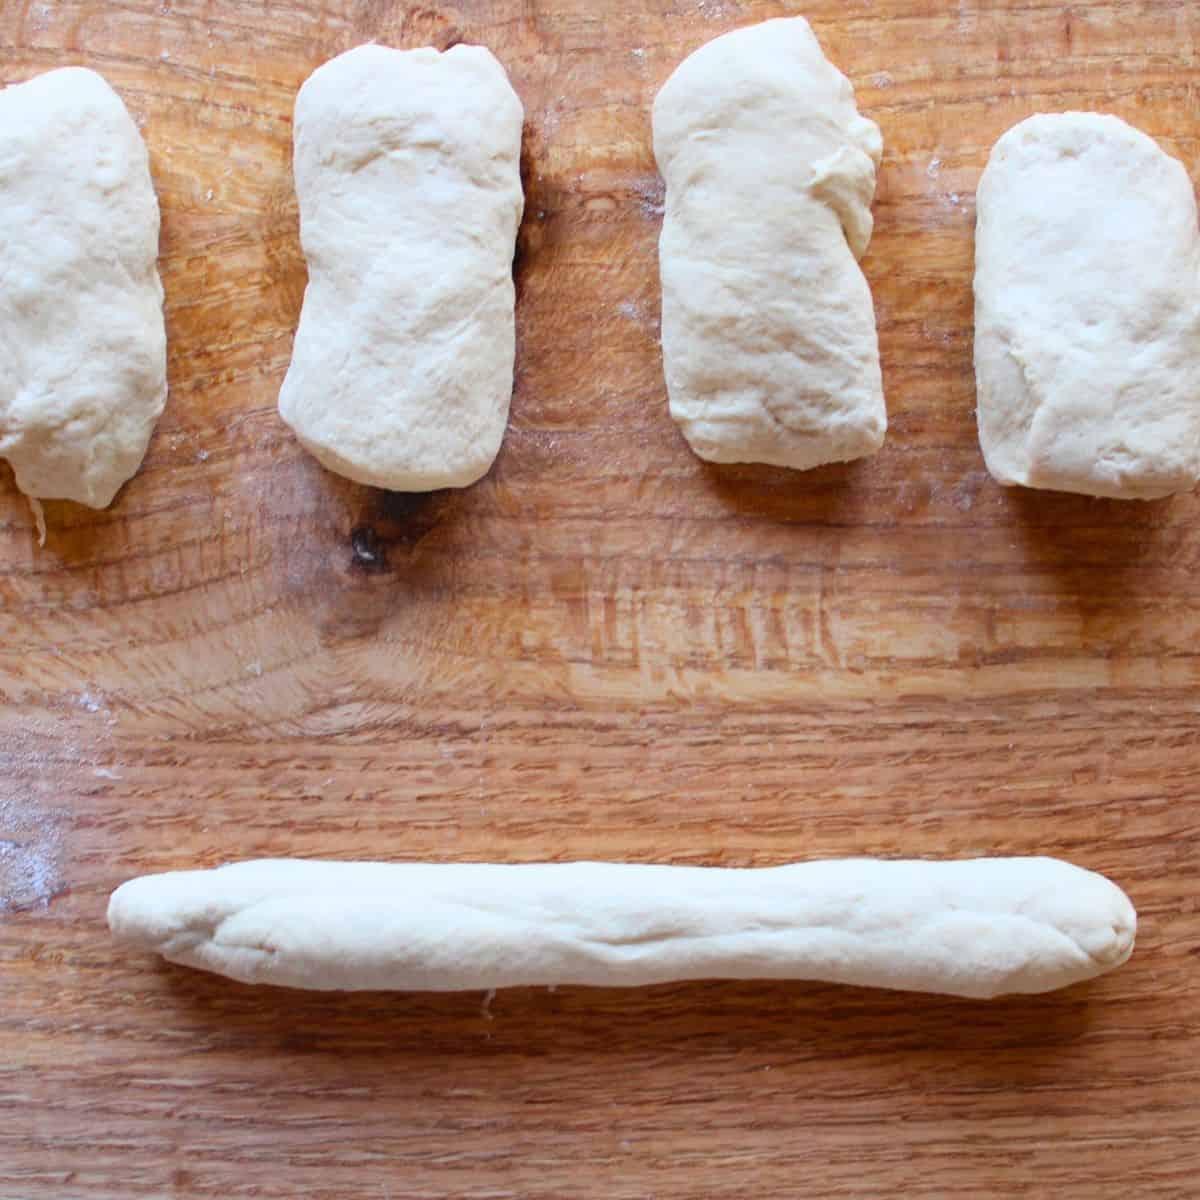
- Step 3: Shape the Bagels
Now it’s time to shape! Roll each piece into a smooth ball, then gently stretch it into a rope or snake shape. Wrap the rope into a circle, overlap the ends, and press the seam together with the seam side down. I like to use my index fingers to gently roll and smooth the join. Each step is shown in the photo tutorial below so you can see exactly how it’s done.
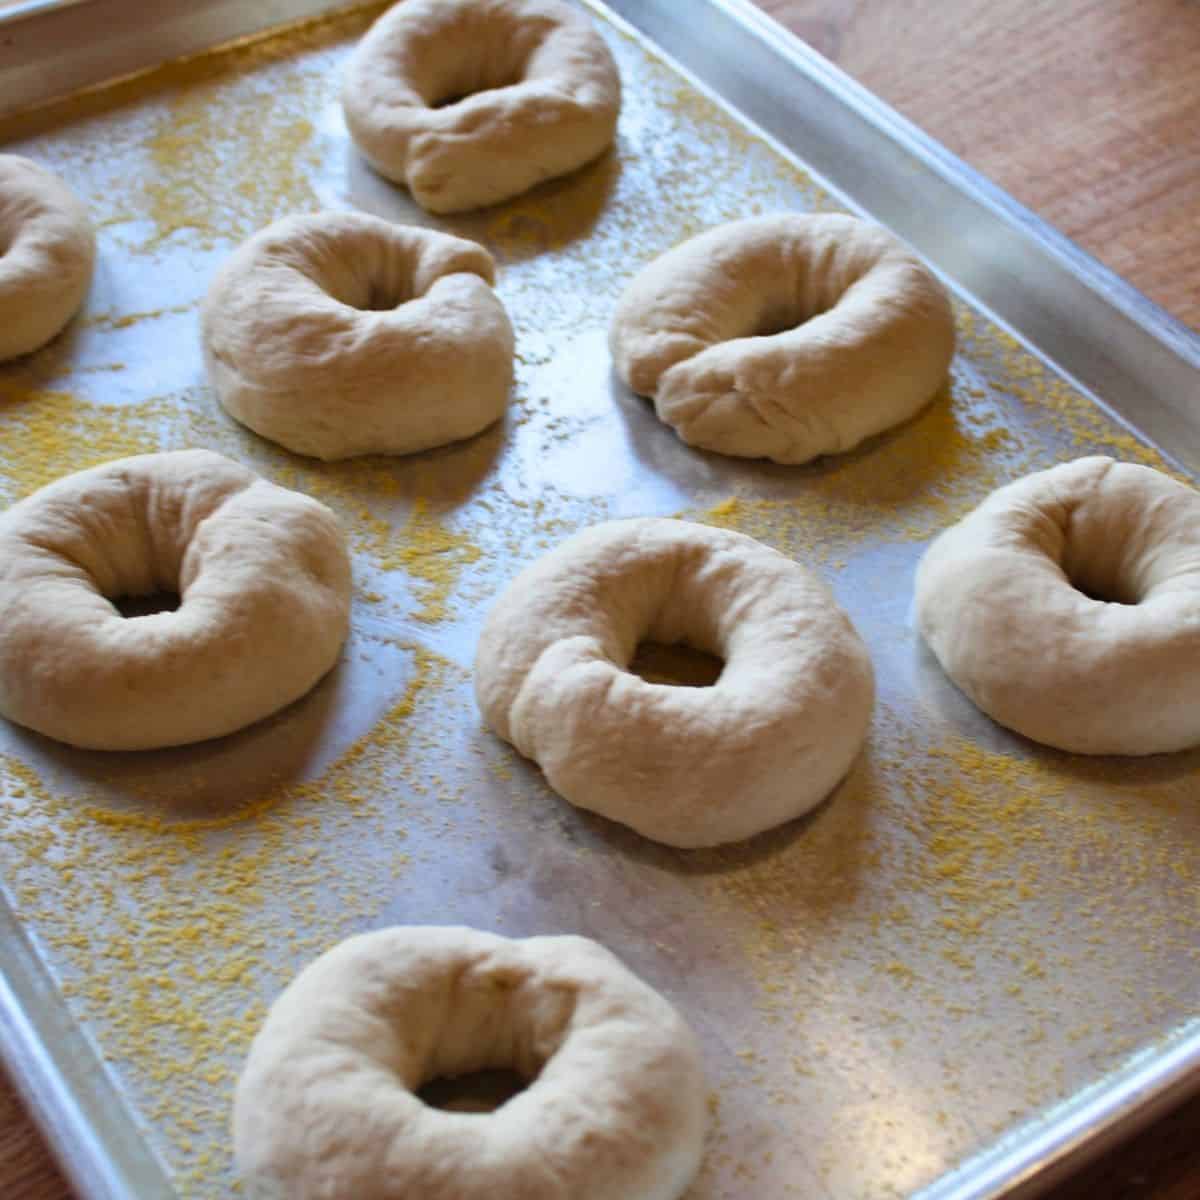
- Step 4: Proof the Bagels
Place the shaped bagels onto a sheet pan that’s been dusted with a mix of cornstarch and flour (either all-purpose or rice flour works well). Cover the tray with plastic wrap and let the bagels proof at room temperature until they look slightly puffed—about an hour to an hour and a half.
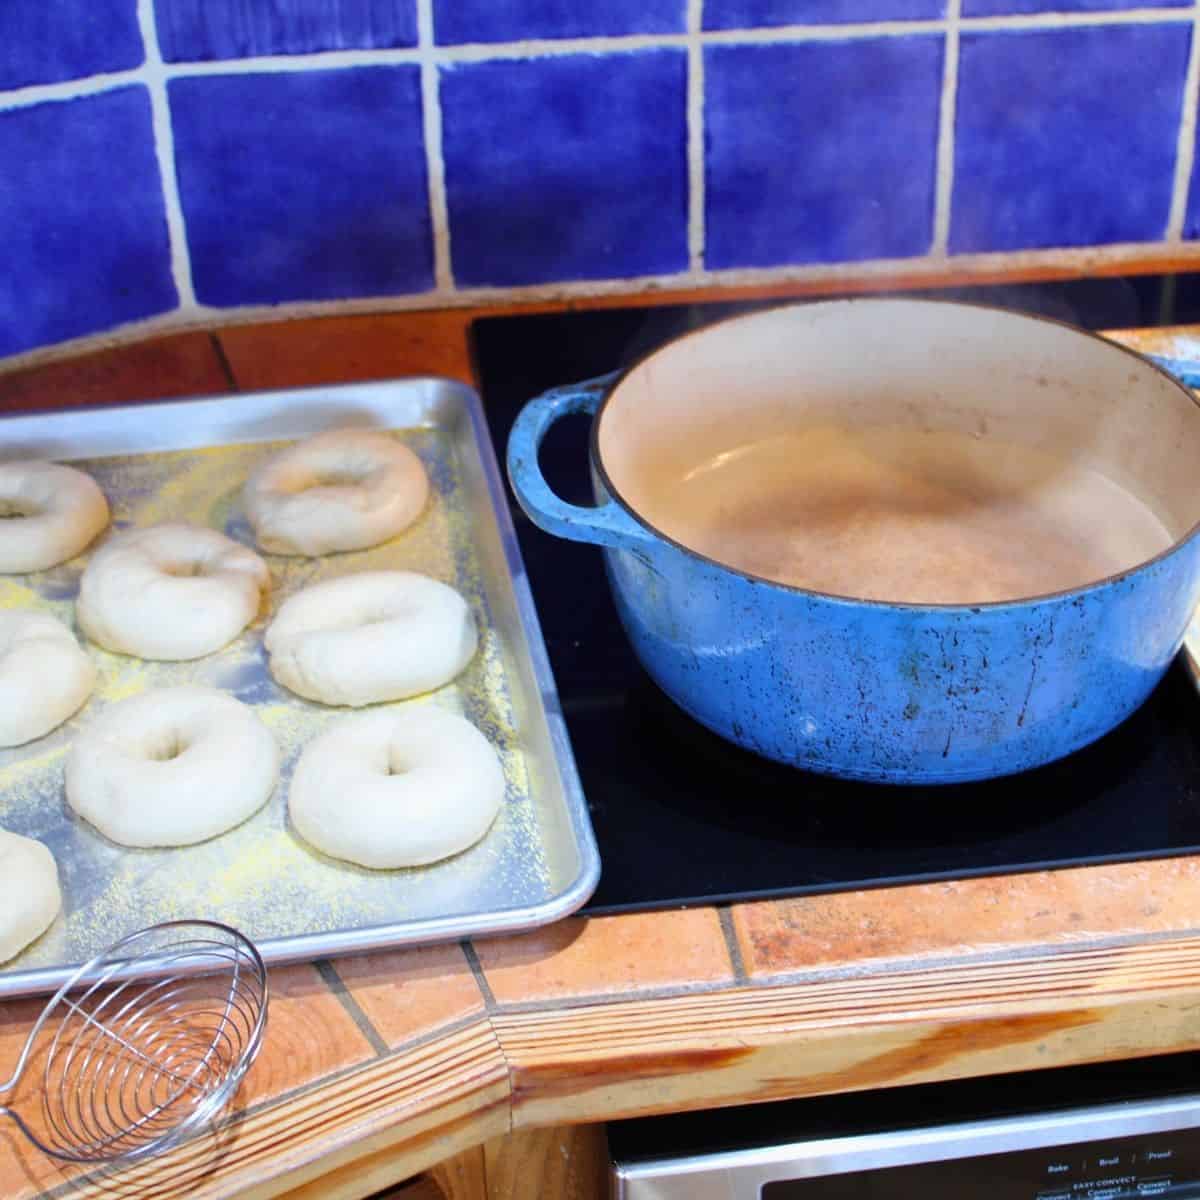
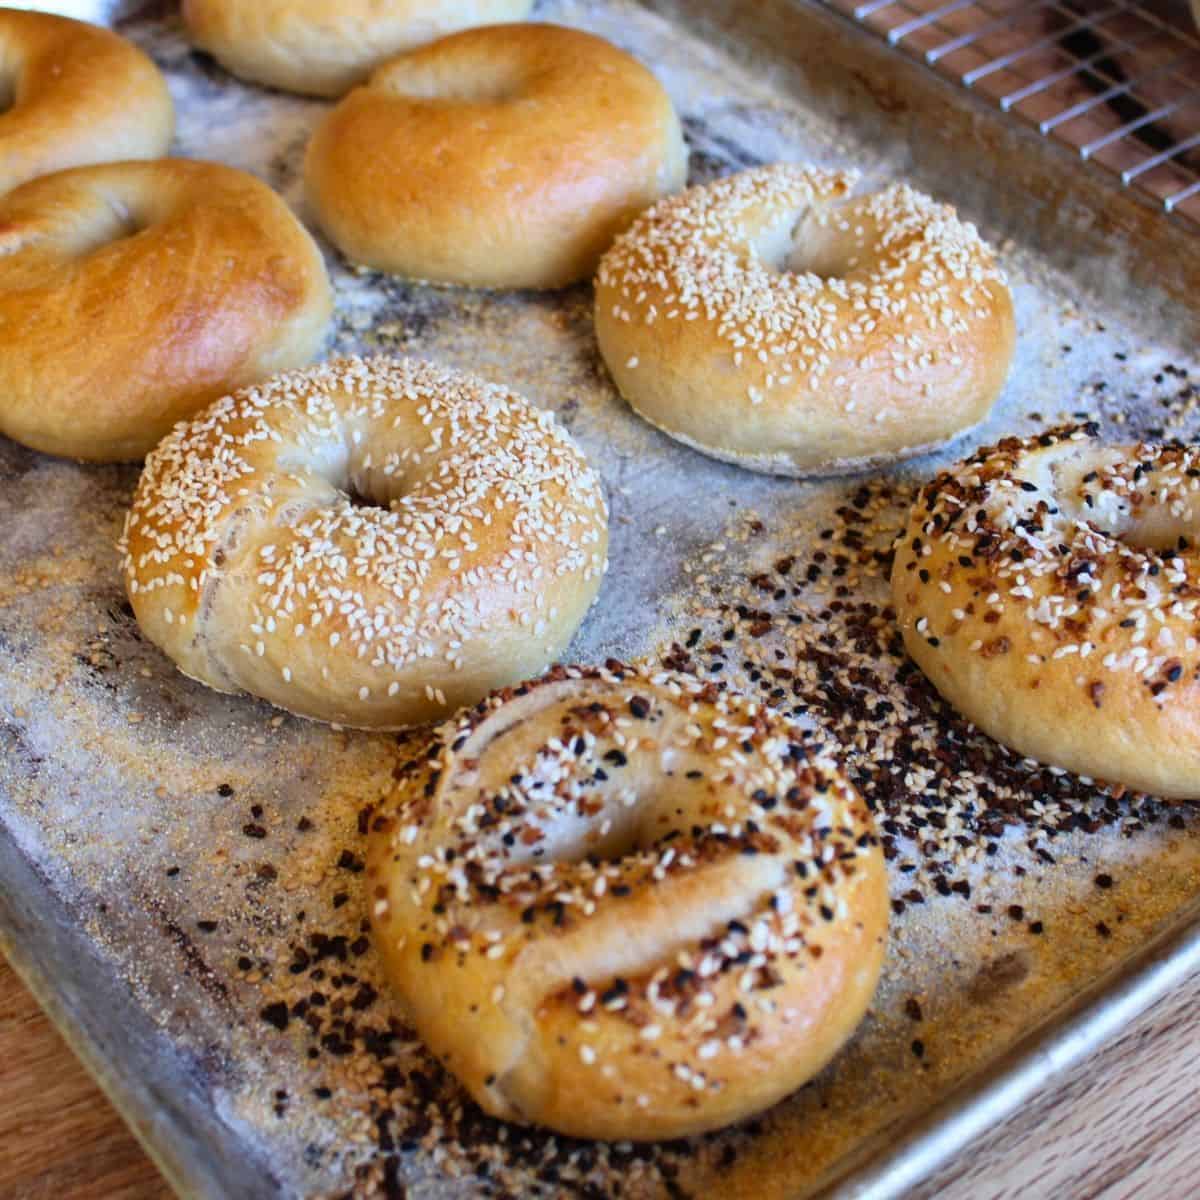
- Step 5: Boil and Top the Bagels While your bagels are finishing their final rise, bring a large pot of water to a boil. I like to add a spoonful of barley malt syrup or brown sugar to the water—it helps give the bagels a beautiful shine. Get your slotted spoon and topping tray ready. Once the water’s boiling and the bagels are proofed, gently lower each bagel in and boil for about 30 seconds per side. As soon as they come out of the pot, press the bottoms into your chosen toppings (like sesame seeds, poppy seeds, or everything seasoning), then sprinkle a little more on top to finish

- Step 6: Step 6: Bake the Bagels
Place the boiled and topped bagels onto a parchment-lined baking sheet and bake until they’re deep golden brown and crisp on the outside. I’ll show you exactly what they look like when they’re done—you’re going to be proud of this bake!
Storage Tips for Leftover Bagels
If you have leftover bagels (lucky you!), here’s how to keep them tasting fresh:
- Room Temperature: Store cooled bagels in a plastic bag or airtight container at room temperature for up to 2 days. Keep them out of the fridge—it tends to dry them out faster.
- Freezer-Friendly: Bagels freeze beautifully! For the best results, slice them in half before freezing, then wrap them in plastic wrap or parchment paper and place them in a freezer-safe bag. That way, you can pop a half straight into the toaster—no thawing needed.
- Reheating Tip: Toasting is the best way to bring day-old or frozen bagels back to life. A quick toast crisps up the outside while keeping the inside chewy and soft.
Whether you’re saving a few for later or making a double batch, these tips will help your homemade bagels stay fresh and delicious.
FAQ: Your Bagel Questions, Answered
Can I use yeast instead of sourdough starter?
Yes! If you don’t have a sourdough starter, you can still make these bagels using commercial yeast. To replace the 150g of active sourdough starter, use:
- 1 teaspoon active dry yeast or instant yeast
- 60g water
- 60g bread flour
Mix these into the dough along with the other ingredients and proceed with the same process, adjusting rise times as needed (yeast dough may rise faster).
Can I make mini or smaller bagels?
Absolutely! If you want to make mini bagels, just divide the dough into 12 equal pieces instead of 8. They’re perfect for snacking, kids, or building a little bagel board with your favorite toppings. Keep an eye on your bake time—they may bake a few minutes faster than full-sized bagels.
Any tips for first-time bagel makers?
Yes—and here’s the big one: don’t stress about making them look perfect. Bagels take a little practice, especially when it comes to shaping. If your first batch isn’t bakery-beautiful, that’s totally okay. They’ll still taste amazing, and every time you make them, your shaping skills will improve. Have fun with it and enjoy the process!
Bagel Toppings and Flavor Ideas
One of the best things about making New York-style bagels at home is getting to customize the toppings and flavors just the way you like them.
Once your bagels are shaped and have finished their final proof, they go into a quick boiling water bath. This step not only creates that signature chewy crust—it also gives the toppings something to stick to.
Here’s how to get toppings on both the top and bottom of your bagels (just like a true New York bagel):
- Before boiling, prepare a tray or sheet pan with a generous layer of your chosen topping—this could be bagel seasoning, sesame seeds, poppy seeds, or even just sea salt.
- As each boiled bagel comes out of the pot, set it directly onto the tray with the toppings. The bottom will press into the toppings while it’s still wet and sticky.
- Then, sprinkle more of the same topping over the top of the bagel so it’s coated all around. This method is easy, neat, and lets you make multiple flavors in one batch!
Want to go beyond toppings? You can also add flavorings into the dough itself. After dividing your dough into pieces (before shaping), try sprinkling in ingredients like:
- Cinnamon and raisins
- Chopped jalapeños and shredded cheddar
- Dried blueberries
- Everything bagel seasoning for extra flavor throughout
Just sprinkle your add-ins over the dough piece and gently press or roll them in as you shape the bagel. This gives you the flexibility to make a variety of bagels in one batch, or you can mix flavor into the whole batch before dividing if you’re sticking to just one type.
Better Than the Bagel Shop: Overnight Sourdough Bagels
Ingredients
- 4 cups bread flour 500 g
- 1 cup + 1 tablespoon room temperature water 250 g
- ¾ cup active sourdough starter 150 g
- 2 tablespoons sugar 24 g
- 1½ teaspoons salt 10 g
- Cornstarch and flour mix for dusting tray – all-purpose or rice flour work well
- 1 tablespoon barley malt syrup or brown sugar for water bath
- Optional: egg wash 1 egg + splash of water
- Optional: sesame seeds poppy seeds, bagel seasoning, or your favorite toppings
Instructions
Mix the Dough
- In a large mixing bowl, stir together the bread flour, room temperature water, active sourdough starter, and sugar. Use a wooden spoon or Dutch whisk to mix until no dry flour remains and a shaggy dough forms. Cover and let rest for 30 minutes.
Add Salt and Knead
- Sprinkle salt over the dough and knead by hand on a clean surface for 8–10 minutes until the dough is smooth, elastic, and strong. The dough will feel stiff and dense.
Refrigerate Overnight
- Cover the bowl tightly with plastic wrap or a damp towel and refrigerate for 8 to 14 hours.
Divide and Shape
- The next morning, let the dough sit at room temperature for about 20–30 minutes. Turn it out onto a clean surface and divide into 8 equal pieces (about 95 g each). Shape each piece into a smooth ball and let them rest for 10 minutes.
Form the Bagels
- Roll each dough ball into a rope using a circular motion. Wrap the rope into a circle, overlap the ends by about 1 inch, and press the seam together with the seam side down. Use your index fingers to gently stretch and smooth each bagel.
Proof the Bagels
- Place the shaped bagels on a parchment-lined baking sheet dusted with a mix of cornstarch and flour. Cover loosely with plastic wrap and proof at room temperature for 1 to 1½ hours, or until slightly puffed.
Boil and Top
- Bring a large pot of water to a gentle boil. Stir in the barley malt syrup or brown sugar. Use a slotted spoon to gently lower the bagels into the boiling water, 1–2 at a time. Boil for 30 seconds on each side.
- After boiling, place each bagel onto a tray sprinkled with your chosen topping. Press the bottom gently into the topping, then sprinkle more on top.
Bake the Bagels
- Preheat oven to 450°F (232°C). Place the bagels on a parchment-lined baking sheet. Brush with egg wash if using. Bake for 20–24 minutes, rotating the pan halfway through, until deep golden brown.
Cool and Serve
- Let bagels cool on a wire rack for at least 15–20 minutes before slicing and serving.
Notes
- Use a kitchen scale for best results and evenly sized bagels.
- Don’t skip the boiling step—it’s what gives bagels their iconic crust and chewy bite.
- For toppings on the top and bottom, place the boiled bagel on a tray with toppings immediately, then sprinkle more on top while still wet.
- To make mini bagels, divide the dough into 12 pieces instead of 8 and reduce the bake time slightly.
- Store leftover bagels at room temperature in a sealed plastic bag for up to 2 days, or slice and freeze them for longer storage. Toast to revive texture.
If you enjoyed this overnight bagel recipe, here are a few more tried-and-true bakes that other readers can’t get enough of:
- Same Day English Muffins
Soft, fluffy, and full of those signature nooks and crannies—perfect for breakfast sandwiches or toasting with butter. - Cinnamon Rolls & Sticky Buns
Whether you love a classic swirl or gooey caramel topping, these are the ultimate comfort bake. - Soft Pretzel Dough
This easy pretzel recipe makes chewy, golden pretzels that are great for snacking, dipping, or turning into pretzel buns.

Have You Tried This Recipe?
There’s something so satisfying about pulling a tray of homemade bagels out of the oven—especially when you know they started with just a few simple ingredients and an overnight rest. Whether this is your first attempt or your new favorite weekend bake, I hope this overnight bagel recipe brings some bakery magic into your kitchen.
If you have any questions, drop them in the comments below—I read and respond to every one! And if you enjoyed this recipe, I’d be so grateful if you left a 5-star review to help other bakers find it too.
Want to show off your bake? Tag me on Instagram @BetterBakerClub or follow along on TikTok for more sourdough bakes, tips, and tutorials.
Thanks so much for stopping by—and happy baking!


Alicia Wall says
These bagels turned out great and were a big hit with my family! Thank you! I made plain, sesame seed, and chocolate chip.
Jaycie Miller says
I forgot my dough in the fridge for over 24 hours. If I take it out tomorrow, will it still work?
Danielle says
My dough was so dry I could get it to stick together when following the instructions.
Dayna says
These bagels are fantastic! My family loved them and I gave some to a friend who loved them too.
Shelley Nitzschke says
I would love to try your bagel recipe they look delicious. I can’t seem to find the ingredient amounts to make the bagel dough. I read the instructions but can’t find the recipe amounts. Thank you
Better Baker says
You can find it in the recipe card at the bottom of the post.
Tonia Marie Ramirez says
This has been my go to recipe since I've found it. My family and friends love them! I haven't had to adjust anything when making them. very easy to follow.
ava says
Can I make them same day?