









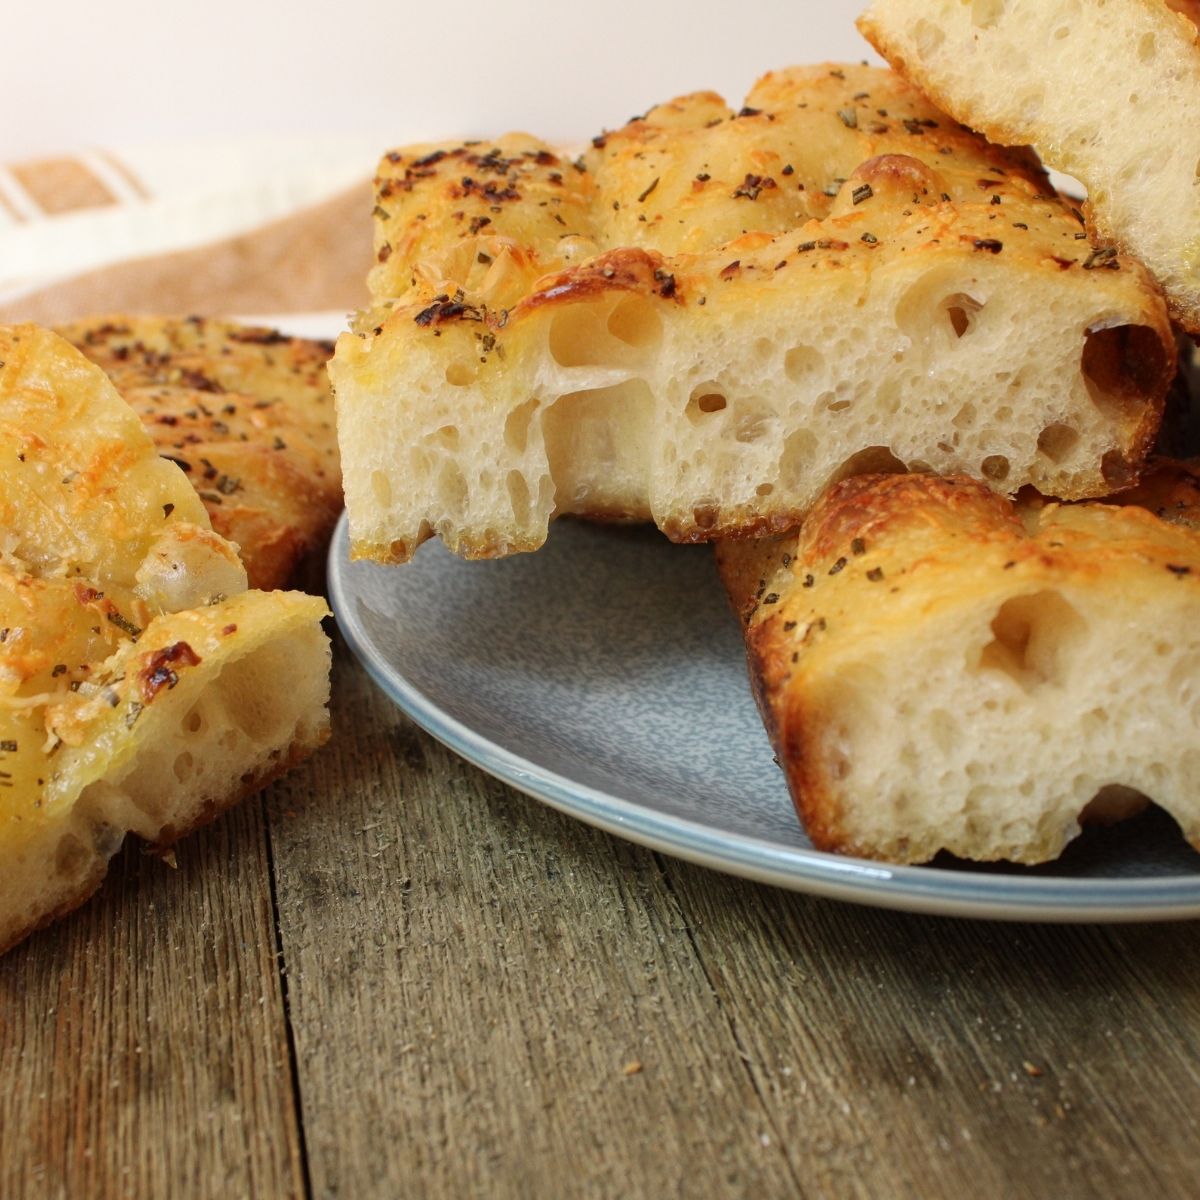
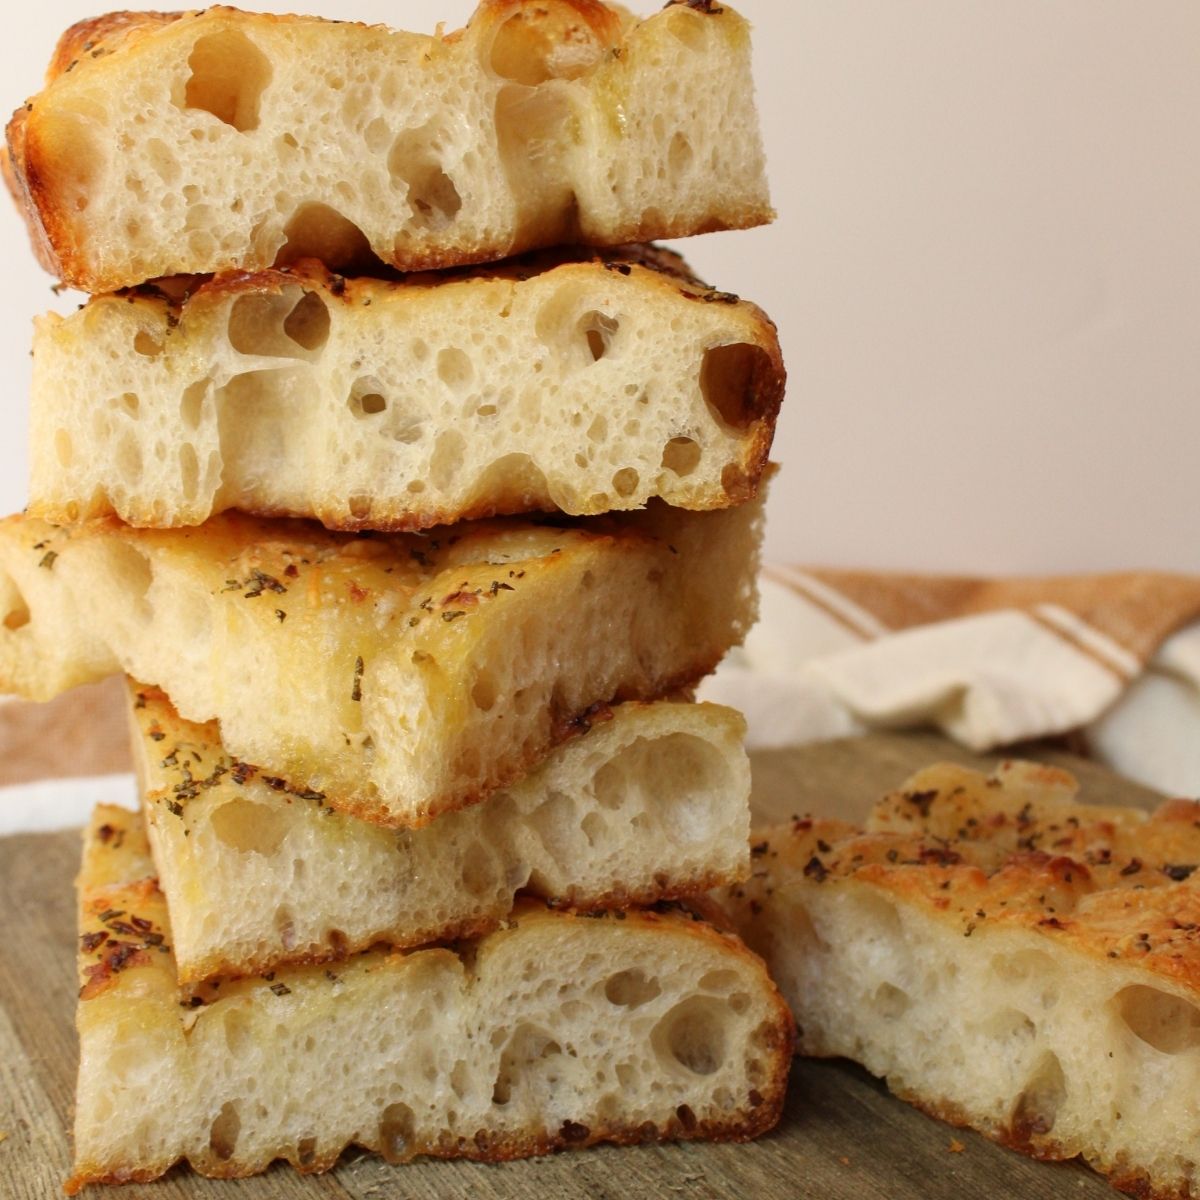
This sourdough focaccia has a crispy crust, an airy interior, and a light sourdough flavor. You’ll mix the dough the day before and let it ferment overnight in the fridge. The next day, finish it with classic rosemary and sea salt, or get creative with your favorite toppings.
While You’re Here, You’ll Also Love...
If this recipe speaks to your sourdough-loving heart, don’t miss my Easy Sourdough Breadsticks, or Extra Sour Sourdough Loaf. These are some of the most baked recipes on my blog, and they’re filled with the same helpful, step-by-step details to help you bake beautiful loaves everytime.
Why You’ll Love This Recipe
- The overnight rise builds flavor and flexibility into your schedule.
- It’s incredibly versatile. Top it with herbs and veggies of your choice.
- The crispy edges and airy crumb make it the perfect bread to eat warm or reheat the next day.
How Long to Make This Sourdough Focaccia
This is a slow fermentation bread, meaning most of your time is inactive. From mixing to baking, this recipe spans two days. The secret is in the timing. An overnight rise in the refrigerator gives the dough time to build flavor, trap air bubbles, and develop that perfect chewy texture.
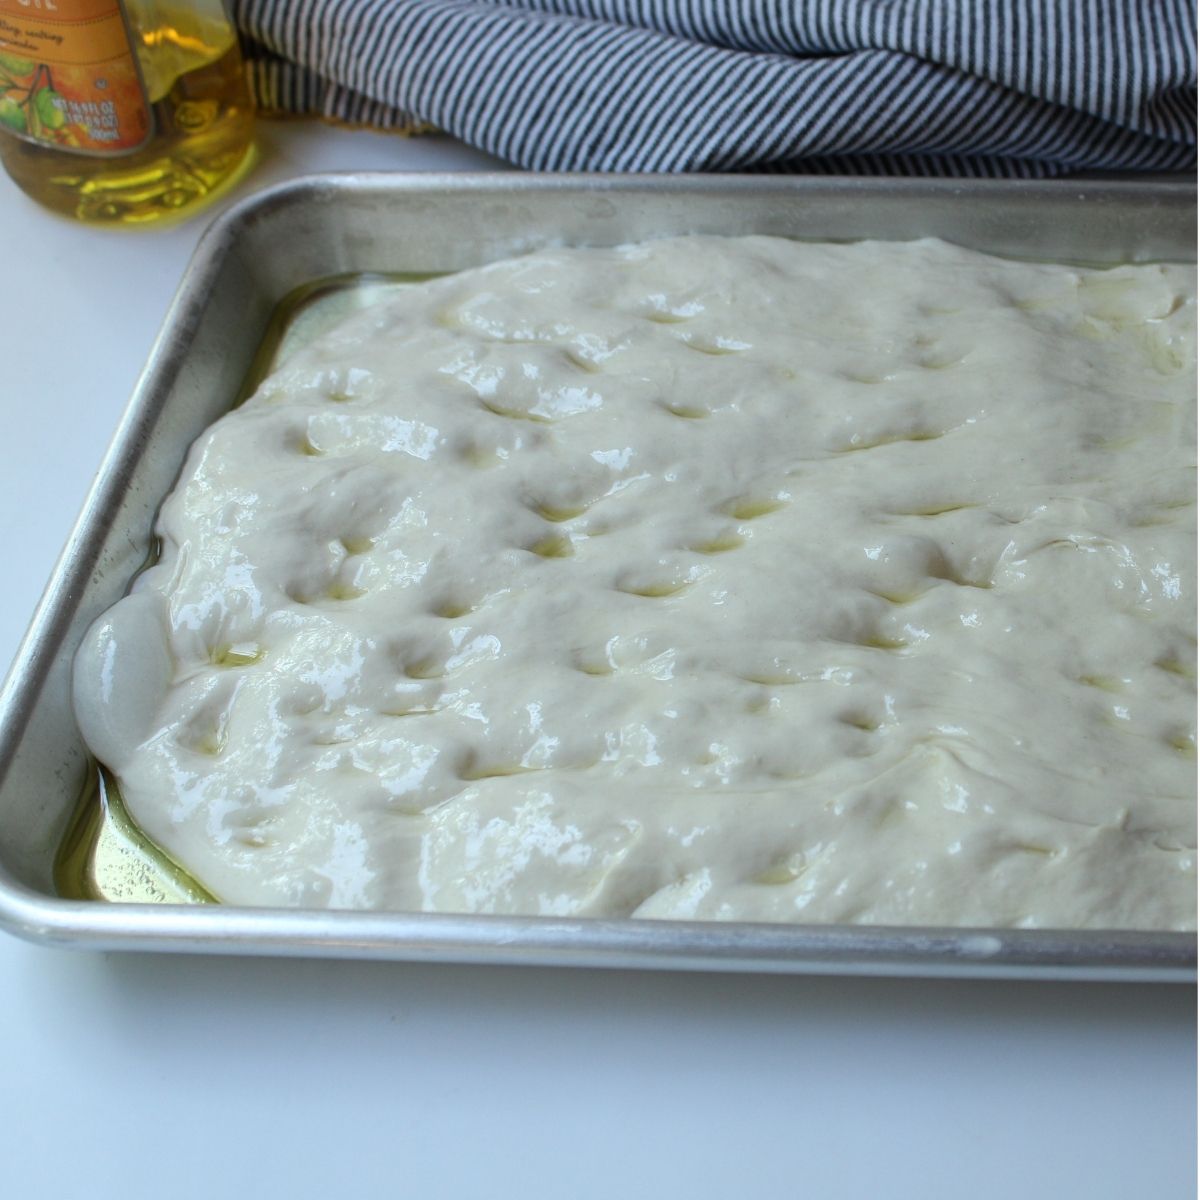
You don’t need to be an expert to make this. The dough is soft, stretchy, and very forgiving. If you can stir, fold, and wait, it’ll turn out great.
- Day 1: mix, stretch and fold, first rise, and cold ferment. (about 3 hours, but most is easy 2 minute folds)
- Day 2: pan the dough, second rise, bake, and devour.(about 2 hours start to finish)
Quick Timeline:
- Hands-on time: 30 minutes
- First rise: 2 hours
- Cold ferment: 12 to 72 hours
- Second rise: 2 to 4 hours
- Bake time: 22 to 26 minutes
It’s worth every minute. This focaccia bread recipe is one of the easiest breads to make.
Let’s Talk About the Pan
You’ll be baking this in a quarter sheet pan, or a 9x13. I love using my Nordic Ware sheet pan with this plastic lid (affiliate links). The lid is perfect for sliding the pan into the fridge during the overnight rise or covering leftovers without drying them out. The smaller pan also helps create taller edges and a beautifully chewy interior.

Feed Your Starter Ahead of Time
For this recipe, feed your sourdough starter 8 to 12 hours before mixing your dough. You'll need 100 grams of active starter for this recipe, so make sure you feed enough.
A simple feeding is:
- 50 g sourdough starter
- 50 g water
- 50 g bread or all-purpose flour
This will give you about 150 g of active starter, leaving enough for the recipe plus a little extra to keep your starter going.
Your starter is ready when it has doubled in size, looks bubbly, and has a light, airy texture. If you're unsure, a small spoonful should float in a glass of water.
If your kitchen is cold, place your starter in a warm spot like inside a turned-off oven with the light on. Use warm water (around 75–80°F) when feeding your starter and mixing your dough.
Tools and Ingredients You’ll Need
Before you begin, make sure you have:
- Bread flour or King Arthur all-purpose flour for good gluten structure
- Extra-virgin olive oil for both the dough and topping
- Kosher salt or flaky sea salt for seasoning
- Quarter sheet pan and this optional lid
- Plastic wrap or a damp towel
- Large bowl for mixing, or a medium bowl if you’re halving the recipe
- Small saucepan if you're warming olive oil with herbs or garlic for the topping
Special equipment note: You don’t need a mixer for this recipe, but if you prefer one, use the bowl of a stand mixer with the dough hook on low speed for about 6 minutes until the dough pulls into a smooth ball.
The Full Process (Step-by-Step)
1. Mix the Dough in the Afternoon
In a large bowl, combine your active sourdough starter, warm water, and flour. Stir until a shaggy dough forms. Add salt and olive oil and continue mixing by hand. This is a high-hydration dough, so it will feel sticky.
Let the dough rest for 30 minutes. This dough rest period allows the flour to hydrate and makes the next steps easier. It should go from a rough ball to a softer, more workable dough.
2. Stretch and Fold
Using wet hands, perform 3 to 4 rounds of stretch and folds every 30 minutes over a 2-hour period. To do a stretch and fold:
- Grab one side of the dough, stretch it up, and fold it over.
- Turn the bowl 90 degrees and repeat on all four sides.
You’ll start with a sticky, loose dough. By the last fold, you should notice the dough forming a dough ball that holds together better with visible air bubbles.

3.Bulk Ferment
Cover the dough and let it rise at room temperature until it looks slightly puffed and has a few small bubbles on the surface. It should feel light and airy but still hold its shape.
4. Pan the Dough
Generously coat a quarter sheet pan with 2 to 3 tablespoons of olive oil. Gently turn the dough out onto the pan and flip it once so both sides are lightly coated with oil. It will continue to relax and spread as it rests. Cover loosely and refrigerate overnight or up to 48 hours.
5. Dimple and Top
Remove dough from the refrigerator 2-3 hours before you are ready to bake. Drizzle with more olive oil and use oiled fingers to dimple the surface of the dough.
Sprinkle with coarse or flaky sea salt, and top with fresh rosemary, cherry tomatoes, parmesan cheese, or a pinch of Italian seasoning if you'd like.
6. Bake
Preheat oven to 450°F with a rack in the middle of the oven. Bake for 22 to 26 minutes, rotating halfway through, until golden on top and crispy on the bottom of the pan.
Cool slightly on a wire rack, then slice and serve. Your finished bread should be crisp on the outside and soft inside.
How to Serve Focaccia
This focaccia is best eaten warm, but it holds up well for leftovers. Here’s how to make the most of it:
- Serving suggestions: Pair with soup, slice for sandwiches, or dip into olive oil and balsamic.
- Storage: Keep leftovers in an airtight container or under the Nordic Ware plastic lid at room temperature for up to 3 days.

Selling Focaccia? Here’s What to Know
If you're selling focaccia, you can use a disposable aluminum pan to make it easy to transport. Or bake a full batch, cut it into quarters, and use these micro-perforated bread bags for packaging.
Want to plan your bake schedule? You can mix the dough up to 3 days in advance. Bake the day of or one day before delivery for best results.
Crispy Sourdough Focaccia
Ingredients
- 100 g active sourdough starter ⅓ cup + 1 Tbsp
- 265 g warm water 1 cup + 2 Tbsp
- 360 g bread flour 3 cups
- 10 g kosher salt 1½ teaspoon
- 20 g extra-virgin olive oil 1½ teaspoon
- 42 g Oive oil for pan and topping 2 tablespoon for pan, 1 tablespoon for drizzle
Instructions
- In a large bowl, combine active sourdough starter, warm water, salt, olive oil, and bread flour. Stir until a shaggy dough forms. Continue mixing by hand until the ingredients are fully incorporated. The dough will feel sticky and loose, this is normal for a high-hydration dough. Cover the bowl and let it rest for 30 minutes so the flour can fully hydrate.
- With wet hands, perform a stretch and fold by lifting one side of the dough, stretching it upward, and folding it toward the center. Rotate the bowl and repeat on all four sides. Continue with 3 more rounds of stretch and folds, spaced 30 minutes apart. By the final round, the dough should feel more elastic, hold its shape better, and show small bubbles starting to form.
- Cover the bowl with plastic wrap and let it bulk ferment at room temperature. It’s ready for the next step when it has risen by about 50%, there are small bubbles visible on the surface, and the dough jiggles slightly when moved. (Usually about 3-4 hours)
- Generously coat a quarter sheet pan with 2 tablespoons of olive oil. Turn the dough out onto the pan, and flip it once so all sides are coated in oil. Cover loosely and refrigerate overnight or up to 48 hours for a slow, cold rise that develops flavor and texture.
- Remove the dough from the refrigerator and let it sit, covered, at room temperature for 2 to 3 hours. It’s ready when the dough looks puffy, has bubbles on top, and has mostly filled the pan.Drizzle olive oil over the top. With oiled fingers, gently press deep dimples all over the dough. As you dimple, gently guide the dough toward the edges of the pan, but don’t force it. Add flaky salt and any toppings you like, such as rosemary, tomatoes, Parmesan, or Italian seasoning.
- Preheat the oven to 475°F with the rack in the center. Bake for 22–28 minutes, rotating halfway through, until the top is deep golden brown and the bottom crust is crisp. Transfer to a wire rack and cool for at least 10 minutes before slicing.
Notes
Recipe Notes
- Your dough should be sticky. Resist the urge to add more flour. Use lightly oiled hands when handling the dough.
- Give it time. Sourdough rises at its own pace. If your kitchen is cool, the dough may need a little longer to become puffy and bubbly.
- Don't skimp on the olive oil. It's the secret to a crispy, golden crust.
- Bake until golden brown. A deeply golden crust means better flavor and a crispier bottom.
Dayna says
This is possibly the best savory I have ever made. Really so delicious and turns out perfectly every time! Thank you for the best recipe!!