


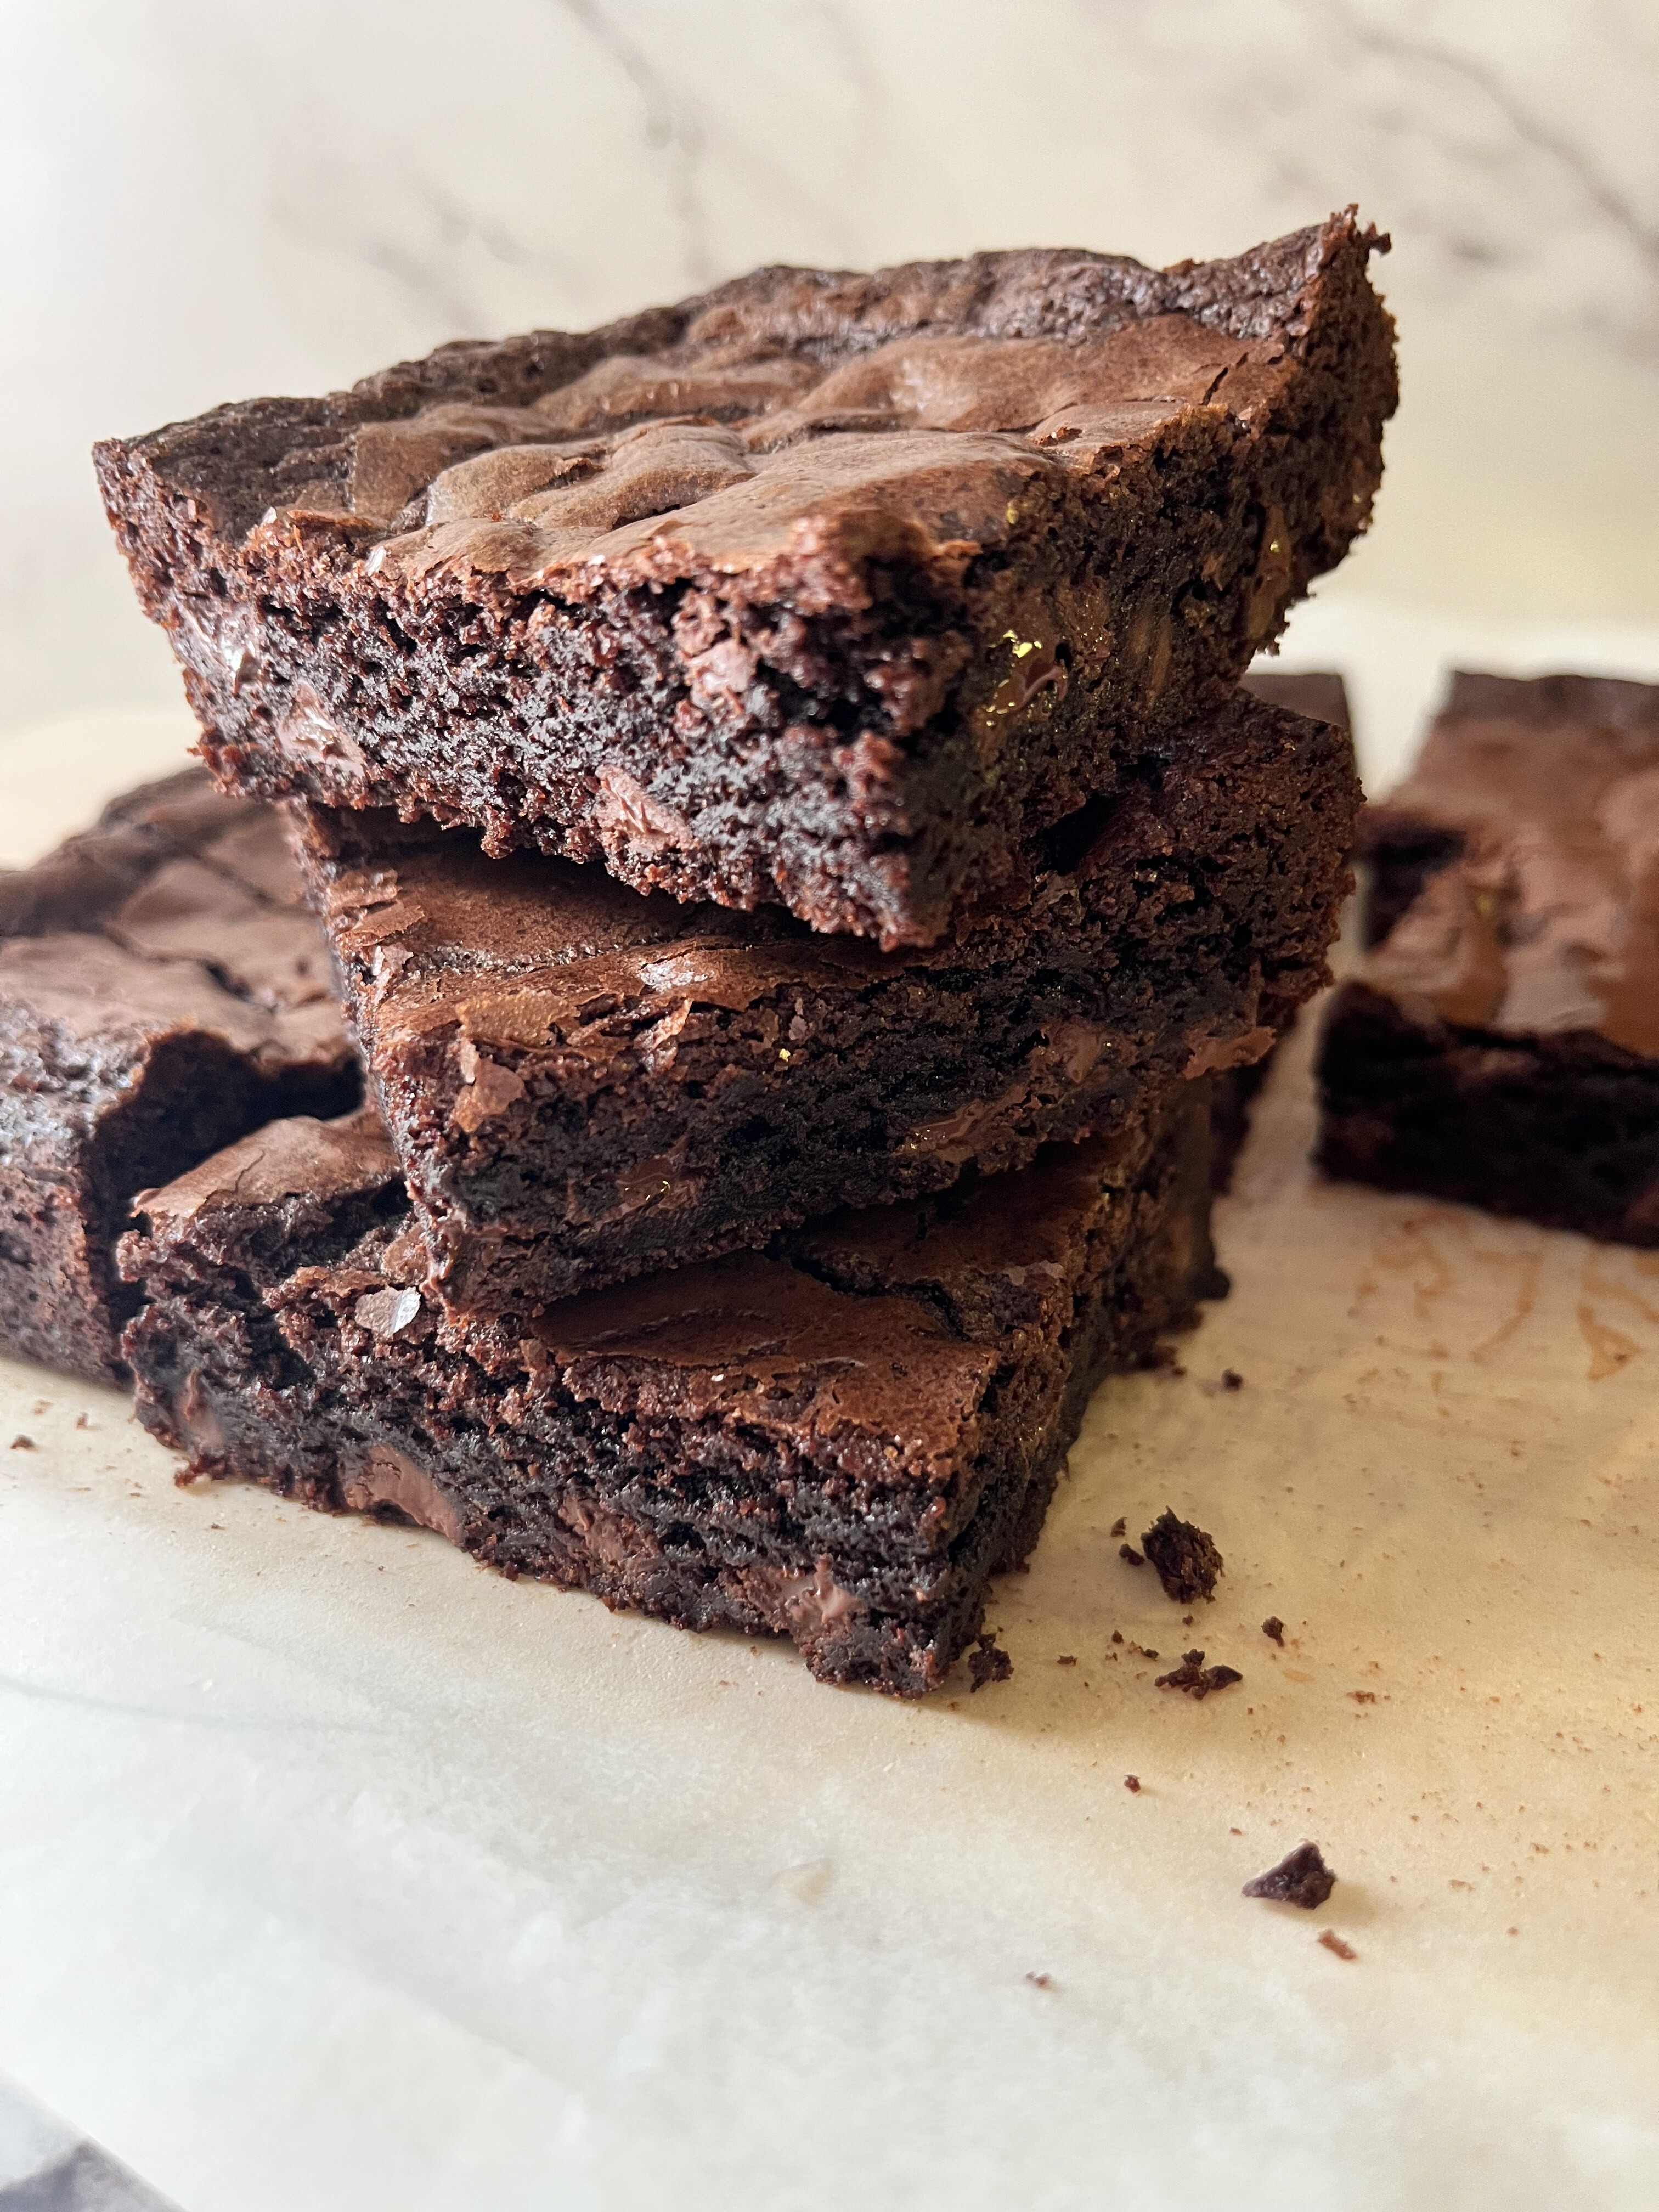
Ready to learn how to make your brownies shiny on top? Check out these four simple changes you can make to your brownie batter to create a crackly top and shiny crust!

How to make brownies shiny on top
When I used to own a bakery, we made brownies every day. I noticed that some of my bakers would prepare and bake brownies that came out with glossy tops, while others, who followed the same recipe, ended up with brownies that had a dull finish. So, what was causing this difference? It all boils down to the way they did it.
After much observation, here are the four factors that determine whether brownies have a shiny or matte top.
Use hot melted butter
The first thing you can do to get shiny top brownies is to use hot melted butter. Melting the butter helps the sugar dissolve as you stir it in. If you wait too long after melting the butter, the sugar won't dissolve as well.

Beat the sugar and eggs well
The next factor that contributes to a beautiful top crust is how well you incorporate the eggs into the recipe. Beat the egg mixture for several minutes until you have a glossy smooth mixture. (Be sure and start with room temperature eggs!)
Use the right ratio of ingredients
This might be obvious, but it's important to make sure that the recipe you're using contains enough sugar. Sugar plays a crucial role in making baked goods crispy, especially those delightful crunchy edge pieces. In this recipe, I use a mix of granulated sugar and powdered sugar, which not only adds to the crispness but also contributes to that flaky top.

Add semisweet chocolate chips
I actually stumbled on this tip by accident. We made several varieties of brownies in my shop and I noticed that the batches that had extra chocolate chips added to the batter always came out shiny! That’s when I realized that the extra step of adding chocolate chips to the brownie batter helps the brownies get a crackly top.

The next time the top of your brownies looks matte or dull, try incorporating these tips!
Ingredients in this recipe

Here's a quick look at the ingredients to make the perfect crinkle-top brownie!
Butter- Use melted, unsalted butter for the best flavor
Semi-sweet chocolate chips- ¾ cup of chocolate chips get folded into the batter.
Eggs- This recipe calls for two eggs and one yolk. (discard egg whites, or save them for a different recipe)
Sugar- I like the ratio of 2:1 for granulated and powdered sugar
Cocoa Powder- Dutch-processed cocoa powder makes the best brownies
Vegetable oil- Adds a delicious fudgy texture
Flour- Use all-purpose flour. For best results, I always recommend weighing flour on a kitchen scale.
Baking Soda- Adding just a touch of leavening helps create a great textured brownie
My favorite tools for this recipe
Square metal pan- I’ve sized this recipe to fit perfectly into a 9x9 square pan. This non-stick pan is my go-to for baking perfect brownies every time.
Parchment paper- I always line the pan with parchment paper to ensure easy removal.
Kitchen Scale- Essential for accurately measuring flour and other dry ingredients.
Hand mixer- Sure, you can use a stand mixer, but it's so quick and easy with this hand mixer.
Plastic wrap- If you sell your brownies, or just want them to last a little longer then be sure to use a high-quality food service grade plastic wrap like this.
Step-by-Step Instructions
- Coat a non-stick 9 x 9-inch baking pan with pan spray and line with parchment paper.
- Combine the dry ingredients: In a medium bowl, stir together the flour, cocoa powder, baking soda, and salt. Set aside.
- In a large bowl, measure the granulated and powdered sugar. Whisk together. Set aside.
- In a microwave-safe dish, heat the butter until it is melted and bubbly. About 1 minute.
- Pour the melted butter into the sugar mixture and mix on high speed for about one minute to help the sugar dissolve.
- Add the vanilla extract, oil, eggs, and egg yolk. Mix on medium speed until it is silky and thick, about 3 minutes.
- Add the flour, cocoa powder, baking soda and salt. Mix until you can no longer see any dry flour spots in the chocolate mixture. Then fold in ¾ cup chocolate chips.
- Pour the batter into the prepared pan. Bake at 350 degrees for 35-40 minutes or until the toothpick comes out clean, but moist.
Brownie FAQ’s
What size pan should I use?
This recipe is perfectly sized for a 9 x 9-inch square, non-stick aluminum pan. It is the right size for the amount of batter. If you change the pan size, double the recipe, or alter the fill amount, you could have flat, dry to undercooked brownies.
Should I use a metal or glass pan?
Aluminum, non-stick pans are the best for brownies. If you don't have one and need to use a glass pan, lower your oven temperature by 25 degrees and bake your brownies for the same cooking time.
Next, let's take a look at a few other factors that go into baking the perfect brownie.
How can I tell when the brownies are done?
You can tell when brownies are done by the crackle on top. Once you start to see the small hairline cracks in the shiny surface your brownies are almost done. Watch for the cracks to spread towards the middle of the pan and then take them out of the oven.
How long do they last, can they be frozen?
Another reason I love brownies so much is because of how well they freeze. Just bake as usual and cut your brownies into desired portion sizes. Wrap each piece in plastic wrap, then place the pieces inside a freezer-safe plastic container, or a freezer zip lock bag.
The Best Homemade Shiny Top Brownies
Ingredients
- 8 tablespoon Butter or 4 oz, or 113g
- 1 cup Granulated sugar or 8 oz, or 226g
- ½ cup Powdered sugar or 2.5 oz, or 70g
- 2 ea Eggs Large, room temperature
- 1 ea Egg yolk Discard whites
- ¾ cup Cocoa powder or 3 oz, or 77g
- ⅓ cup Vegetable oil or 2 oz , or 60g
- ½ cup All-purpose flour or 2.5 oz, or 70g
- ½ teaspoon Salt or 1.5 g
- ⅛ teaspoon Baking soda
- 1 teaspoon Vanilla or 4g
- ⅔ cup Semi-sweet chocolate chips or 4.5 oz, or 130g
Instructions
- Pre-heat oven to 350 degrees
- Coat a non-stick 9 x 9-inch baking pan with pan spray and line with parchment paper. Set aside.
- Combine the dry ingredients: In a medium bowl, stir together the flour, cocoa powder, baking soda, and salt. Set aside.
- In a large bowl, measure the granulated and powdered sugar. Whisk together. Set aside.
- Add the vanilla extract, oil, eggs, and egg yolk. Mix on medium speed until it is silky and thick, about 3 minutes.
- In a microwave-safe dish, heat the butter and tell it is melty and bubbly. About one minute. Pour the melted butter into the sugar mixture and mix on high speed for about one minute to help the sugar dissolve.
- Add the vanilla extract, oil, eggs, and egg yolk. Mix on medium speed and tell it is silky and thick- about three minutes.
- Add the flour, cocoa powder, baking soda, and salt. Mix until you can no longer see any dry flower spots. Fold in ⅔ cup of chocolate chips.
- Pour the batter into the prepared pan. Bake at 350 degrees for 35-40 minutes or until the toothpick comes out clean, but moist.
- Allow the brownies to cool completely before cutting into 9 equal pieces.

Now you know the secret for how to make brownies shiny on top
No need to reach for a box mix ever again! With these four simple tweaks, you can bake crinkly top brownies the first time, and every time!
Let me know in the comments how your brownies turned out!
Carol P says
Can you use this recipe with a pan that makes individual brownies?
Better Baker says
Hi Carol,
You can absolutely use this recipe in a pan that makes individual brownies. If you are using the type of individual pan that makes 12 brownies. just fill 9 of them since this recipe is the size of a 9 x 9 pan and makes 9 servings. If you decide to fill all 12 spaces, you'll have a thinner brownie that bakes a little quicker.
Nan Laparr says
This recipe was the most confusing recipe ever. The measurements were totally confusing and put in such a strange order. I am 65 years old and actually had to call my mom and get her opinion about the measurements! I still have no idea what 3.oz of flour 1/2 cup is. Am I competely stupid or are these these recipes from a foreign country.
Better Baker says
Hi Nan, I write my recipes so that they are accessible to all different types of bakers. Some people like to weigh their ingredients and prefer the units to be in ounces. Others like to measure using cups and teaspoons. Sorry, you found it too confusing. Hope your brownies turned out good!
gloria Walls says
cant wait to try this......i use a digital scale and understand your measurements fine.....just got a z shaped bakers edge pan.....can i use that.......thanks gg
Wisteria says
I accidentally added all the dry ingredients together because one of the first instructions says “add the dry ingredients together “ I didn’t read the whole recipe first so my bad. I got too excited. But I might help to just write add the cocoa, flour, baking soda and salt together instead of starting with add the dry ingredients together. I made a video while baking these brownies if you wanna see how they turned out @helloimwisteria on YouTube.