


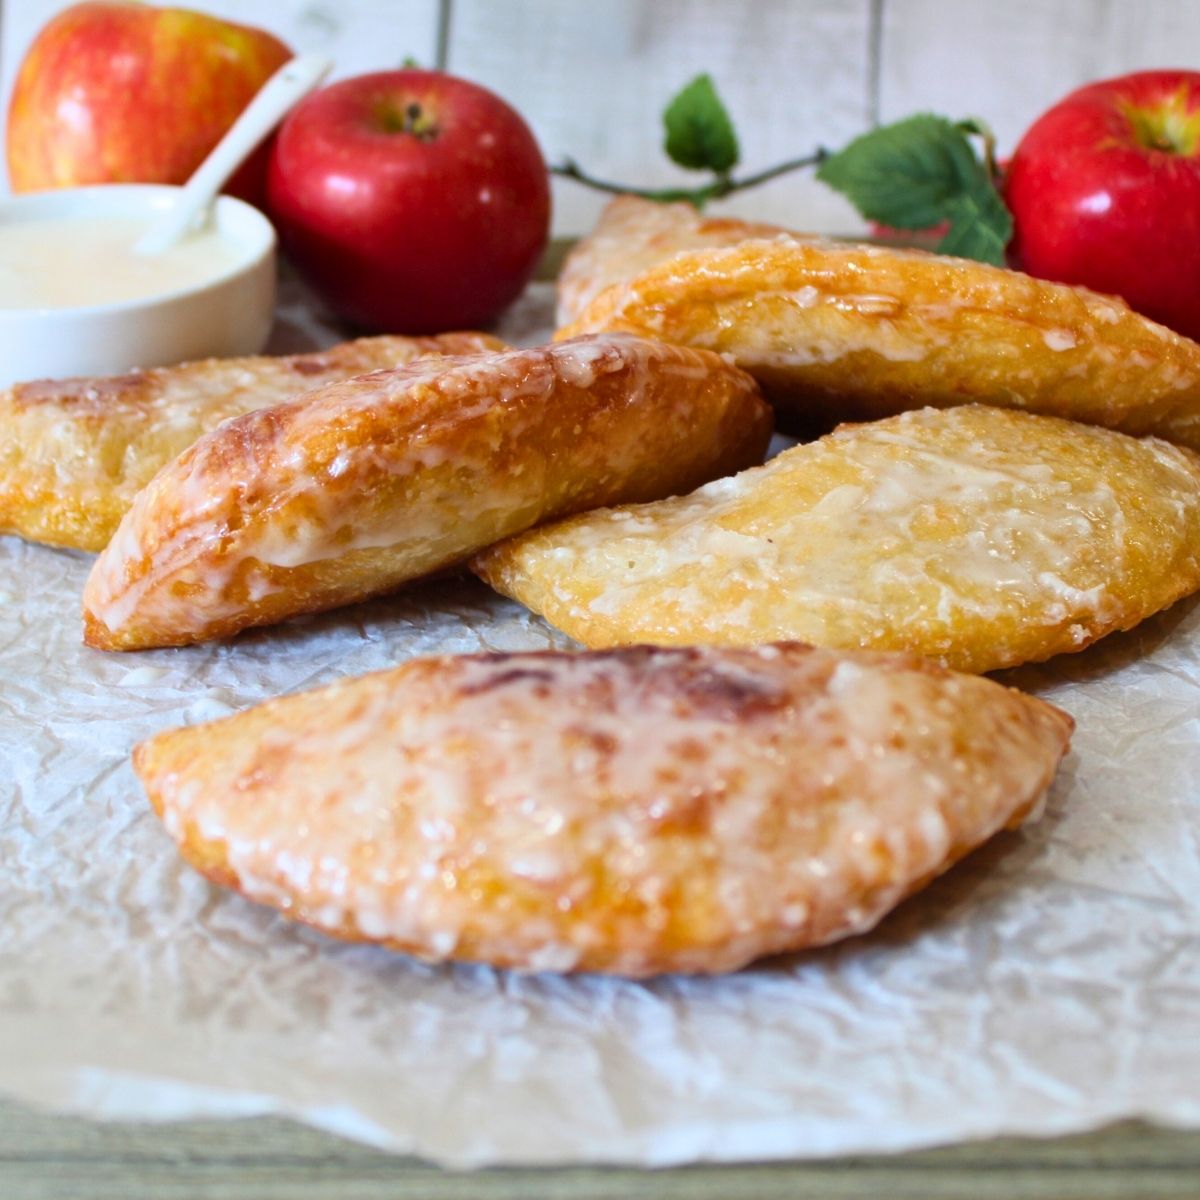
This Amish fried pie recipe has everything you crave in a fall dessert: a rich, fluffy crust, warm spiced apple filling, and a silky glaze that melts into every bite. It’s the kind of tasty treat that feels homemade in the best way. It’s crispy at the edges, soft in the center, and bursting with sweet, cozy flavor.
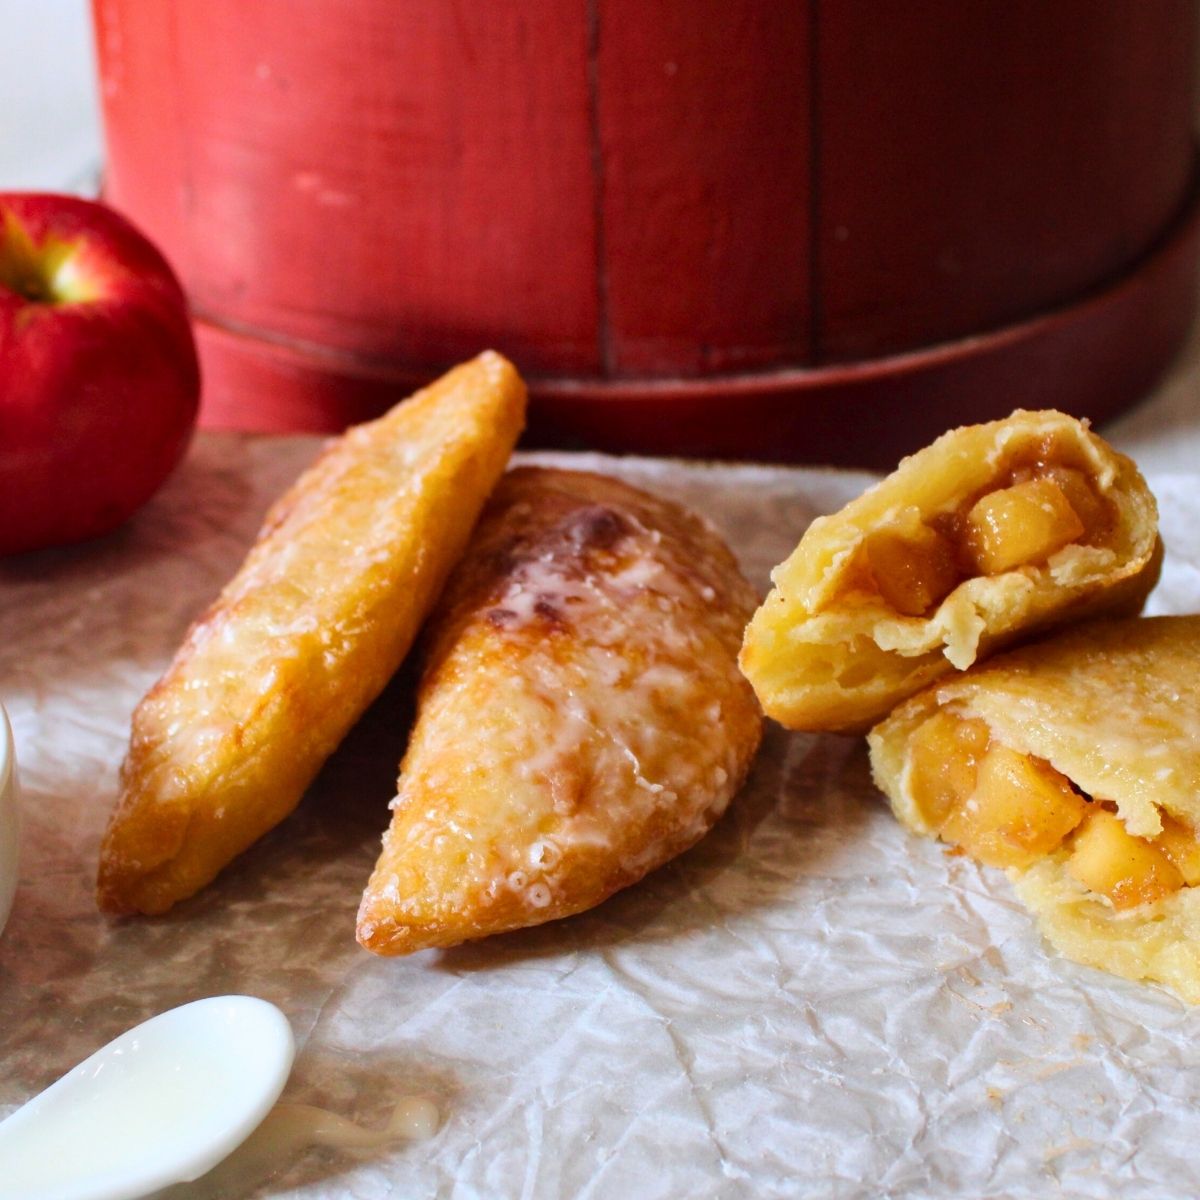
Every fall, I find myself craving the kind of dessert that feels like it came straight from a country kitchen. These Amish fried pies deliver!
Why You’ll Love This Amish Fried Pie Recipe
If you’ve never made fried pies before, don’t worry. I’ll show you step by step how to make this Amish fried pie recipe, without overwhelm or a mess in your kitchen.
- You can make the apple filling a day ahead.
- The pastry dough can also be made ahead and chilled.
- Fry and glaze right before serving for the best texture and flavor.
Whether you’re baking for your family, your fall market table, or just because it’s a cozy weekend, these little apple fry pies are everything you love about sweet desserts, wrapped up in a flaky, hand-held bite.
The Key Tools That Make It Easier
You don’t need special equipment to make this recipe work, but these basic tools help, especially if it’s your first time working with homemade pie crust or hot oil:
- Dial Thermometer-A thermometer helps your oil stays at the correct frying temperature (350°F) for even browning and safe cooking.
- Pastry Cutter- These help you work cold butter into the flour mixture for a flaky crust.
- Rolling Pin – Rolls dough evenly without tearing.
- Wire Cooling Racks – Keeps pies crisp while cooling and allows glaze to set.
- Slotted Spoon – Safely lifts pies from the frying pan without splashing. I use this one for hand pies as well as my Easy Overnight Bagels.
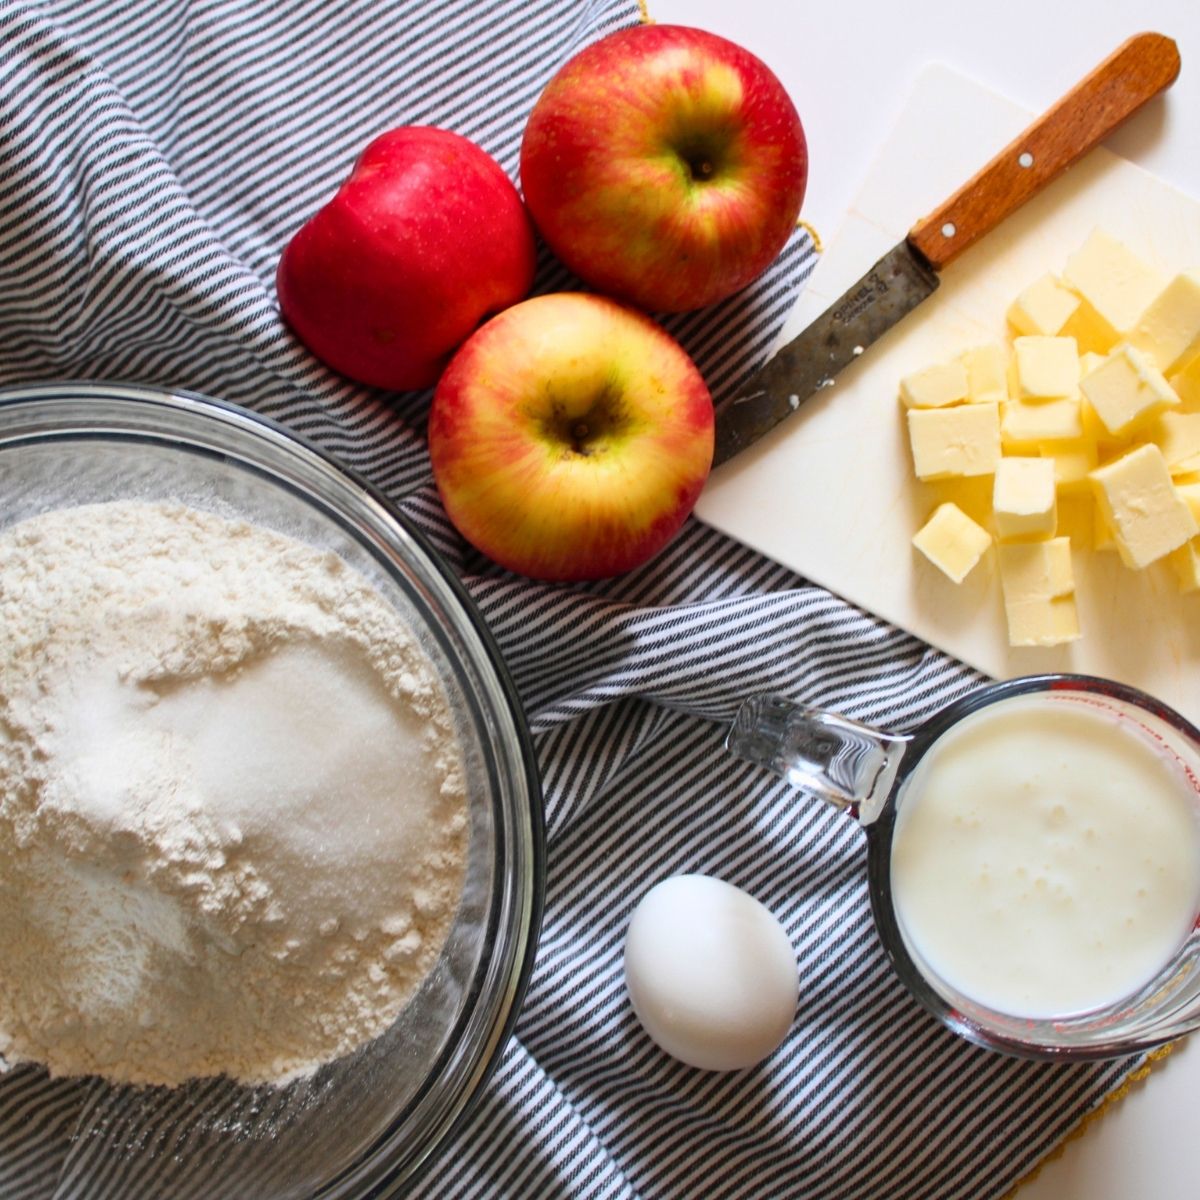
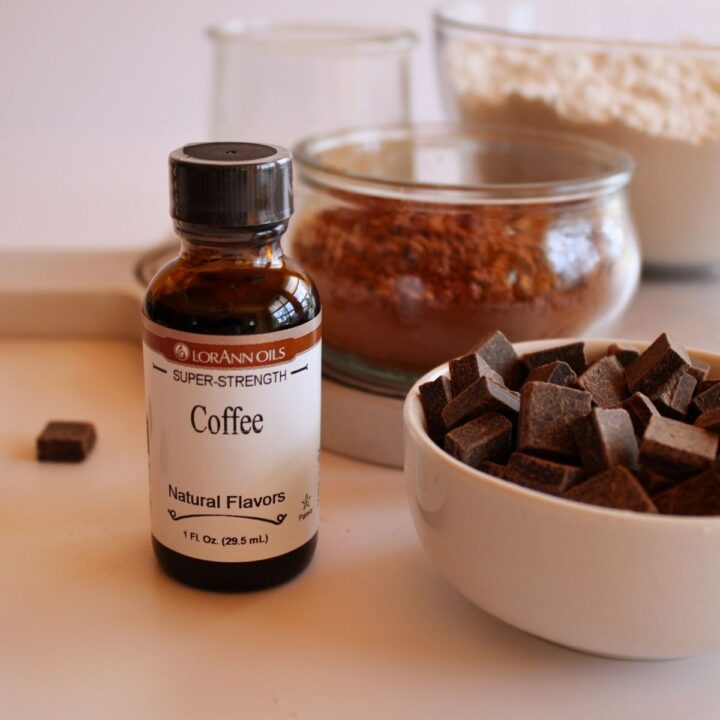
The Key Ingredients for Irresistible Amish Fried Pies
These are the pantry staples and cozy flavors that make Amish fried pies so delicious. No fancy ingredients here, just simple, tried-and-true basics that work together beautifully:
- All-purpose flour – The base of the dough. It gives just enough structure while staying soft and tender.
- Cold butter – Essential for that flaky, layered crust. Keep it cold so it steams up while frying.
- Granulated sugar – Adds a hint of sweetness to the pastry without making it overly dessert-like.
- Salt – Brings balance and enhances the buttery flavor.
- Egg – This gives the dough a fluffy, tender texture you don't get with most hand pie recipes.
- Buttermilk – Makes the dough rich, soft, and easy to work with.
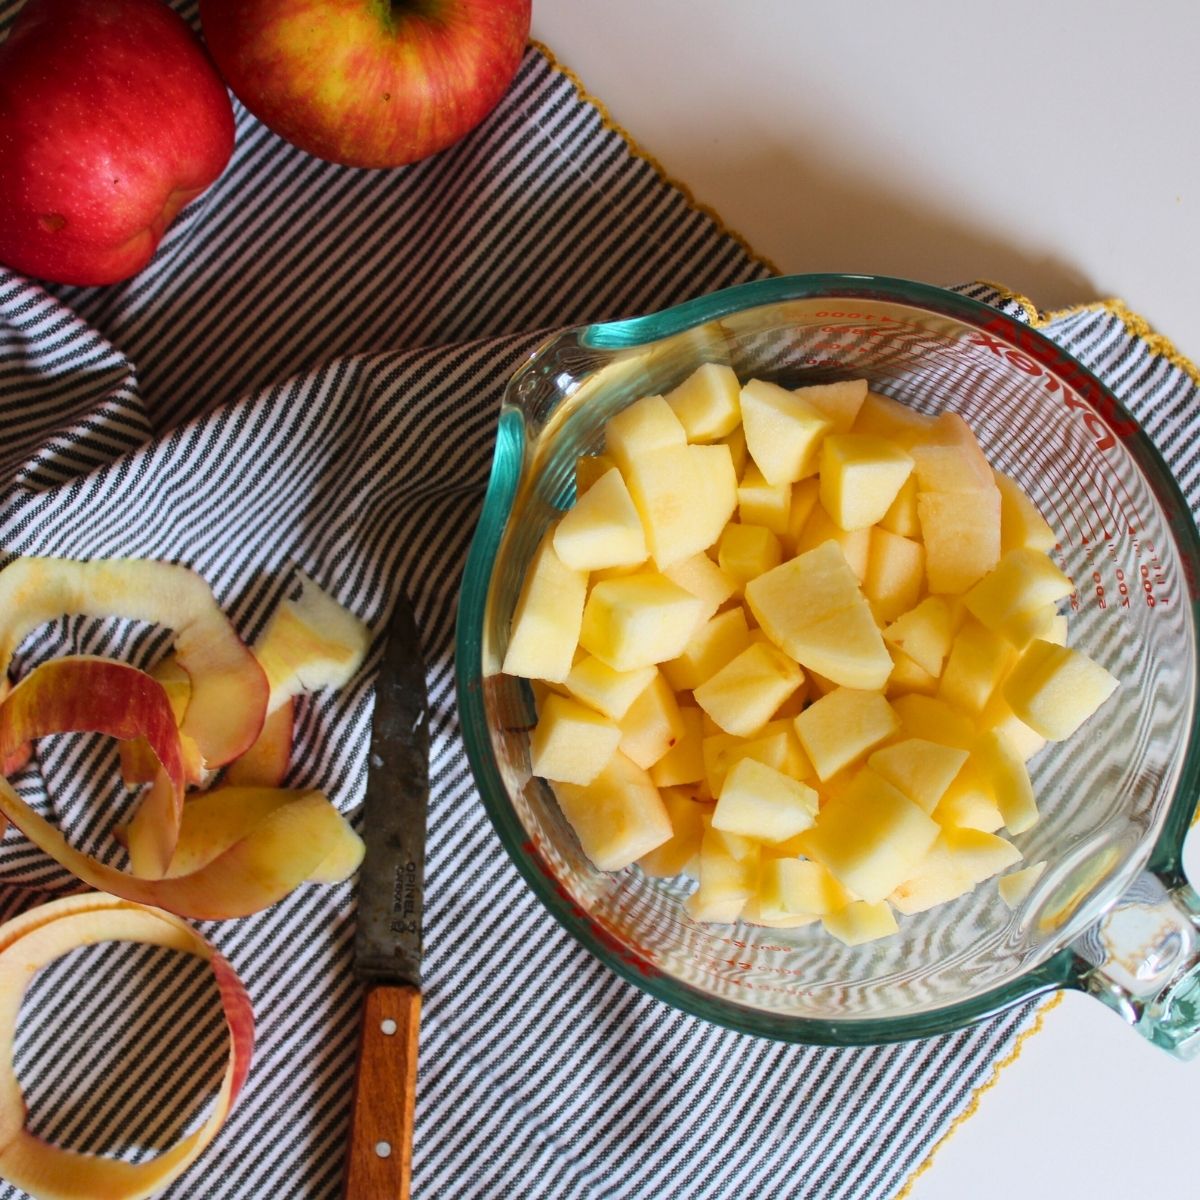
- Chopped apples –You'll need about 5 tart-firm apples like Honeycrisp or Granny Smith.
- Brown sugar – Brings caramel notes to the fruit filling.
- Lemon juice or apple juice – A splash keeps the filling bright and balanced.
- Vanilla extract – Adds a cozy flavor to both the filling and glaze.
- Cinnamon – Just enough to give it that classic fall flavor.
- Powdered sugar and milk – For a light glaze, or try it with maple syrup using my maple glaze recipe.
How to Make Amish Fried Pies (It’s Easier Than You Think!)
Here’s a quick overview of how to make Amish fried pies so you can see how it all comes together. The exact measurements and detailed instructions can be found in the recipe card below.
Make the Filling Combine apples, brown sugar, lemon juice, cinnamon, and vanilla in a saucepan. Cook over medium heat for 8–10 minutes until the apples are soft. In a small bowl, mix cornstarch with water. Stir the slurry into the apple mixture and continue cooking for a few minutes, until thickened. Let cool completely before using.
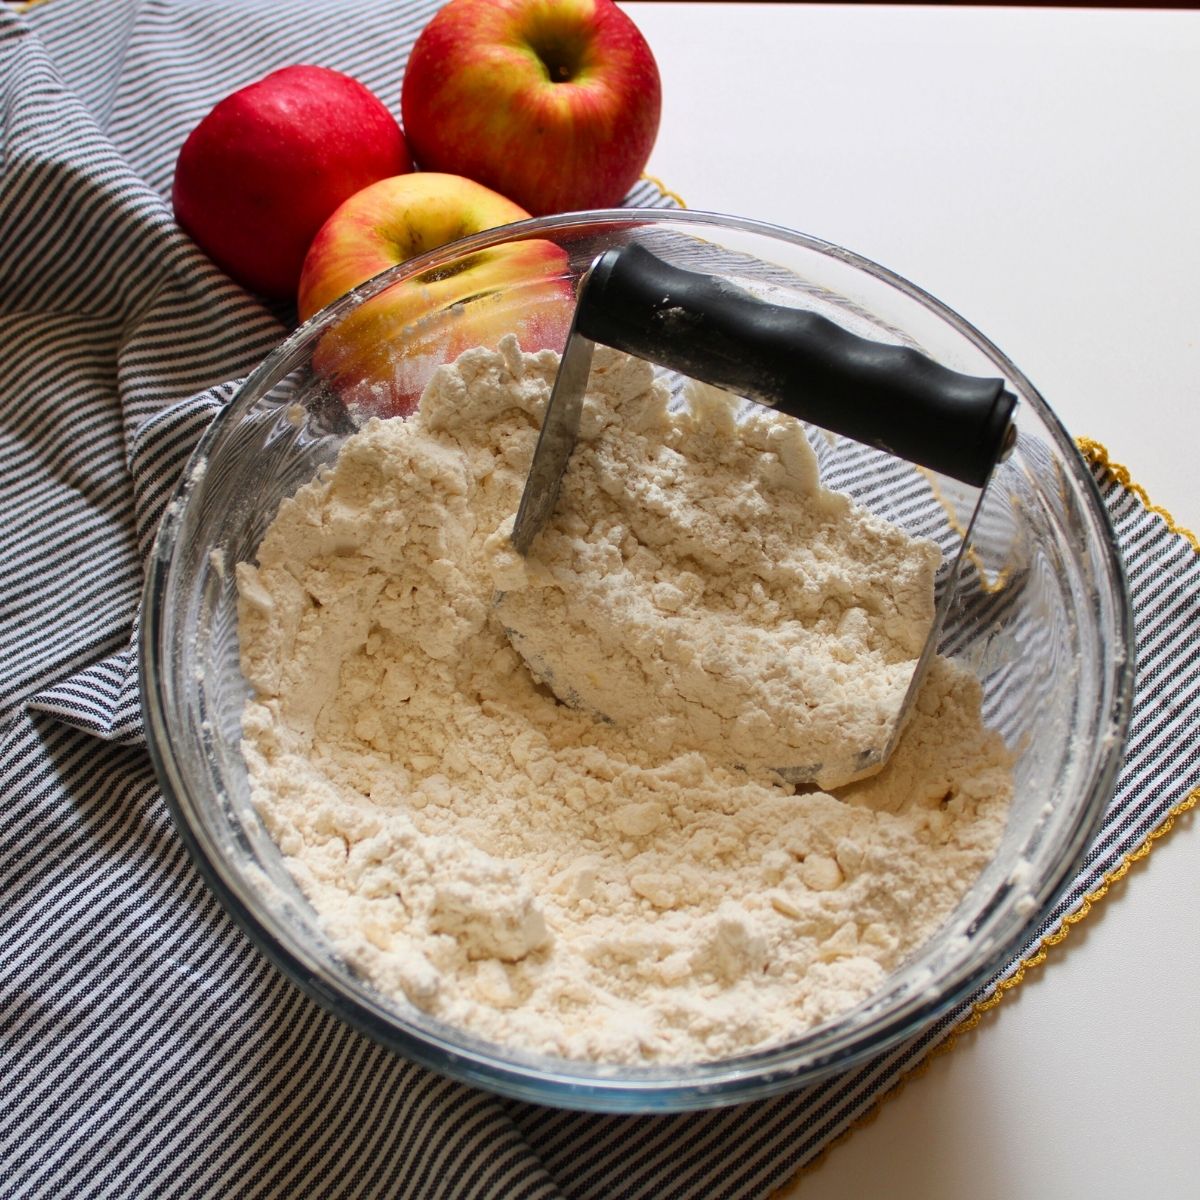
Make the Dough In a large bowl, whisk together flour, sugar, and salt. Use a dough blender or pastry cutter to work in the cold butter until the mixture looks like coarse crumbs. In a separate bowl, whisk the egg with the buttermilk and add it to the flour mixture. Stir until the dough comes together. Form it into a ball, wrap in plastic wrap, and refrigerate for at least 1 hour.
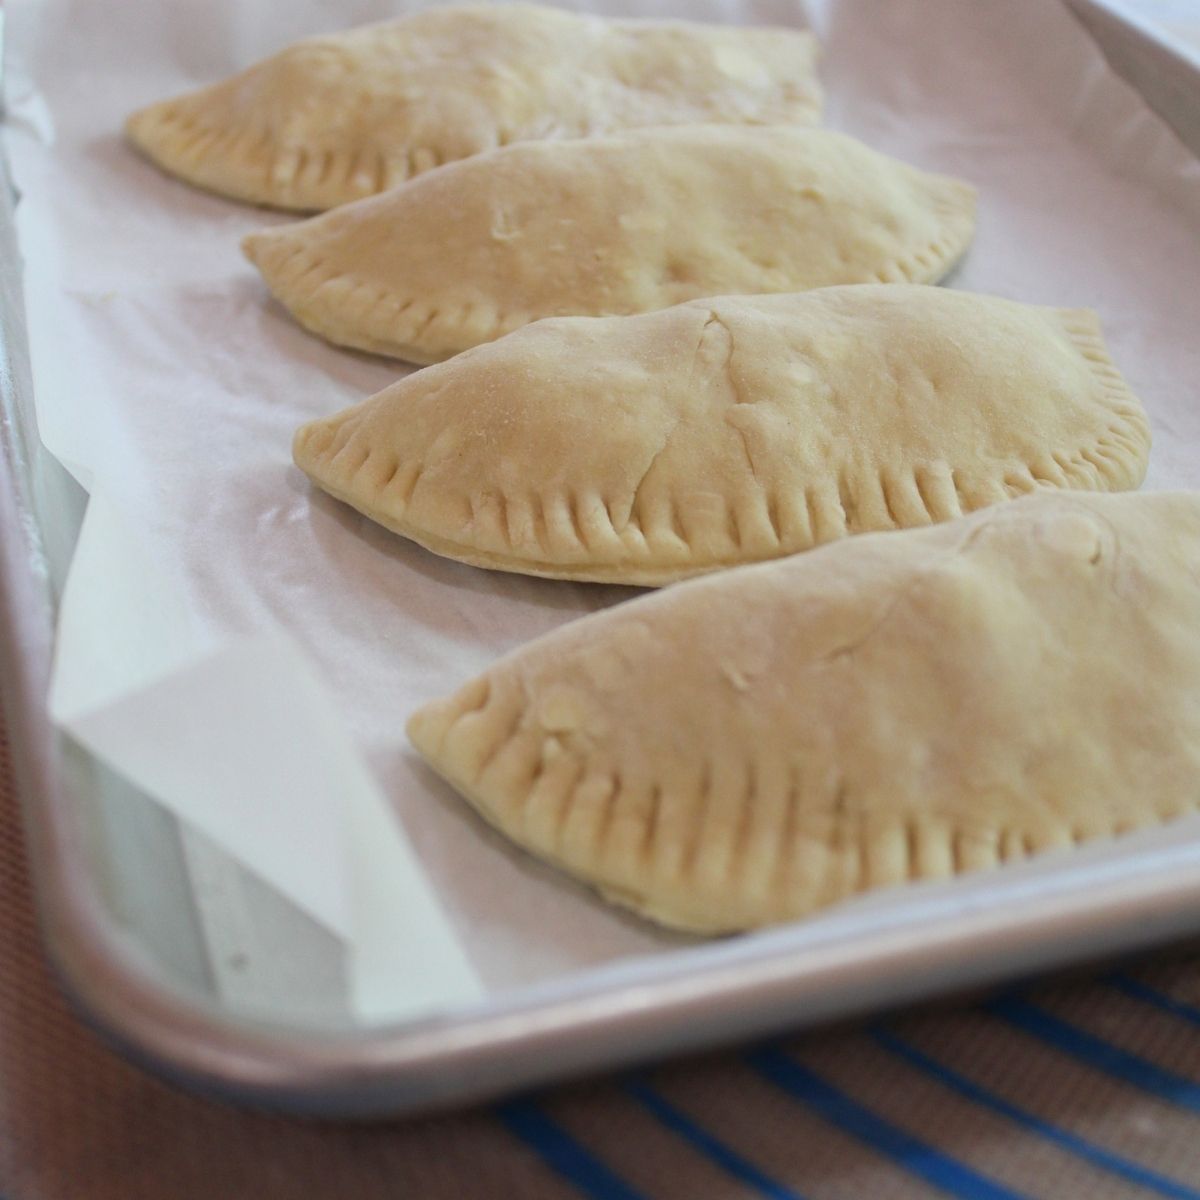
Roll and Fill (See below for shaping tips) After chilling, divide the dough evenly into 8 portions. Gently roll each piece into a ball and then roll each ball into a 6-inch circle on a lightly floured flat surface. This method helps avoid rerolling scraps and keeps your dough tender. (Each portion will weigh about 155–160 grams.)
Spoon a heaping tablespoon of cooled filling onto one half of each circle. Beat the second egg and brush along the edge. Fold the unfilled side over to form a half-moon and press to seal with a fork. Cut a small slit in the top for steam to escape.
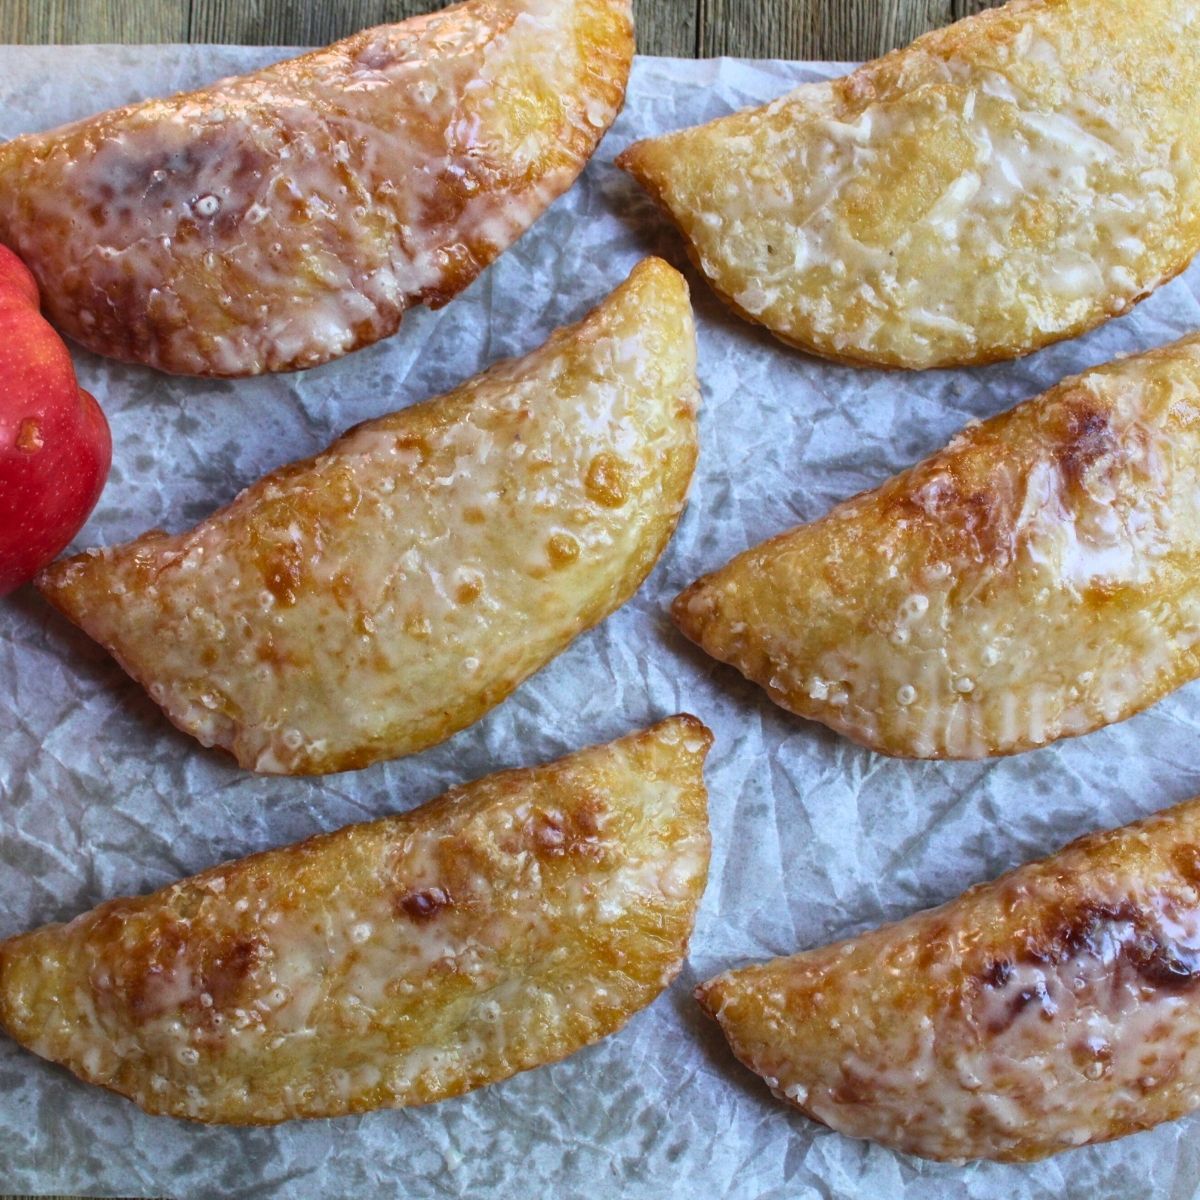
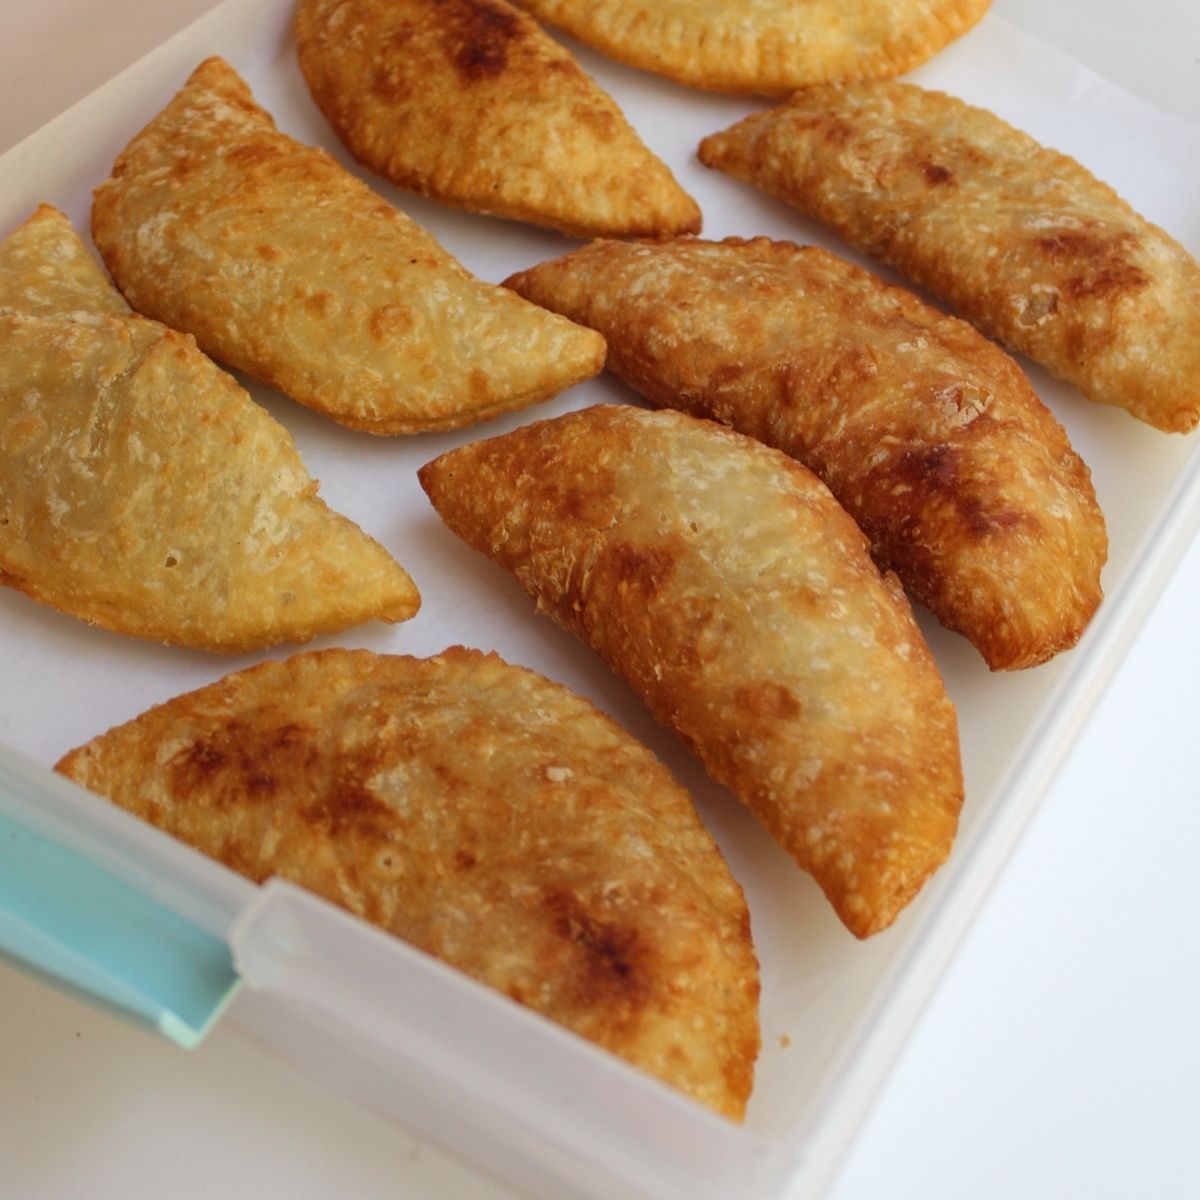
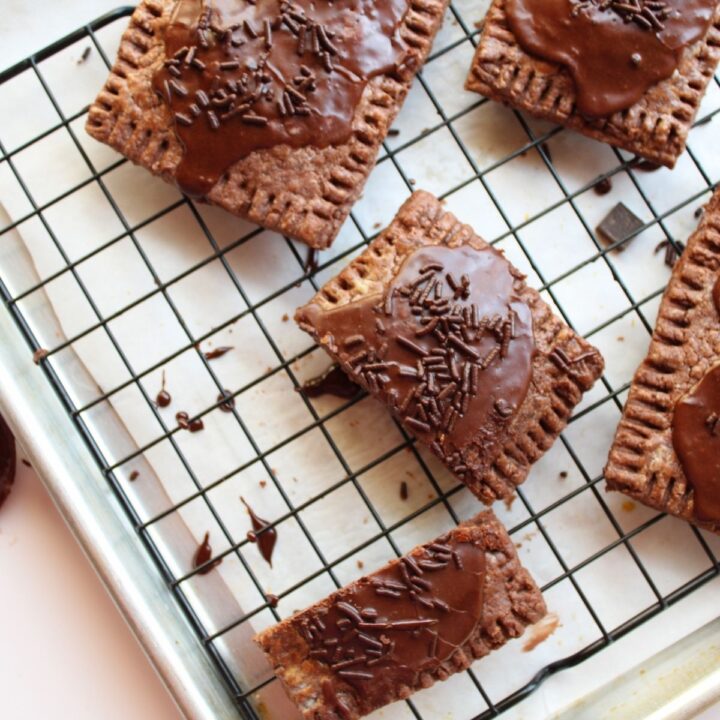
Fry Heat oil in a dutch oven or frying pan to 350°F. Make sure to use a pan deep enough that the oil sits well below the rim—this helps prevent splattering and overflow. These pies brown quickly, so turn frequently and fry just 2–3 minutes per side, until golden (not dark brown). Use a slotted spoon to remove and place on paper towels or a wire rack.
Finish with a Light Glaze
In a small bowl, whisk together:
- 1 cup powdered sugar
- 1–2 tablespoons milk or cream
- ½ teaspoon vanilla extract (optional)
Brush the glaze over warm pies using a pastry brush or dip the tops. Let rest on a wire rack for 10–15 minutes until the glaze is set.
Want to take it to the next level? Try these with my Maple Glaze Recipe for the ultimate cozy fall treat.
Easy Maple Glaze
Looking for a glaze that tastes amazing on everything?
This Easy Maple Glaze is a must-try. It’s silky-smooth, not too sweet, and brings out the best in all your fall bakes—from Amish fried pies to pumpkin bread and coffee cake.
Get the Easy Maple Glaze Recipe Here
Allyson's Tips to Make Them Bakery-Worthy Every Time
- Chill your dough for at least one hour.
- Cool your filling completely before assembling.
- Divide dough into 6 equal portions for even rolling (see above).
- Turn pies frequently while frying, they brown fast.
- Fry in a deep, roomy vessel to avoid oil overflow.
- Glaze while pies are warm for a smooth finish.
- Store unglazed pies on a cooling rack covered loosely with a plastic bag overnight, then glaze before serving or packaging.For markets or gifting, package in 4 x 6-inch waxed paper sleeves with a cute label.
These tips take your end result from good to bakery-style perfect.
Want to Sell These? Tips for Bake Sales & Markets
Want to sell these cozy hand pies? Try packaging them in waxed paper sleeves for a professional finish. I love this apple-print version with a self-sealing flap (see photo below). Any 4 x 6-inch waxed paper or glassine sleeve will work well for displaying and stacking.
- Package individually with a cute label.
- Store unglazed pies on a cooling rack, covered in a plastic bag overnight and glaze the morning of your sale.
- Label ingredients if required by your cottage food law (see this blog post for guidance).
Want more bakery tips like this? Join Bake Better Academy and turn your bakes into income. We share new recipes and seasonal ideas to help you sell what you make.

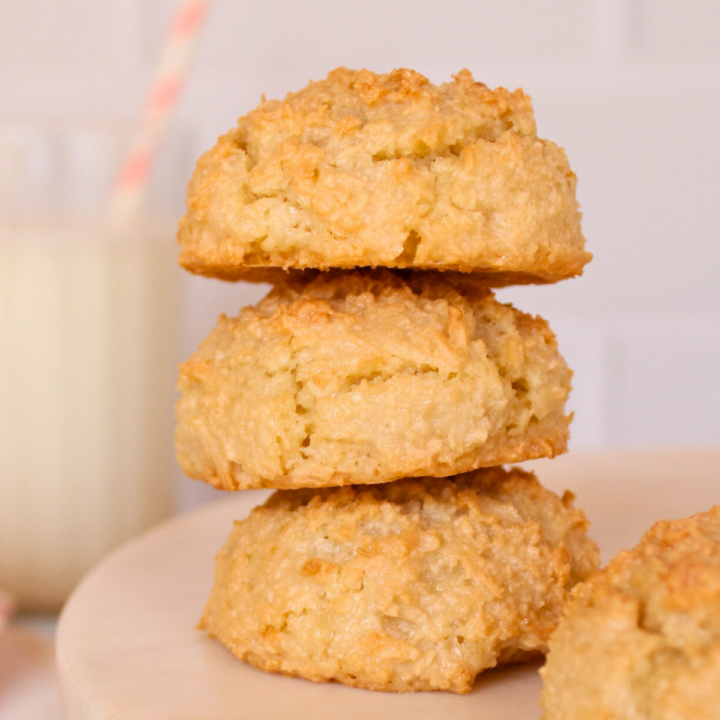
More Fall Recipes Like This Amish Fried Pie Recipe
If you loved this Amish fried pie recipe, here are a few more cozy, old-fashioned treats to try next:
Looking for more ideas? Browse my Fall Recipes Collection for all things cozy, crisp, and bake-sale ready.
Amish Fried Pie Recipe
Ingredients
For the Dough
- 3 cups all-purpose flour aprox. 375g
- 2 tablespoons granulated sugar
- ½ teaspoon salt
- 1 stick cold butter, cubed ½ cup
- 2 large eggs 1 for dough, 1 for sealing
- 1 cup buttermilk
For the Filling
- 5 cups chopped apples about 6 medium apples
- ⅔ cup brown sugar
- 1 tablespoon lemon juice or use apple juice for a less tangy filling
- 1 teaspoon vanilla extract
- 2 tablespoons corn starch
- ½ cup water
For Frying
- Enough oil for 2 inches of frying
- Paper towels or wire rack
For the Glaze
- 1 cup powdered sugar
- 1-2 tablespoons milk or cream
- 1 pinch salt optional
Instructions
- Make the filling: In a saucepan, combine apples, brown sugar, lemon or apple juice, vanilla, and cinnamon. Cook over medium heat for 8–10 minutes until the apples are soft. In a small bowl, stir together 2 tablespoons of cornstarch with ½ cup of water. Add to the pan and cook for 1–2 more minutes, until the mixture thickens. Remove from heat and let cool completely.
- Make the dough: In a large bowl, mix flour, sugar, and salt. Cut in butter until crumbly. Stir in a mixture of 1 egg and buttermilk. Form into a dough ball, wrap in plastic, and chill 1 hour.
- Roll and shape: Divide chilled dough into 8 pieces (about 155–160g each). Roll into balls, then flatten each into a 6-inch circle. Fill one half with 2 tablespoons of filling. Brush edges with beaten egg, fold, and crimp shut. Cut a slit in the top.
- Fry: Heat oil in a deep pan to 350°F. Fry pies 2–3 minutes per side, turning as needed. Drain on paper towels.
- Glaze: In a small bowl, whisk together powdered sugar, milk or cream, and vanilla extract (if using) until smooth and pourable. Brush over warm pies or dip the tops. Let rest for 10–15 minutes until set.
- Want to take it to the next level? Try these with my Maple Glaze Recipe for the ultimate cozy fall treat.
Notes
- You can make the apple filling a day in advance.
- The dough can also be made ahead and chilled overnight.
- Let the filling cool completely before assembling—this keeps the dough from tearing or softening.
- Divide the dough into 8 equal pieces and roll each into a ball for easy shaping without scraps.
- Use 2 tablespoons of filling per 6-inch circle for the best seal and minimal leaking.
- Don’t overfill—these seal best with a modest amount of filling.
- Glaze while warm for a glossy, smooth finish that sets perfectly.
- Store unglazed pies on a cooling rack covered loosely with a plastic bag overnight, then glaze before serving or packaging.
- For markets or gifting, package in 4 x 6-inch waxed paper sleeves with a cute label.
Leave a Reply