One of the biggest challenges to sourdough bakers is knowing how long to proof sourdough before baking.
When I studied artisan bread baking in culinary school, I learned the science behind fermentation. After training bakers and working hands-on in the bakery, I’ve found it’s more helpful to know what signs to look for as the dough ferments.
This guide will show you how to read the dough, not the clock, with step-by-step photos to help you get the best texture, flavor, and rise in your sourdough bread.

How Long to Proof Sourdough Bread
Proofing, also called fermentation, is the process where the yeast and bacteria in the dough create gas, causing the bread to rise. Sourdough proofing happens in stages.
Stretch and Folds
At the beginning of bulk fermentation, I like to perform a technique called stretch and folds to strengthen the dough. Stretch and folds don’t cause much rising but help strengthen the gluten. This makes the dough rise better during bulk fermentation and creates a more open crumb.

Bulk Fermentation (First Rise)
Bulk fermentation starts when you mix your dough, but real rise happens after the stretch and folds. During this stage, the natural yeast and bacteria in the sourdough starter feed on the flour, releasing gas. This gas is what makes the dough rise.
How Long to Proof Sourdough Bread During Bulk Fermentation?
How long bulk fermentation takes depends on the temperature. If your kitchen is warm, the dough will rise faster because the yeast is more active. If your kitchen is cool, the dough will rise much more slowly because the yeast works more slowly at lower temperatures.
Warmer temperatures, ( 75-80°F) 4-6 hours.
Cooler temperatures, (65-70°F) 8-12 hours.

Final Proof (Second Rise)
After the first rise, the dough is shaped and then left to rest again for the final proof. There are two ways to do the final proof:
Room Temperature Final Proof- If you want to bake your bread the same day, let the shaped dough proof at room temperature.
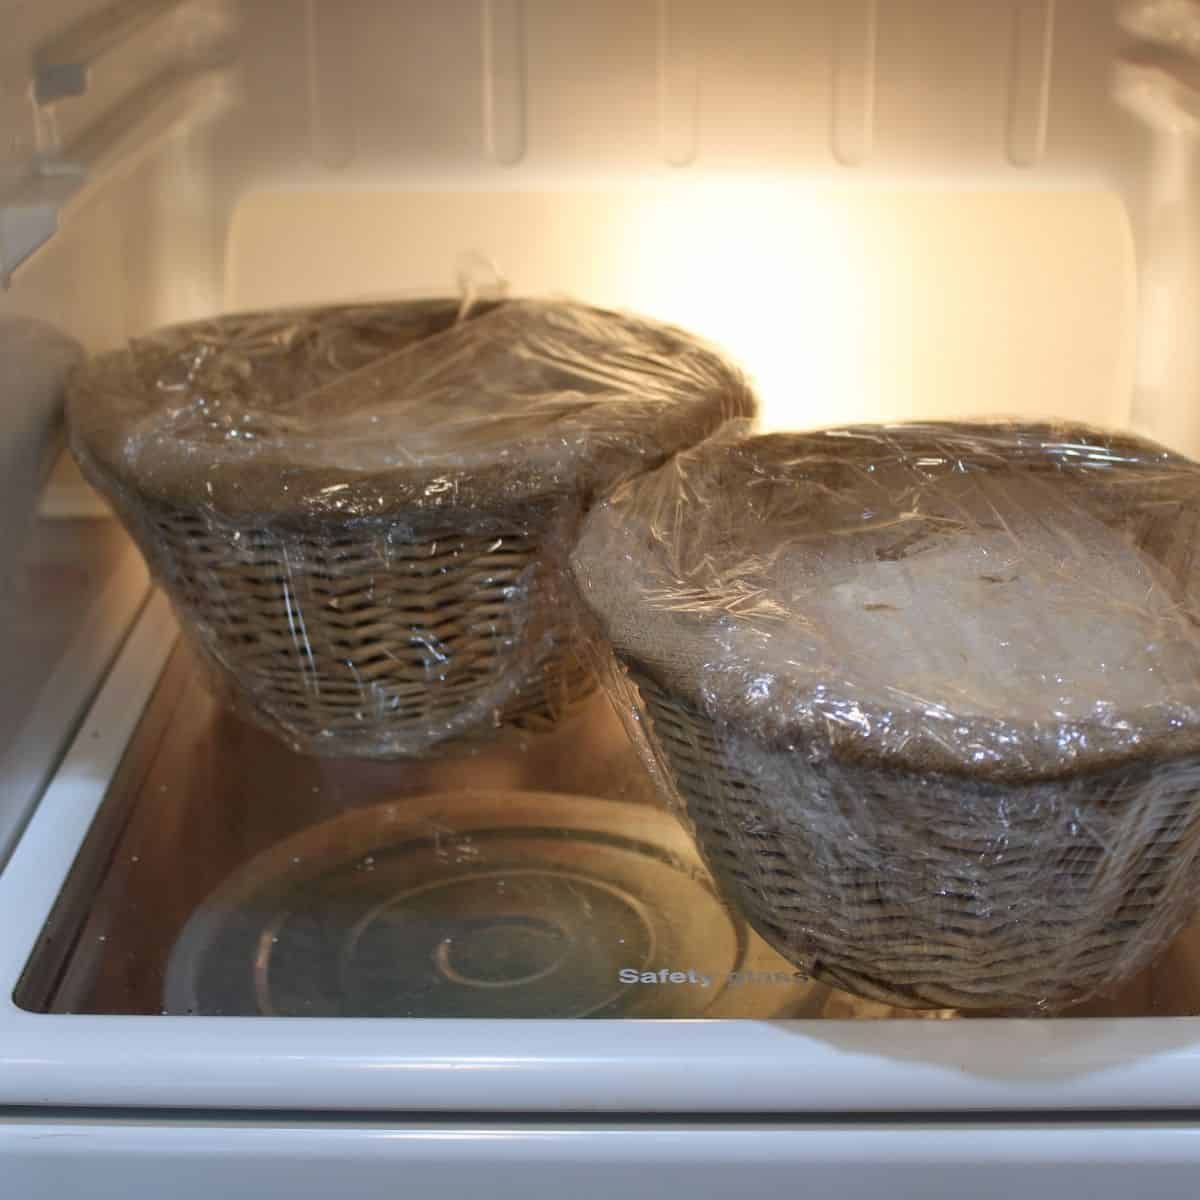
Cold Proofing (Overnight Proof in the Fridge)-Many bakers prefer to let their sourdough dough rise in the fridge overnight. This is called a cold final proof or cold retardation.
How Long to Proof Sourdough Bread for the Final Rise?
The final proof time depends on temperature and method:
-
Warm Room (75-78°F / 24-26°C): 4-6 hours
-
Cool Room (65-70°F / 18-21°C): 8-12 hours
-
Cold Proof (Fridge at 38-42°F / 3-5°C): 12-24 hours
The dough is ready when it looks slightly puffy and passes the poke test—press a finger in gently, and it should spring back slowly. If it stays deep, it's overproofed. If it bounces back too fast, it needs more time.
How Long to Proof Sourdough Bread at Different Stages
The right proofing time depends on several factors, including the temperature of your kitchen, the type of flour you're using, and whether you’re using a room-temperature or cold-proof.
Room Temperature Final Proof (Same Day Loaf)
Room-temperature proofing is faster and results in a milder flavor. If you want to bake the same day, this is the way to go.
- Proofing time: 4-6 hours (not including bulk ferment), depending on room temperature.
- Signs it's ready: The dough should look slightly puffed and pass the poke test—if you press it gently, it should spring back slowly but leave a slight indent.
Room temperature proofing is a great option when you need fresh sourdough without the wait!
Cold Proofing (Overnight Proof in the Fridge)
Cold proofing slows fermentation, enhancing the bread’s flavor and texture.
- Ideal time: 12-24 hours for best results.
- Extended proofing: Some doughs can last up to 48 hours, but longer times risk over-proofing, leading to collapse during baking.
No need to let the dough warm up—bake it straight from the fridge! Scoring and baking cold dough in a Dutch oven or cast iron pot improves oven spring, helping it rise more when it hits the heat.
Why Cold Proof?
In my bakery, we used cold fermentation to control the process and enhance flavor. This technique, known as cold retardation, improves:
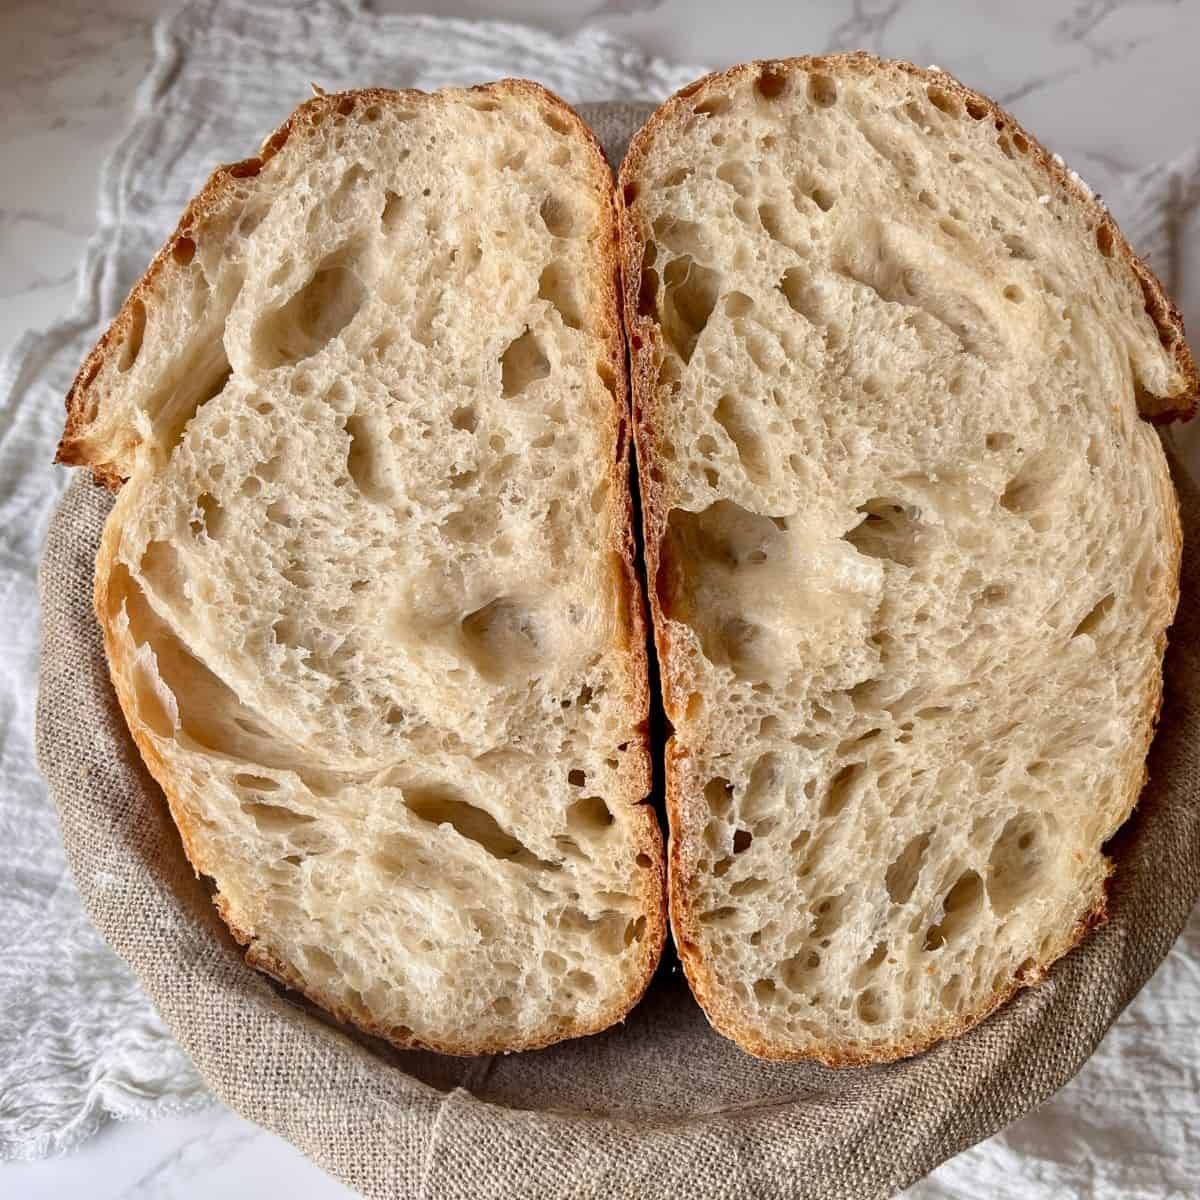
- Texture – Softer and easier to slice.
- Crumb – More open and airy.
- Crust – Crispier due to extended fermentation.
Cold proofing is an easy way to improve your bread!
Factors That Affect Proofing Time
Several factors affect how long sourdough takes to proof. Dough temperature, kitchen temperature, and the type of flour all play a big role in fermentation speed.
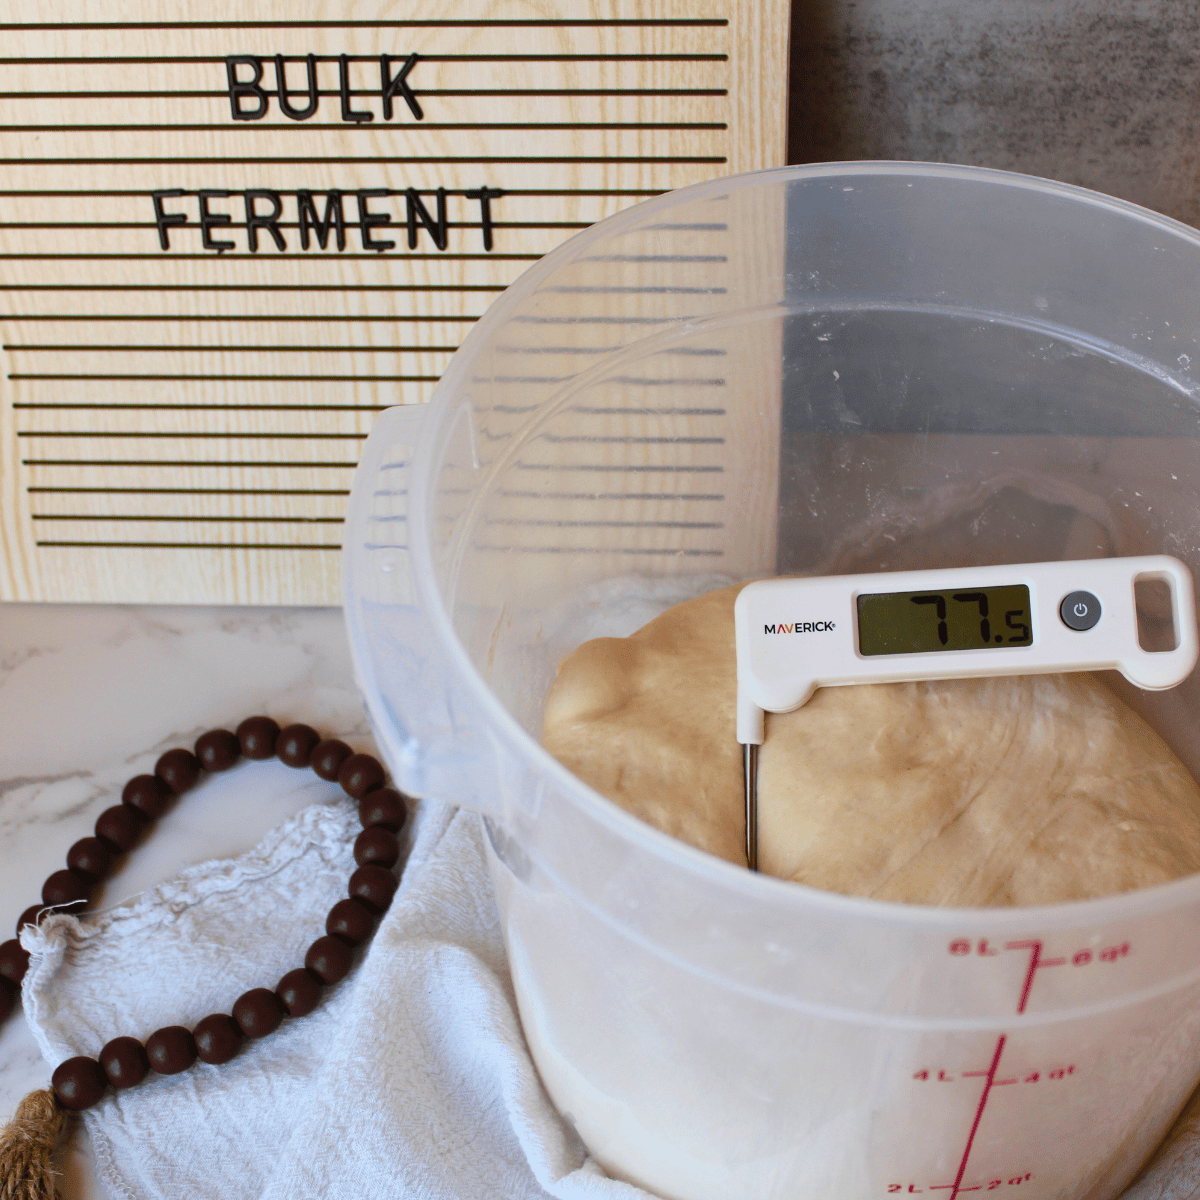
How Dough Temperature Affects the Proofing Time
The temperature of your dough is one of the most important things to get right in sourdough baking. Checking your dough’s temperature helps control fermentation and proofing times. To measure it:
-
Use a digital thermometer – Insert the probe into the center of the dough.
-
Take the temperature after mixing – This helps you know if the dough will ferment at the right speed. Ideal temp: 74-78°F (23-26°C).
-
Check during bulk fermentation – Dough should be 76-80°F (24-27°C) for steady fermentation. If it's too cold, it may need more time.
-
Monitor cold proofing – Your fridge should be 38-42°F (3-5°C) to slow fermentation without overproofing.
If the dough is too cold, fermentation will be slow. If it’s too warm, it may proof too quickly. Adjust proofing time or temperature to stay in the right range.
How Kitchen Temperature Impacts Sourdough Proofing Time
The fermentation process changes depending on how warm or cool the dough is:
-
In a warm temperature (75-80°F), the dough ferments faster, and you need less time to proof it. This is helpful when you want to bake on the same day but increases the risk of overproofing.
-
In a lower temperature (65-70°F), fermentation slows down, creating a better gluten structure and more flavor. However, it requires a longer proofing period.
-
In a cold fermentation (below 50°F), the yeast becomes much less active. The dough can sit in the fridge for a couple of days, allowing for a more complex flavor.
How Flour Type Affects Fermentation Speed
Whole grain bread ferments faster than white bread because whole grain flour contains more enzymes, nutrients, and bran, which feed the wild yeast and bacteria in sourdough. The exact speed increase depends on the percentage of whole-grain flour used.
Compared to 100% white bread flour, here’s how different percentages of whole grain flour can impact bulk fermentation time:
-
25% Whole Grain Flour → Bulk fermentation is 10-20% faster
-
50% Whole Grain Flour → Bulk fermentation is 25-35% faster
-
75% Whole Grain Flour → Bulk fermentation is 40-50% faster
-
100% Whole Grain Flour → Bulk fermentation is 50-60% faster
How to Control Dough Temperature for a Perfect Proof
Ideal temp: 74-78°F (23-26°C)
If too cold (below 72°F/22°C):
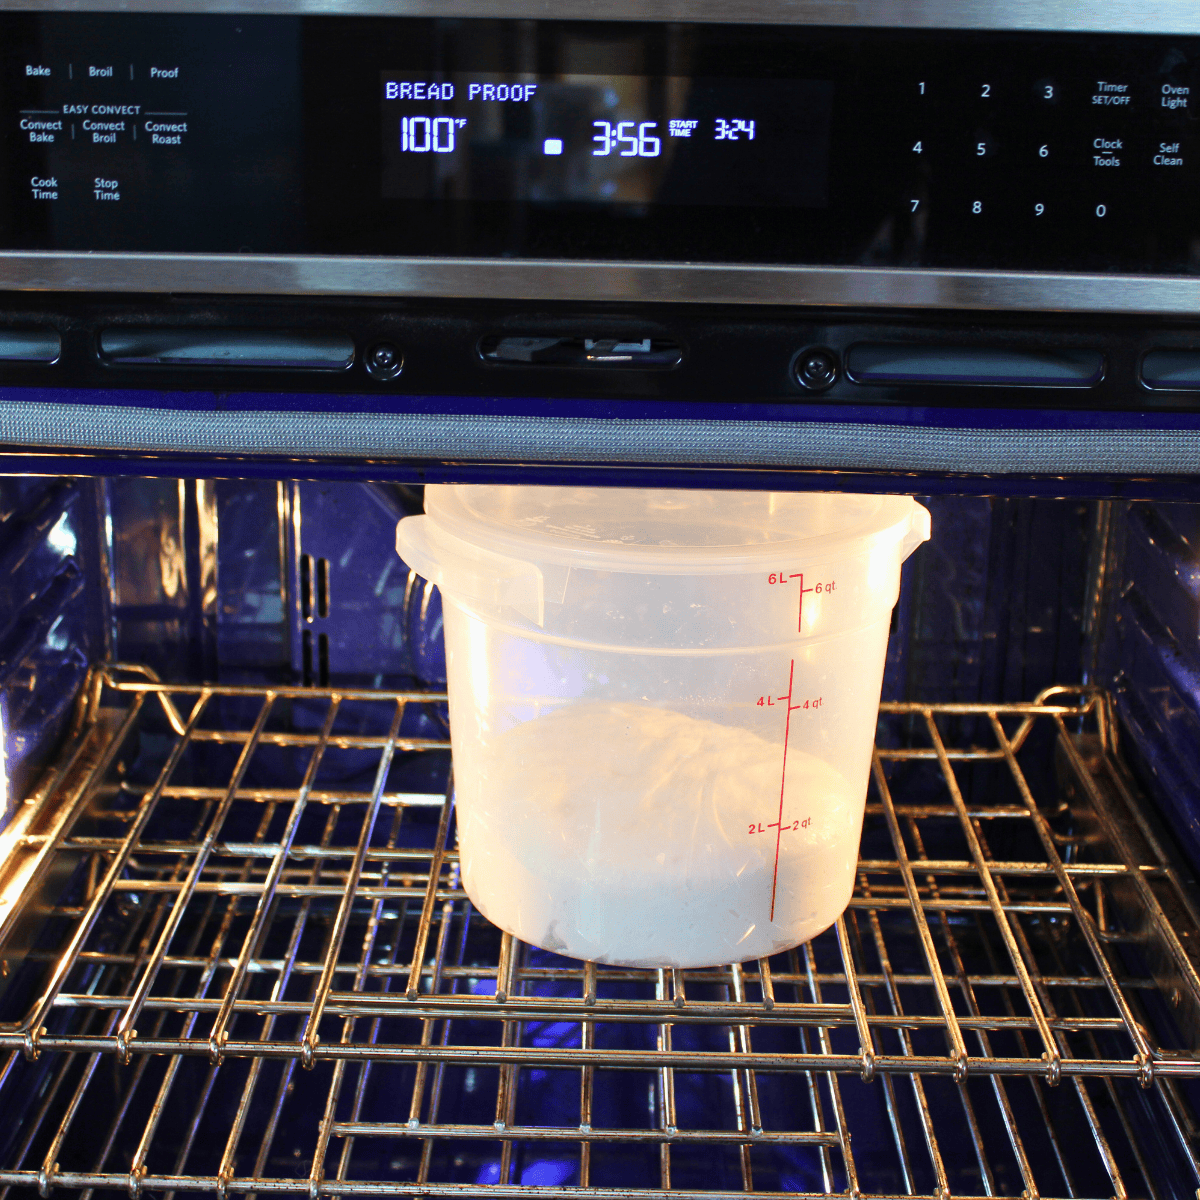
- Place in a proofing box or oven with the light on for gentle warmth.
- Wrap the bowl in a tea towel or plastic bag to trap heat.
If too warm (above 80°F/27°C):
- Move to a cooler spot (like a basement or near an AC vent).
- Set the bowl on a cool surface like marble.
- Chill in the fridge for 5-10 minutes if needed.
Testing When Sourdough Is Ready to Bake
One of the hardest parts of making sourdough is knowing when the dough is ready to bake. If you bake it too soon, the bread will be dense and won’t rise properly. If you let it proof for too long, the dough can collapse and become flat in the oven.
How to Tell If Sourdough Is Fully Proofed
Here are two ways to tell if your sourdough is ready:
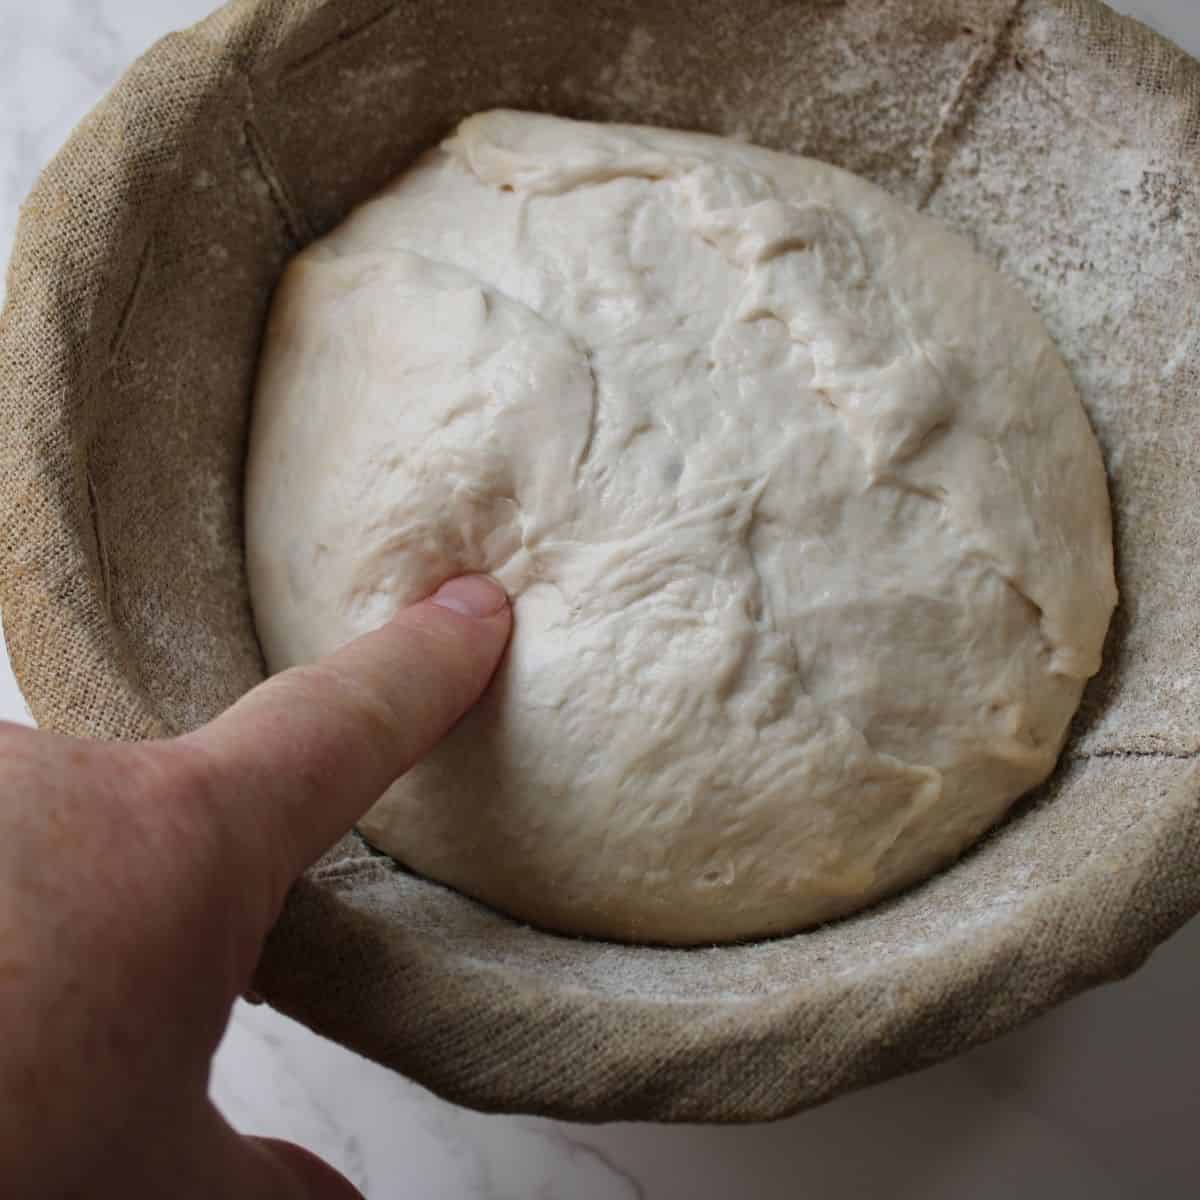
The Poke Test: A Simple Way to Check Proofing
One of the best ways to check if your dough is proofed is to do the poke test.
Gently press your finger into the dough:
-
If the indentation springs back slowly, the dough is ready to bake.
-
If the indentation springs back immediately, the dough is underproof and needs more time.
-
If the indentation stays deep and doesn’t bounce back, the dough is over-proofed and may collapse when baked.
Signs Your Sourdough Dough Needs More Time to Proof
The dough should have visibly expanded during both bulk fermentation and the final proof. If the dough hasn’t grown in size, it likely needs more time. If it has doubled in size, it is probably ready to bake.
Troubleshooting Proofing Problems
If your bread doesn’t turn out the way you expected, don’t worry! Here’s how to fix the most common proofing mistakes:
What to Do If Sourdough Dough Isn’t Rising
If the dough hasn’t been proofed long enough, it will be too tight and won’t have enough air inside. This leads to a dense, heavy loaf with little rise.
How to fix it:
-
Give the dough more time to proof before baking.
-
Keep it in a warmer spot to speed up fermentation.
How to Fix Overproofed Sourdough Bread
If the dough has been proofed for too long, it can become weak and deflate before baking. Overproofed dough spreads out instead of holding its shape and results in a flat loaf.
How to fix it:
-
If it’s only slightly over-proofed, you may still be able to bake it. It won’t rise as much, but it will still be edible.
-
Next time, shorten the proofing time or use a cooler proofing temperature.
Dough Sticking to the Banneton Basket
If your dough sticks to the proofing basket, it can be hard to remove without damaging the shape.
How to fix it:
-
Dust the banneton basket with rice flour to prevent sticking.
-
Use parchment paper to transfer the dough safely into the oven.
Final Thoughts on Sourdough Proofing
Proofing is one of the most important steps in making great sourdough bread. It takes practice to get it right, but once you understand how temperature and time affect your dough, you’ll be able to make adjustments for the best results
How to Adjust Proofing Time for Different Baking Schedules
If you want to bake your sourdough the same day, use a room temperature proof for the final rise. If you prefer better flavor and texture, try a cold-proof overnight in the fridge.
No matter which method you choose, watch the dough, not the clock. Learning to recognize when the dough is properly proofed is the key to baking great sourdough bread.
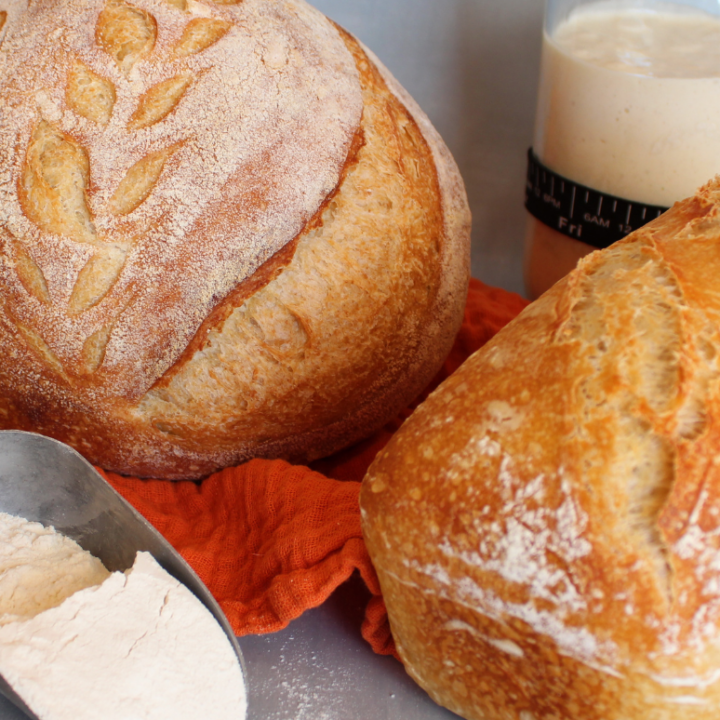
Great Sourdough Recipes to Try
If you’re looking for sourdough recipes to try, start with my same-day sourdough pizza crust. This dough uses more starter, so it ferments quickly and is ready to bake in just a few hours. It’s the best way to get a flavorful crust without waiting for an overnight rise.
For those who love an extra sour sourdough bread, my cold retard sourdough recipe is perfect. By using a longer proofing period and letting the dough ferment at a colder temperature,, this method builds the perfect San Francisco sourdough flavor.
If you want to see the baking process in action, check out my TikTok channel- you’ll find plenty of helpful tutorials!
Leave a Reply