


Avoid common cake mistakes by learning how long to let cake cool before icing. Your layers will thank you, and so will your buttercream!

If you have ever tried frosting a hot cake, then you know what a disaster that can be. Crumbs get everywhere and your best-laid plans are out the window!
In today’s post, I’ll be outlining the steps to successfully cooling and frosting cakes so that you can improve your cake decorating skills and feel confident baking and frosting cakes.
Before we dive in, here are a few other cake tutorials you might find helpful:
-
What Size Is a Sheet Cake? — A quick guide to choosing the right pan size for any party.
-
4-Inch vs. 6-Inch Smash Cake — Perfect if you're planning a mini cake moment or a birthday photoshoot!
-
Best KitchenAid Attachment for Frosting — Make sure you’re mixing your buttercream the right way!
Lessons learned the hard way
Let me share a little story from my early days as a cake decorator. Back then, my little cake shop was always bustling, and customers often popped in for last-minute cake orders. While I was always eager to help, there was one recurring challenge: waiting for the cakes to cool. It seemed like I was always waiting for those freshly baked cake layers to cool down.
Even with my deep freezer trick and diligent flipping of cake layers, it still took several hours for those cakes to cool down sufficiently for me to confidently start icing. But you know what? That waiting time became an opportunity to improve my systems!
While I waited, an idea struck me like a bolt of inspiration. What if I could shave off precious time from the cooling process? So, I started keeping pre-baked cake layers in my freezer, ready to spring into action whenever a time-crunch cake order came my way. It was a game-changer!
I discovered something magical about working with frozen cakes. Not only did it save me time, but it also transformed the buttercream into a silky dream. Now, frosting cakes has become a breeze, and I'm excited to share all my tips and tricks with you. Let's dive right in with all my tips for cooling and frosting cakes!
How long to let a cake cool before icing
The time it takes for cakes to cool down varies depending on the type of cake you're making. Different cakes have different cooling times.
Certain cakes, such as Texas sheet cake, are frosted when they are still warm. When you do this, the icing becomes all gooey. It's meant to be that way as part of how the cake is supposed to taste and look.
Other cakes, like a traditional chocolate cake, need to be cooled for enough time that the warmth from the freshly baked layers won't melt the frosting.
Here are the cooling times for various types of cakes
Cupcakes: Cupcakes typically need about 10 to 15 minutes to cool down before you can frost or enjoy them.
Angel food cake: An angel food cake may require a longer cooling time of around 1 to 2 hours to ensure it cools completely and maintains its delicate texture.
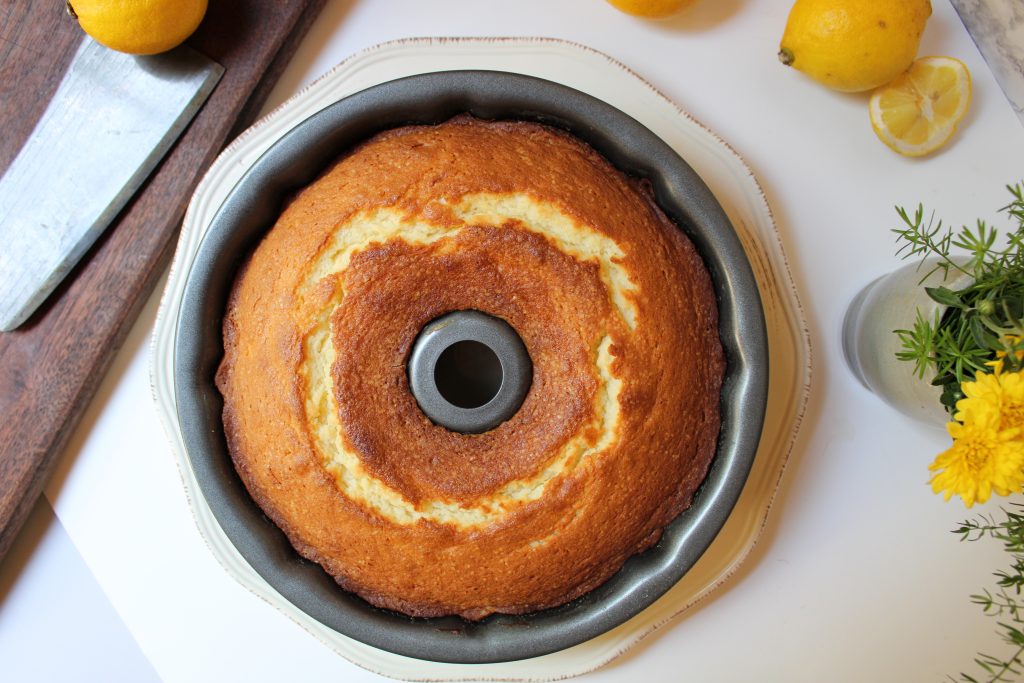
Bundt cake: A Bundt cake usually takes about 20 to 30 minutes to cool in the pan, and then an additional 1 to 2 hours on a cooling rack.
Sponge cake: Sponge cakes should cool for approximately 20 to 30 minutes in their pans, and then they can be removed to cool completely on a rack, which may take another 30 to 45 minutes.
Chiffon cake: Chiffon cakes should be allowed to cool for about 1 to 2 hours in the pan, and then they should be inverted onto a rack to cool completely, which might take an additional 1 to 2 hours.
Layer cakes: Cakes baked in layers typically need about 10-15 minutes to cool in the pan, then an additional 1 hour on a cooling rack.
Remember, these are general guidelines, and cooling times vary.
What’s the best-cooling process for cakes?
The most effective way to rapidly cool cakes is to remove the cake from the cake pan once it's done baking. By doing this, you allow the heat to escape more quickly, which helps the cake cool down faster.
Turn the cake out onto a wire rack or a cooling rack to speed up the cooling process. Cooling times may vary based on factors like the size and thickness of the cake, your kitchen's temperature, and humidity levels.
You’ll know when your cakes have cooled for enough time when you can no longer feel any warmth from the cake with your hand.
How to prevent a cake from sticking to the cake pan
Making sure your cakes come out of the pans smoothly is crucial for a perfect bake. Use a high-quality pan release, a mixture of shortening and flour, or line the pans with parchment paper to prevent the cakes from sticking and leaving crumbs behind.
💡Pro Tip: You can also make your own DIY pan release using this recipe.
Quick cake cooling hack
If you’re short on time, the fastest way to cool cake layers is in the refrigerator or freezer. You’ll save yourself a couple of hours and have the added benefit of frosting a cold cake, (which is my favorite way to decorate cakes.)
-
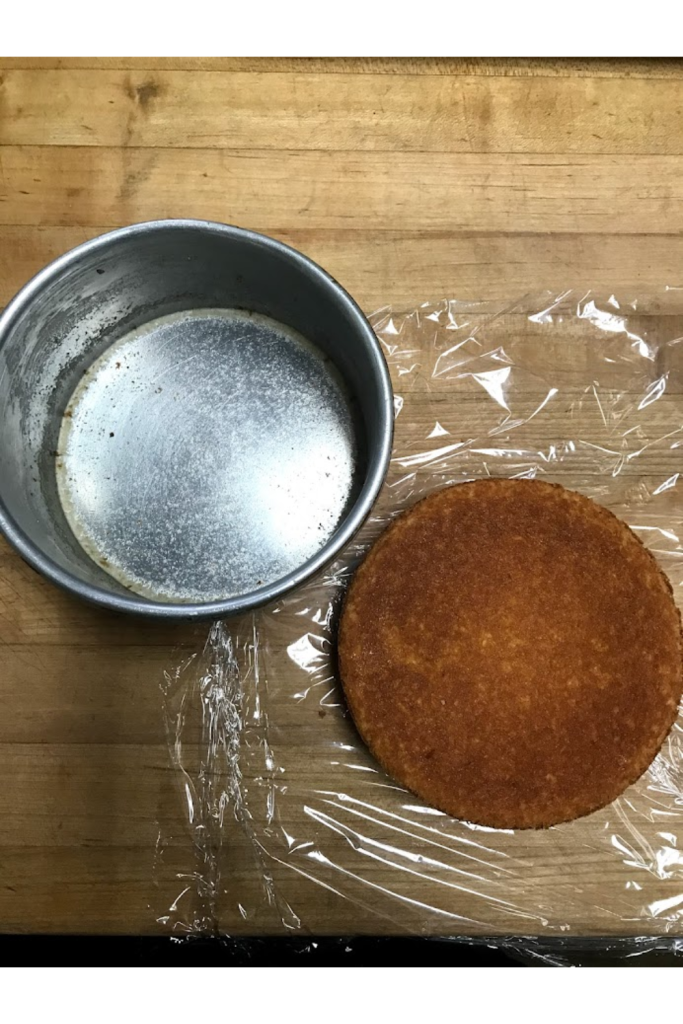
Let the cake cool in its pan until the pan is cool enough to touch
-
Turn the cake out onto a piece of parchment paper
-
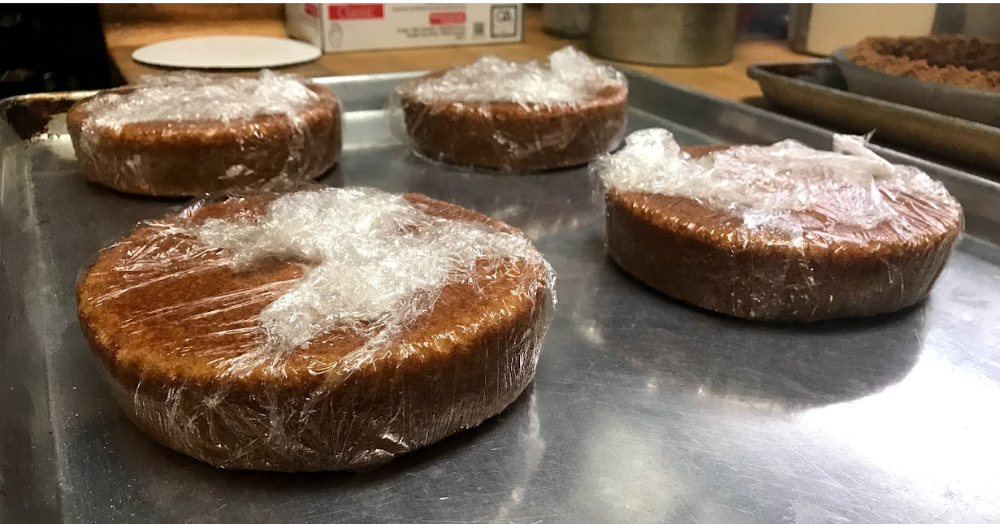
Wrap the cake and parchment paper in plastic wrap
-
Place on a level surface in the refrigerator or freezer.
This is the method that I used in my cake shop for many years. The plastic wrap helps prevent ice crystals from forming and the cake layers can be baked ahead of time and stored in the freezer until you need them.
How to level a cake
If your cakes have a small dome on the tops, you can use a serrated knife to level the cakes while they are still in the pan.
Just use the edges of the cake pan as your guide and cut the top of the cake off with a sawing motion.
After leveling, turn the cakes out onto a piece of parchment paper with the flat surface down. (It helps to have a long serrated knife.)
How to add moisture and flavor with a simple syrup cake soak
A cake soak is a simple syrup that gets added to a cake after it is baked. It’s an easy technique that adds moisture and flavor to cakes.
A basic simple syrup recipe is equal amounts of granulated sugar and water, heated until the sugar dissolves.
After the cakes are removed from the pan, use a pastry brush or a squeeze bottle to generously apply the syrup to the cake surface.

How to crumb coat a cake
Crumb coating (also known as dirty icing) is the process of applying a very thin layer of frosting to the cake. It holds in all the loose crumbs like glue so they don't show through the finished cake.
Here’s how to crumb coat a layer cake:
-
Let the cake layers cool completely
-
Prepare your buttercream frosting and filling
-
Place the cake on a cake pad or plate
-
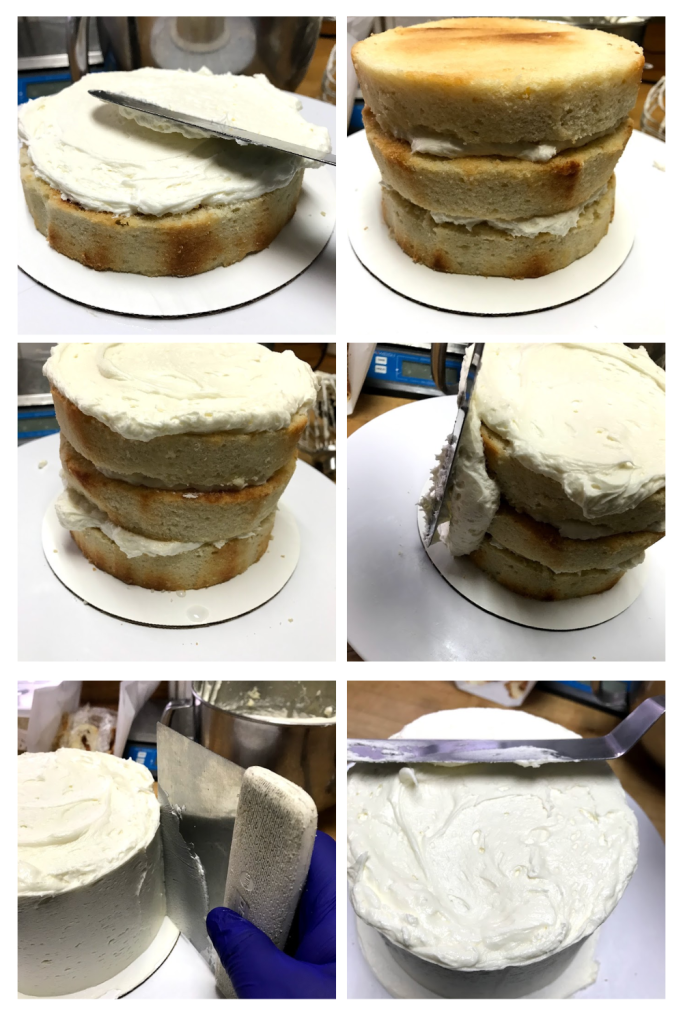
Frost the first layer and top with the second layer
-
Apply frosting to the sides and top of the cake using an offset spatula
-
Use a bench scraper to remove as much of the frosting as you can while still keeping the layers intact.
-
Place the crumb-coated cake in a cool place, ideally in the refrigerator or freezer.
Tips for creating a perfectly frosted cake
Before you start the frosting process, it's a good idea to gather all the supplies you’ll need.
I like to use a large offset spatula, a bench scraper, a cake turntable, a pastry bag, and various tips for decorating my cakes.
Once your cake is fully cool, you're ready to begin decorating.
- Prepare your buttercream frosting. Try my shelf-stable buttercream frosting recipe. I like it because it spreads smoothly and it's easy to work with.
- Remove the crumb-coated cake from the refrigerator and place it on a cake turntable.
- Spread a layer of frosting on top of the cake and use an offset spatula to make it look smooth and even.
- Next, apply frosting to the sides of the cake. Use a bench scraper to smooth the sides.
- Even out the edges along the top pulling the excess frosting it towards the center of the cake.
- If your cake needs more smoothing or additional icing, place it back in the refrigerator for about 15 minutes to allow the icing to firm up. Repeat the process, adding a final layer of frosting to cover the entire cake.
At this point, you can use the extra frosting to add additional decorations. Just put your favorite tip in a pastry bag and fill it with buttercream frosting.
Satisfied with the frosting and decorations? Now place the cake in the safest place, like the fridge, to let it set. This allows the frosting to firm up, and your cake will be at its best when served.
Ready to practice?
Ready to try your hand at a simple, beginner-friendly cake? This recipe for Lemon Bundt Cake bursts with flavor and stays incredibly moist.
This Gateau Au Beurre is a delicious traditional Haitian cake featuring a satisfying blend of butter, spices, and sometimes rum for an authentic Caribbean treat.
Answering Reader's Cake Decorating Questions
Let's do a little cake decorating Q+A session, where I'll be answering reader questions about creating stunning cakes that not only look amazing but taste incredible too!
Questions about cake ingredients
Q: Why is it important to bring ingredients like butter and eggs to room temperature before baking a cake?
A: Room-temperature ingredients blend more easily, resulting in a smoother batter and better cake texture. This ensures an even distribution of ingredients throughout the batter.
Q: Can cream cheese frosting be used to frost all types of cakes?
A: Cream cheese frosting pairs well with a variety of cakes, especially carrot cake and red velvet cake, but it may not be suitable for every flavor. Experiment with different flavor combinations to find the perfect match for your cake.
Questions about baking and cooling a cake
Q: Are there alternative methods for cooling cakes besides using a wire rack?
A: Yes, you can also cool cakes in their pans or on a clean kitchen towel. Experiment with different cooling methods to find what works best for your specific cake recipe.
Q: How can I tell if my cake is fully baked?
A: Insert a toothpick into the center of the cake—if it comes out clean or with just a few crumbs, the cake is ready. This simple test ensures that your cake is baked to perfection.
Q: Do pound cakes require a different cooling process compared to other cakes?
A: Pound cakes typically have a denser texture, so they may need slightly longer cooling times to set properly. Be patient and allow enough time for the cake to cool completely before removing it from the pan.
Questions about decorating and storing cakes
Q: How should I store leftover frosted cake?
A: To keep your cake fresh, store it in an airtight container in the refrigerator. This helps prevent the cake from drying out and preserves its moisture.
Q: Is cake decorating difficult for beginners?
A: With practice and patience, cake decorating can become easier and more enjoyable over time. Start with simple techniques and gradually work your way up to more complex designs.
Q: Why should I crumb-coating a cake before frosting it?
A: Crumb coating helps create a smooth base for frosting, preventing cake crumbs from ruining the final presentation. It also helps the final layer of frosting adhere better to the cake surface.

Ready to start decorating?
Now that you know how long to let your cake cool before icing, it’s time to put that knowledge to work!
Need help along the way?
Whether you’re crumb coating for the first time or want buttercream swirls that wow, I’m here for you. Drop a comment or reach out with your questions — I love hearing from you!
Thanks for stopping by!
Your visits, feedback, and questions mean so much. So grab your spatula, cue up your favorite playlist, and let’s get frosting!
Leave a Reply