Wondering how to make a letter cake? Jump on this beginner-friendly cake trend and discover how simple and fun it can be to create!
Whether it’s for a birthday party, a baby shower, or any special occasion, making an alphabet cake adds a wonderfully personal touch to the celebration.
In this step-by-step guide, I’ll walk you through the process from start to finish, so you can create a stunning cookie cake that’s just as special as your event!
More Cake Recipes
If you give this Letter Cake a try, please remember to rate the recipe and drop a comment below. I always enjoy hearing from bakers who have tried my recipes!
You can SUBSCRIBE to get my latest recipe newsletter or FOLLOW ME on FACEBOOK, INSTAGRAM, and PINTEREST for even more delicious scratch-baked recipes.
Why You'll Love Making a Letter Cake
A letter cake is beginner-friendly for several key reasons:
- No Side Decoration Needed: You focus only on decorating the top. No need to worry about side frosting!
- No Special Pan Required: Any sheet pan with a lip works; simply bake and cut out your desired letter shapes.
- Simple Cookie Dough Recipe: This easy-to-handle dough is forgiving, making it ideal for beginners.
- Trendy Choice: The popular letter cake trend looks impressive but you'll be surprised how straightforward it is to make!
Here's What You Need to Make a Letter Cake
- Cookie sheet with a rim
- Parchment paper
- Scissors
- Sharp knife
- Cake drum or cake board
- Piping bag with a few assorted tips
Prepare the Sugar Dough Cake Layer
Begin by mixing up a sugar cookie-style cake layer. I love using cookie dough as the base of my letter cakes because they are so sturdy.
This recipe yields enough batter for a two-layer single-letter cake. If you want to make multiple letters or numbers, just bake one batch for each letter.
Each letter cake will serve approximately 10-15 people.
Bake Your Cake
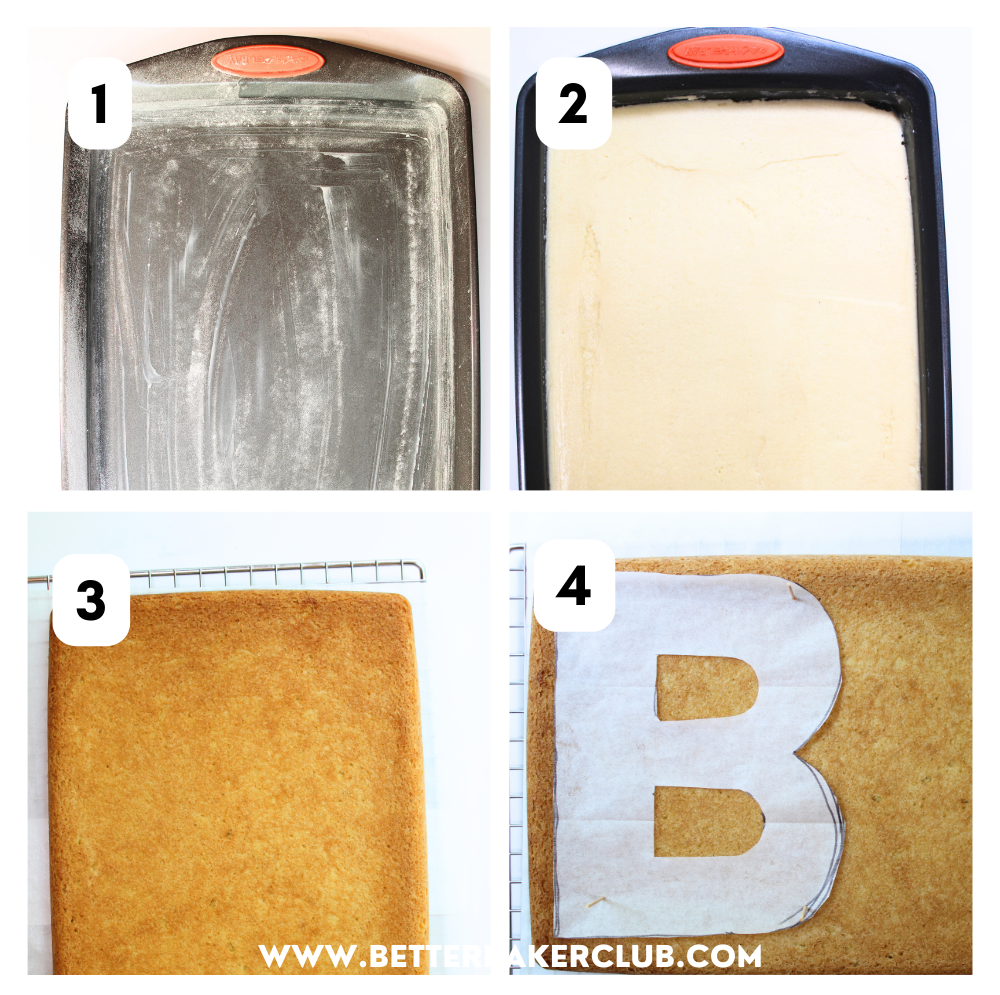
Spread the cake batter onto a 10x15" cookie sheet. Use wax paper to help spread your batter evenly. A good rule of thumb for baking time is to check after 13 minutes and every few minutes after until a toothpick comes out clean from the center.
Cut Out the Paper Template
Creating a number or letter template for your letter shapes is easy. Here’s how to do it:
- Design Your Letter: Use a computer to design the letter in the size and font you want. Make sure it fits the dimensions of your cake. Print the letter onto a piece of paper. If you prefer, you can draw the letter by hand.
- Cut Out the Template: Use scissors to carefully cut out the printed or drawn letter. This will be used as your guide for slicing your cake into the perfect shape.
Want to jump on the number cake trend? This process works great for numbers too!
Shape the Cake
After the cake has baked, let it cool in the pan for about 15 minutes. Then, invert the cake onto a cooling rack to cool fully.
Once cooled, cut the cake in half so there are two equal-sized portions about the size of the letter. Avoiding the outside edge of the cookie cake, place the paper template on top of your cake layer.
Use a sharp, thin knife to carefully cut around the template. Repeat a second time to cut the second layer.
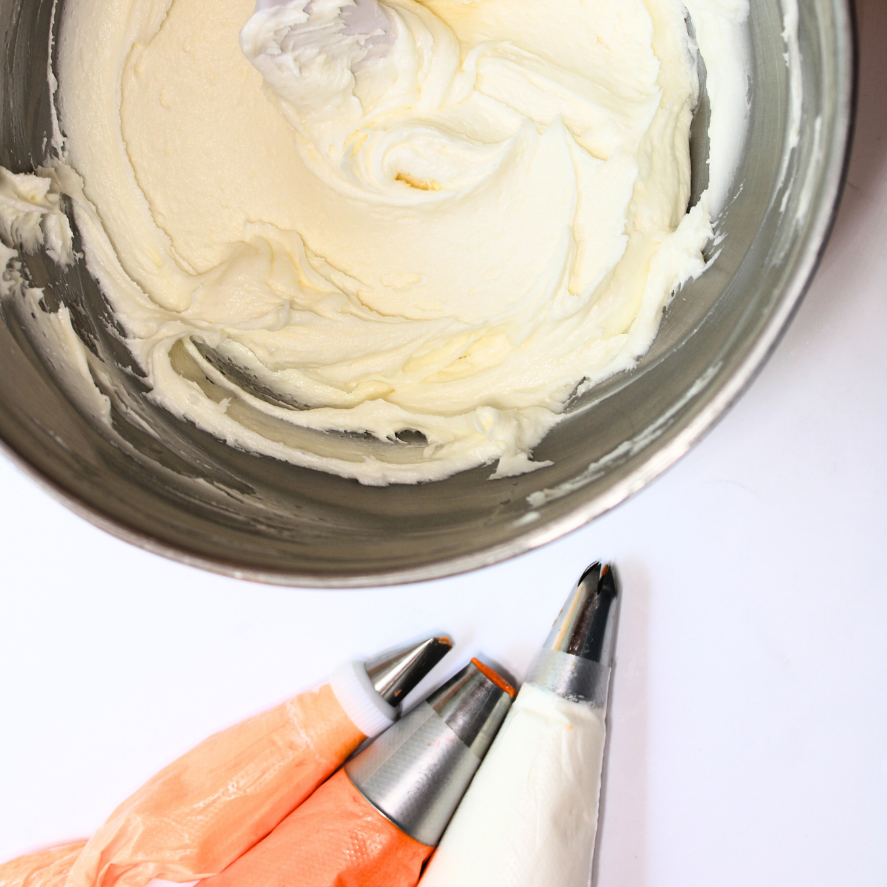
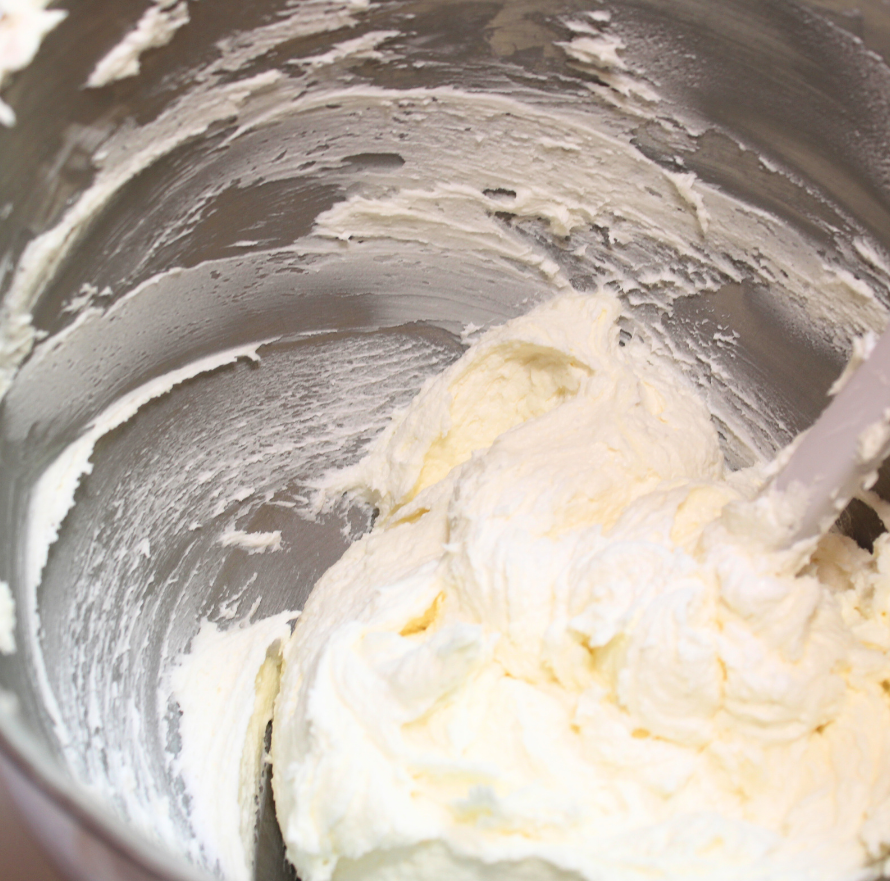
Make the Buttercream
To create a sturdy base for holding up the second layer of the letter cake, I like to use a stiff vanilla buttercream.
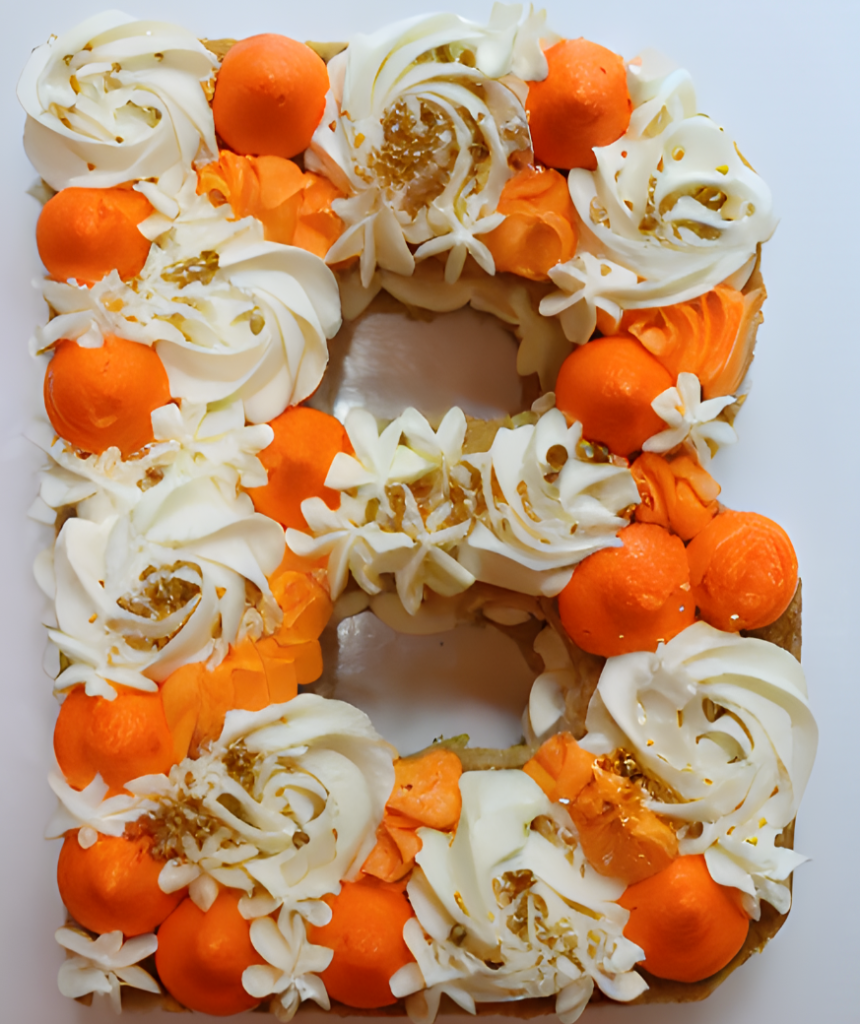
One of my favorite designs is an all-white buttercream with fresh flowers and fresh fruit on top.
If I'm matching a color scheme, I pick three colors for the top of the cake and keep the decorations simple, using sprinkles as my main accent.
Assemble the Cake
Once your cakes are baked and cooled, it's time to assemble.
With your cake layers and buttercream ready, you can now assemble your letter cake:
- Prepare Layers: Once your cake has cooled, use your paper template to cut out the letter shapes from each cake layer. Since this cake does not require leveling, simply cut two identical shapes for each letter you are making.
- Stack and Fill: Start by filling a piping bag with buttercream and attach a large round pastry tip. Place the first layer of your letter on a cake board or serving platter. Pipe generous dollops of icing onto the first cookie layer.
- Carefully place the second cookie layer on top of the icing dollops and continue the process. After you've decorated the top cookie layer with icing, go ahead and sprinkle your favorite toppings over the cake to finish it off beautifully!
The Best Cookie Cake for Making Letter Cakes
Video
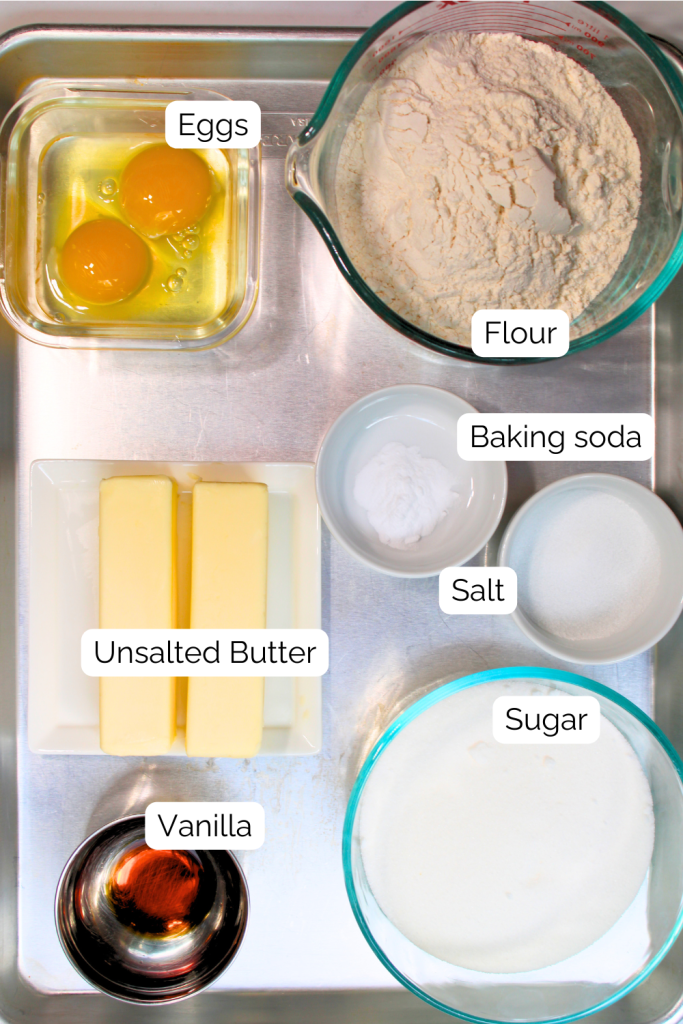
Ingredients
- 1 cup 2 sticks Butter, room temperature
- 1 ½ cups White sugar 317g
- 2 Eggs
- 1 teaspoon Vanilla extract
- 2 ½ cups All-purpose flour 330g
- 1 teaspoon Baking soda 6g
- 1 teaspoon Salt 6g, omit if using salted butter
Instructions
- Preheat Oven: Preheat your oven to 350°F (175°C).
- Cream Butter and Sugar: In the bowl of an electric mixer, cream together the butter and sugar until light and fluffy.
- Add Eggs and Vanilla: Incorporate the eggs one at a time, then mix in the vanilla extract.
- Combine Dry Ingredients: In a separate bowl, whisk together the all-purpose flour, baking soda, and salt.
- Mix Dry with Wet Ingredients: Gradually add the dry ingredients to the creamed mixture, mixing just until combined.
- Prepare the Pan: Line a 10x15 inch pan with parchment paper and lightly grease it.
- Spread the Batter: Evenly spread the batter in the prepared pan.
- Bake: Bake in the preheated oven for 13-15 minutes, or until a toothpick inserted into the center comes out clean.
- Recipe Notes:
- If you are using salted butter, omit the additional salt from the recipe to balance the flavors.
- Ensure all ingredients are at room temperature to help them blend more uniformly.

My Ultimate Buttercream Frosting
Ingredients
- 2 sticks Butter Unsalted, softened
- 4 cups Powdered Sugar
- ½ teaspoon Vanilla
- ¼ teaspoon Salt
- 2 tablespoon Milk
Instructions
- Using an electric or stand mixer fitted with a paddle attachment, beat softened butter until it is soft and smooth. Approx 5-10 minutes depending on how soft the butter was to start with. You may need to scrape the sides to fully incorporate the butter.
- Add the powdered sugar, salt, vanilla, and milk. Begin mixing on low speed then slowly increase to medium. Continue mixing until the buttercream is light and fluffy.
Now You Know How to Make a Letter Cake!
There you have it—a beautiful, personalized letter cake ready for your special occasion. Whether it’s showcasing the initials for a wedding or the age for a birthday, your letter cake is sure to be the centerpiece of the celebration.
Don’t forget to tag me if you try this letter cake. After all, the best part of making a letter cake is not just about following the steps but about creating memories and enjoying the delicious results.
Want to see this process in action? Check out the video in the recipe instructions where I show you how to assemble and decorate this cake.
Leave a Reply