


This Chocolate Brioche bread loaf recipe is very versatile and can be shaped as rolls, buns, and even a wreath. I'll show you step-by-step how I spread loads of chocolate into the buttery, sweet dough and twist it in a Babka style braid to create a beautiful marbled effect.
My recipe for this classic buttery French brioche bread with twists of marbled chocolate is the perfect breakfast, snack or dessert loaf. If you would like to read more about where my Chocolate Brioche originated from, King Arthur Flour has a wonderful Classic French Brioche recipe. Click here to read about it.

Before we jump into the recipe, can I ask you a favor? Would you follow me on Pinterest? I don't want you to miss any of the great Better Baker recipes!
Now, let's get started on this delicious Chocolate Brioche recipe! Brioche may sound and look complicated, but it's not. It is, however, a two-day process. I'll break the recipe down by day so you can see how easy it really is!
Chocolate Brioche Dough: Day One- Mixing the Dough
Since this dough has quite a bit of butter in it, you'll need to mix the dough and chill it overnight so that it will not be too sticky to spread the chocolate. The Dough will transform from a slippery sticky mess to a beautifully smooth and satiny firm dough that can be filled, rolled, and shaped.
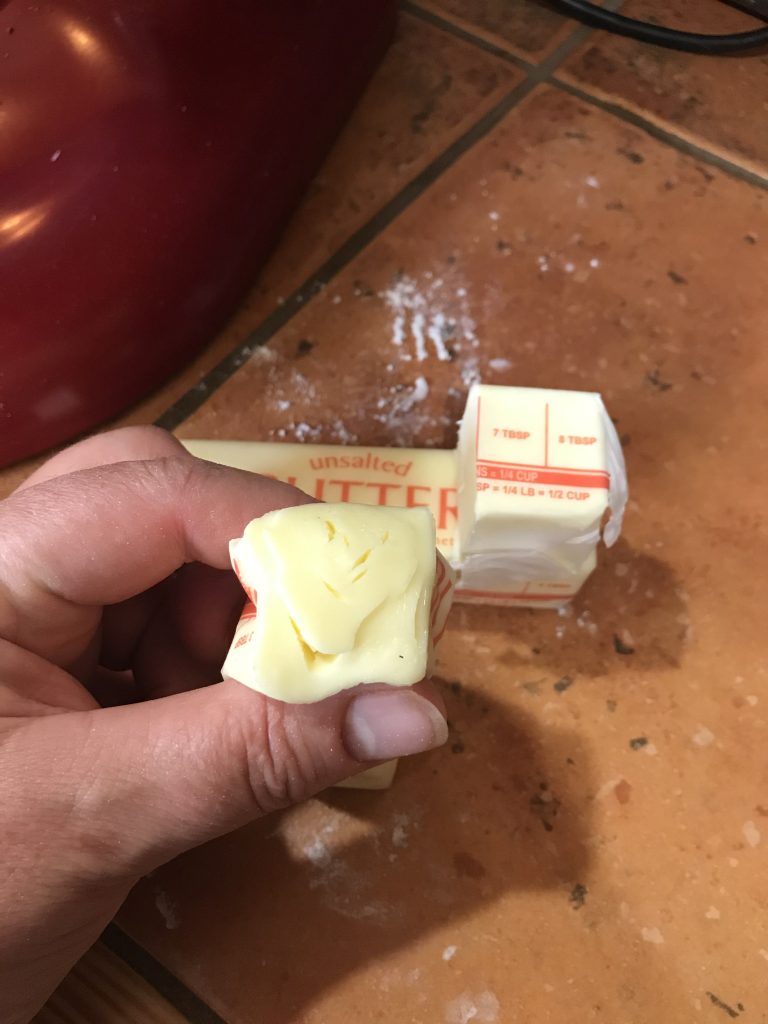
The first thing I do: When I am baking brioche I always let my butter come to room temperature. You should be able to squeeze it and leave an impression in the butter. Don't try softening it in the microwave, it leaves melted spots in the middle that will make the dough too soft.
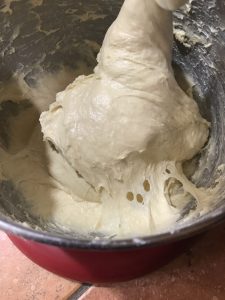
Next, I mix the dough with all the ingredients EXCEPT the butter. Its easier to develop the gluten as a stiffer dough, so mix without butter until the dough pulls away from the sides of the bowl. Then I slowly add the butter in chunks.
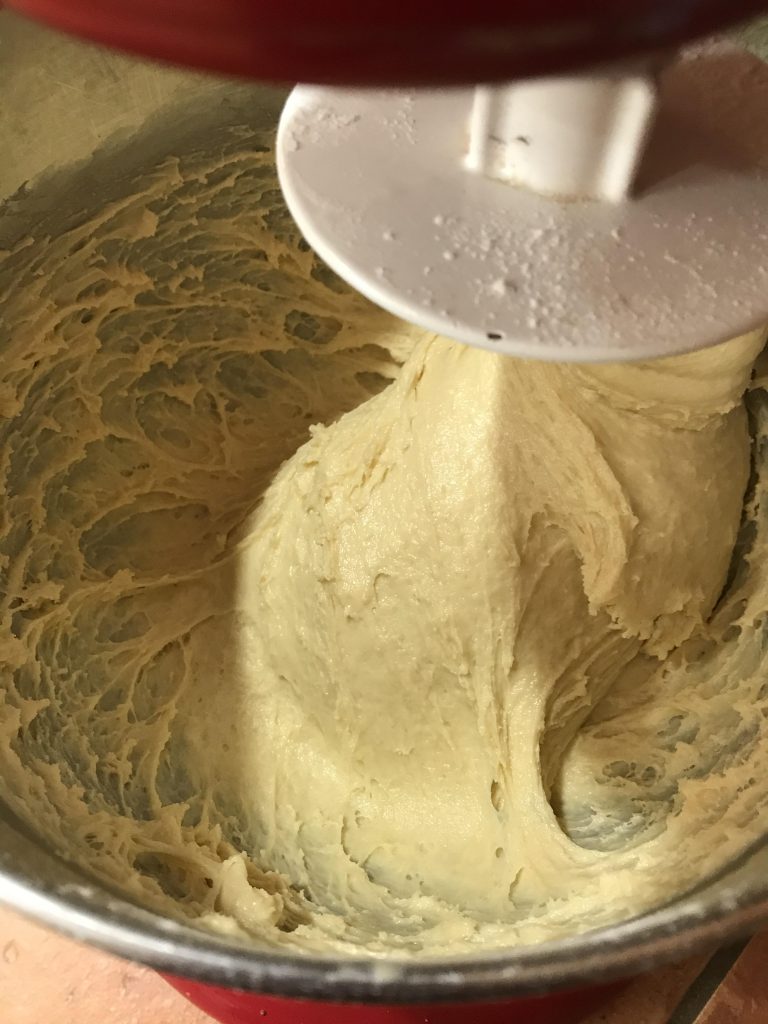
No butter 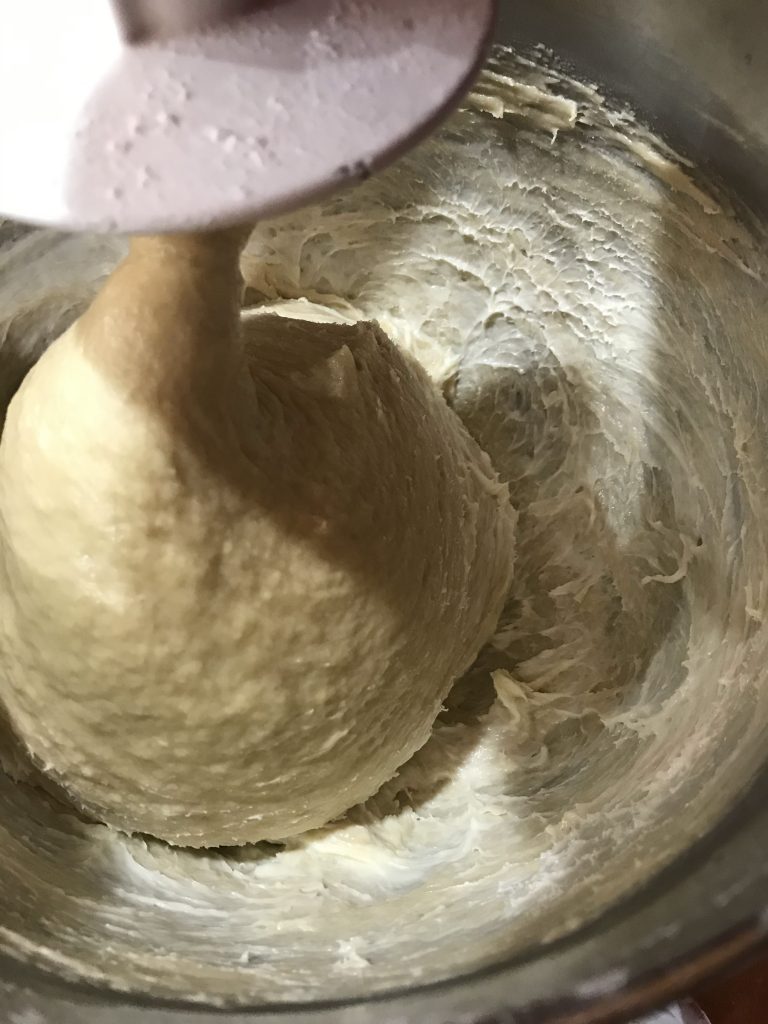
Pulls away from sides of bowl 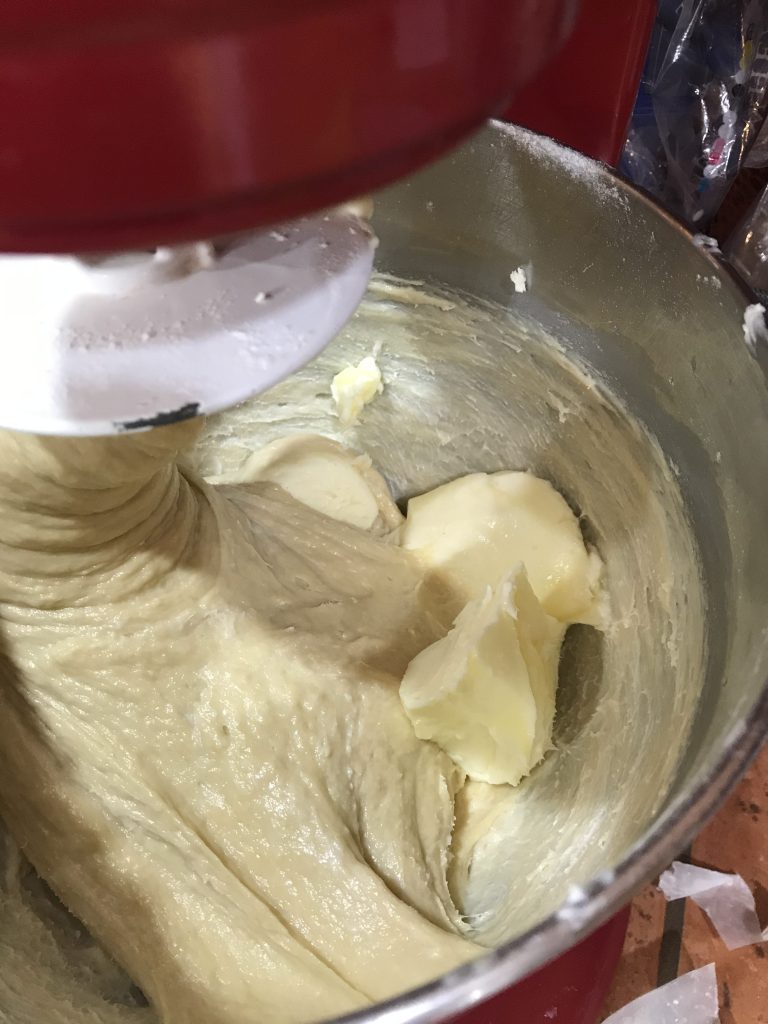
Adding the butter
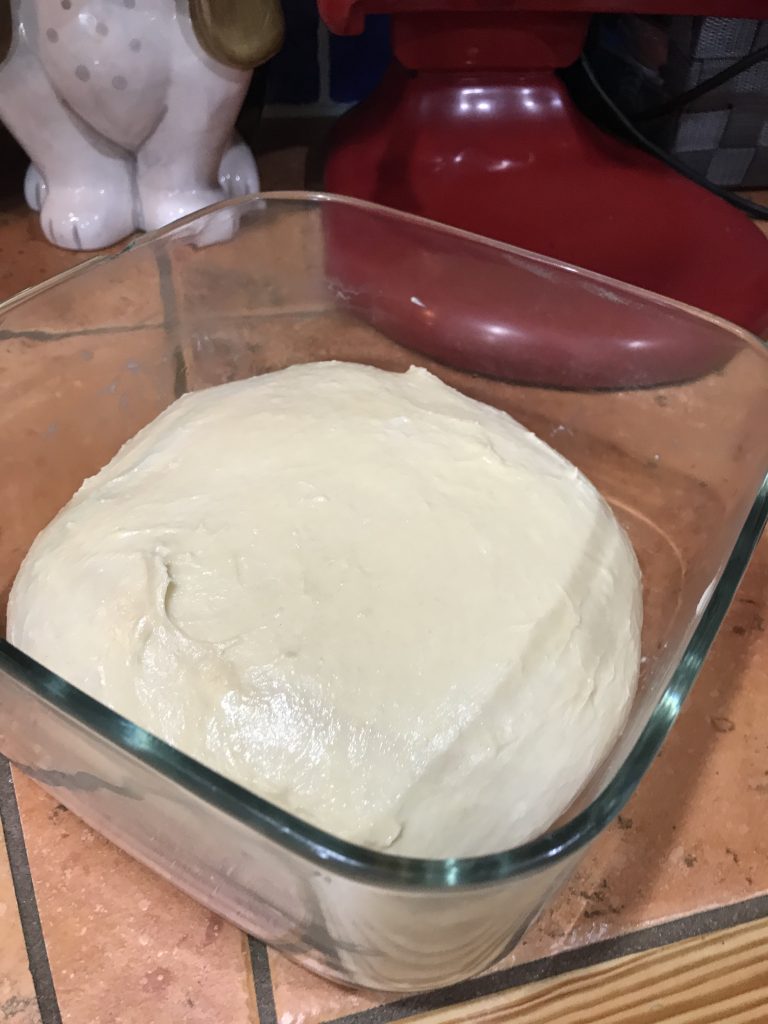
Finally, when the dough is smooth and elastic (usually about 5 minutes of kneading) transfer it to a container with a lid. The dough doesn't rise much overnight, but it should be airtight.
ChocolateBrioche Dough: Day Two- Filling and Baking.
I usually get an early start on day two so that I can have this loaf baked around breakfast time.
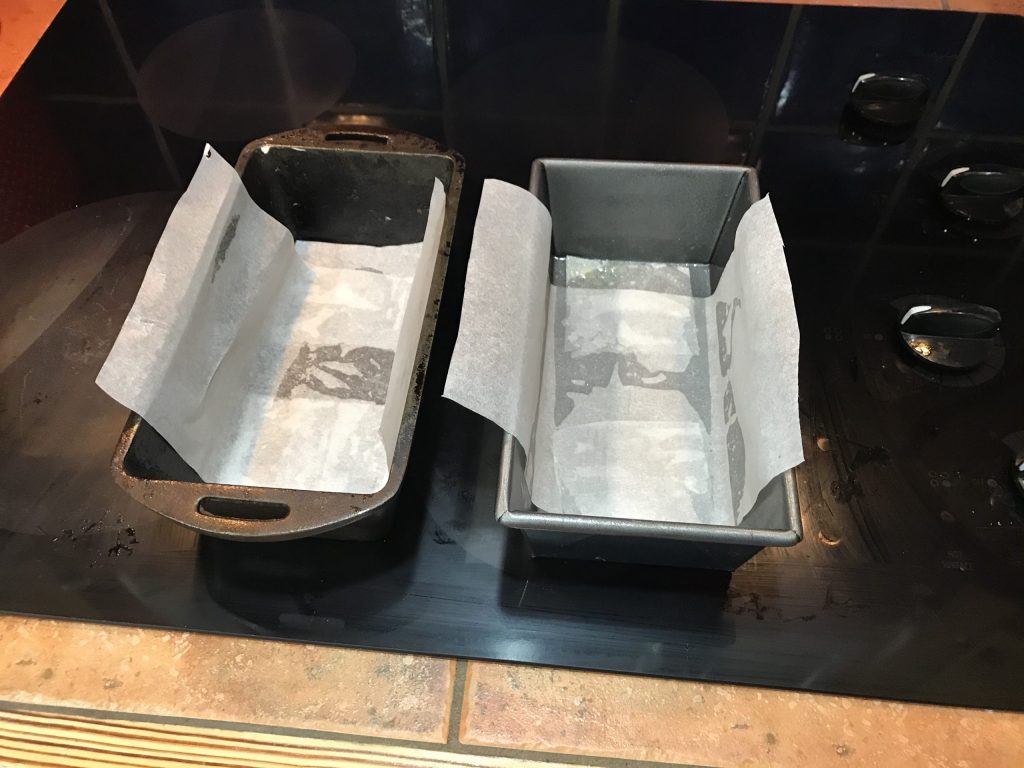
To start day two: Mix the chocolate filling by microwaving the chocolate and butter in 30-second increments until they are fully melted. Stir in the remaining filling ingredients and set aside. Don't do this too early or it will stiffen up and be too hard to spread on the brioche dough. You can also go ahead and heat the glaze mixture by combining the sugar and water and bringing it to a simmer, then set it aside. This will get brushed on the top of the loaf after it comes out of the oven. Prepare your loaf pans by spraying them with pan spray and lining them with parchment paper. You can also mix up the egg wash. Combine one egg yolk with the amount of water that fills half of the eggshell. Whisk with a fork until well combined.
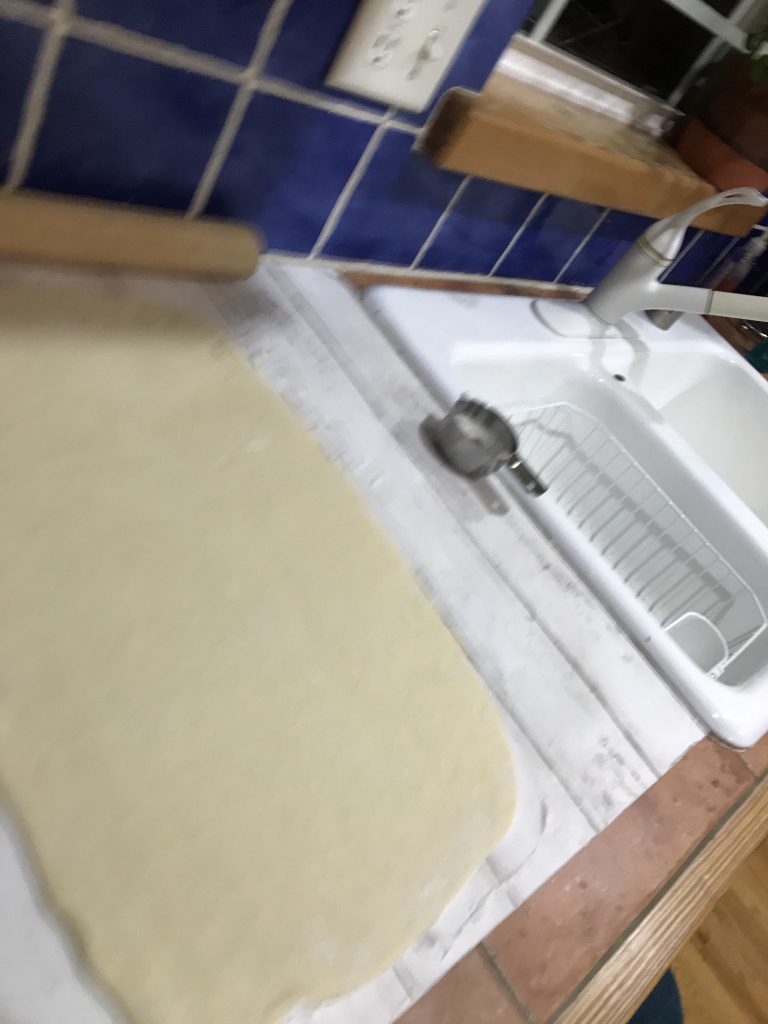
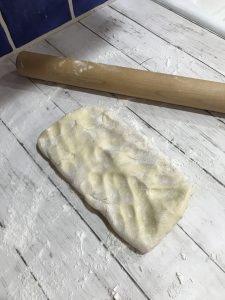
To shape the loaf: Remove the brioche dough from the refrigerator. Cut the dough into two equal-size pieces. Return one piece to the refrigerator to stay cold while you shape the other piece. Place the dough on a well-floured work surface. ( I use a non stick mat since my kitchen has tile countertops). Gently press the dough into a rectangular shape, then begin to roll it into a rectangle that measures approximately 12 x 18 inches.

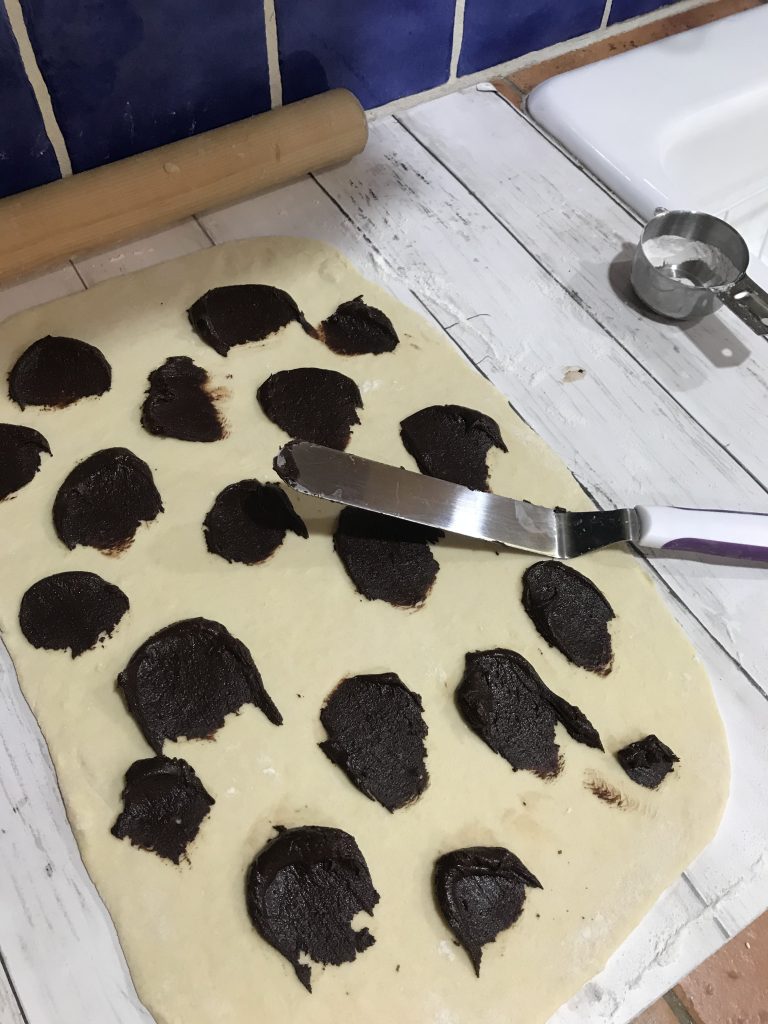
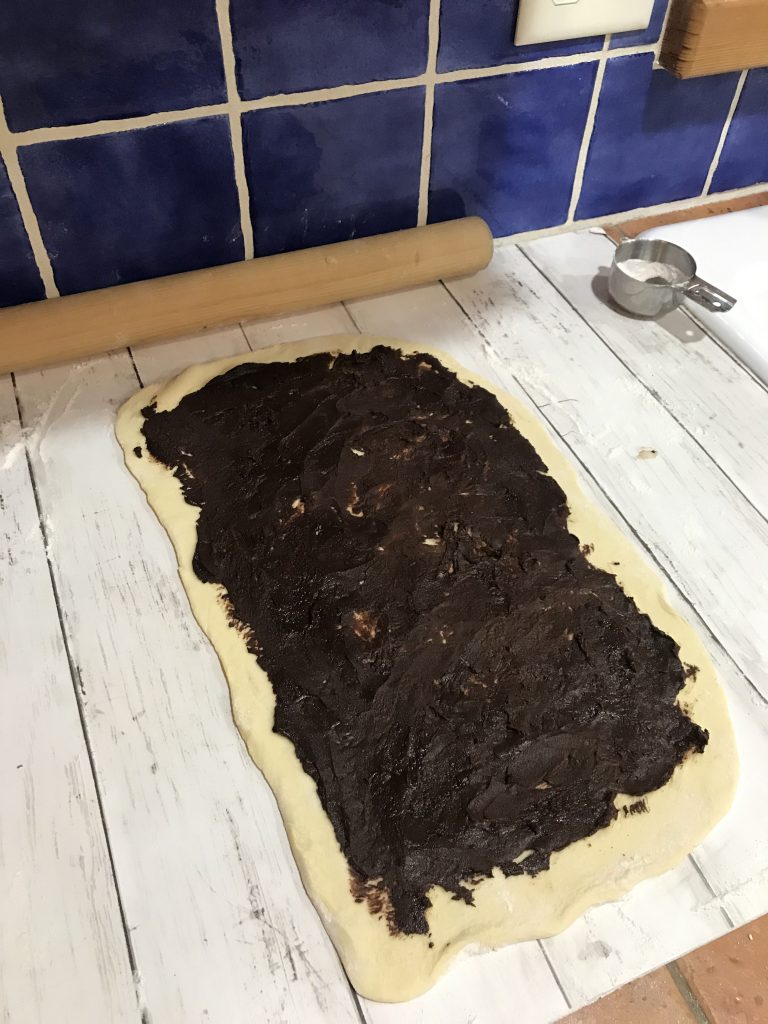
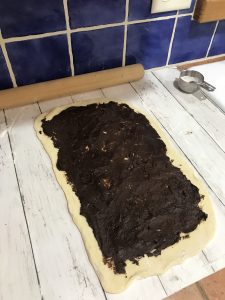
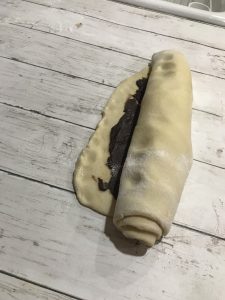
To fill the loaf: Using a spatula, dab small amounts of chocolate filling all around the rectangle of dough, leaving a 1-inch strip on the short end. This will help the roll to seal closed better. With a spatula, spread the chocolate filling evenly around the dough. ( You'll want to work quickly here so that the brioche doesn't get too soft) Now roll the dough into a log in a cinnamon roll fashion. It's best to apply a little tension as you are rolling to avoid air pockets. Pinch the dough to seal the log. Wrap the log in plastic wrap or foil and return it to the refrigerator for 30 minutes. Repeat for the other piece of dough.

To make the marble twist:
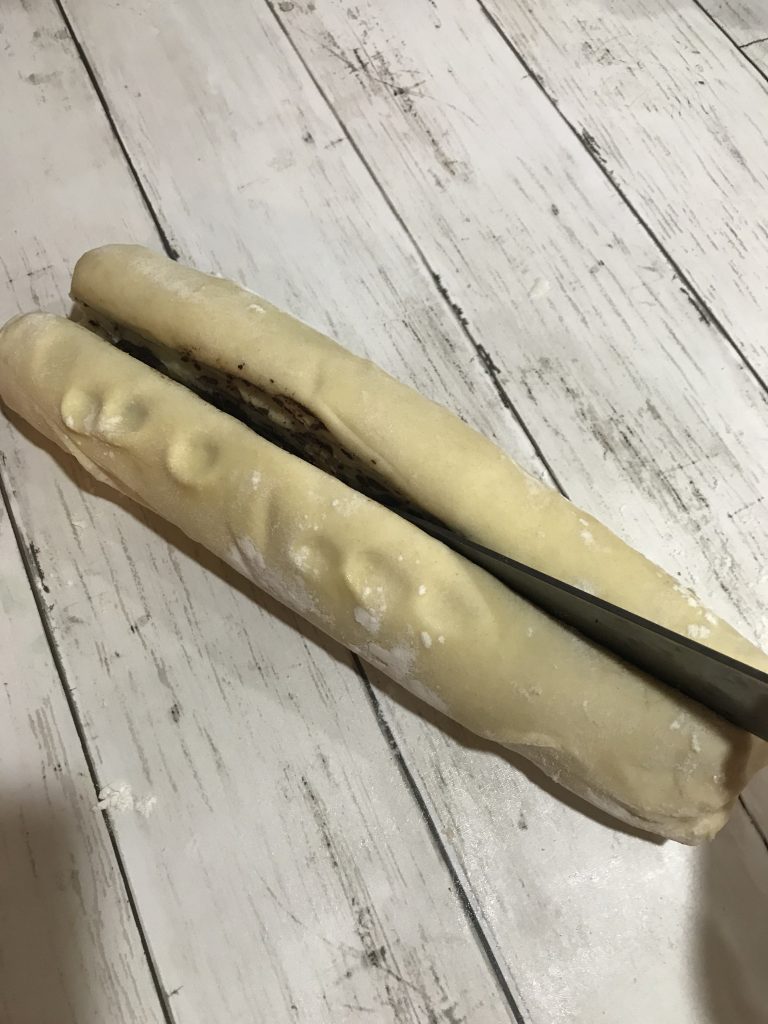
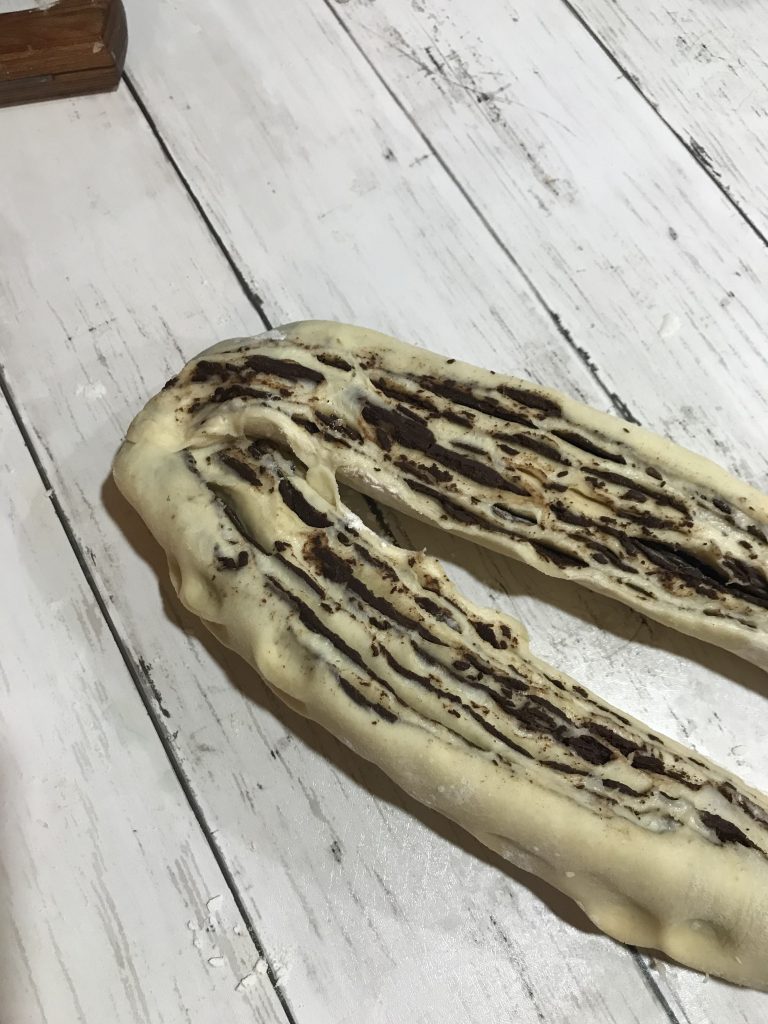
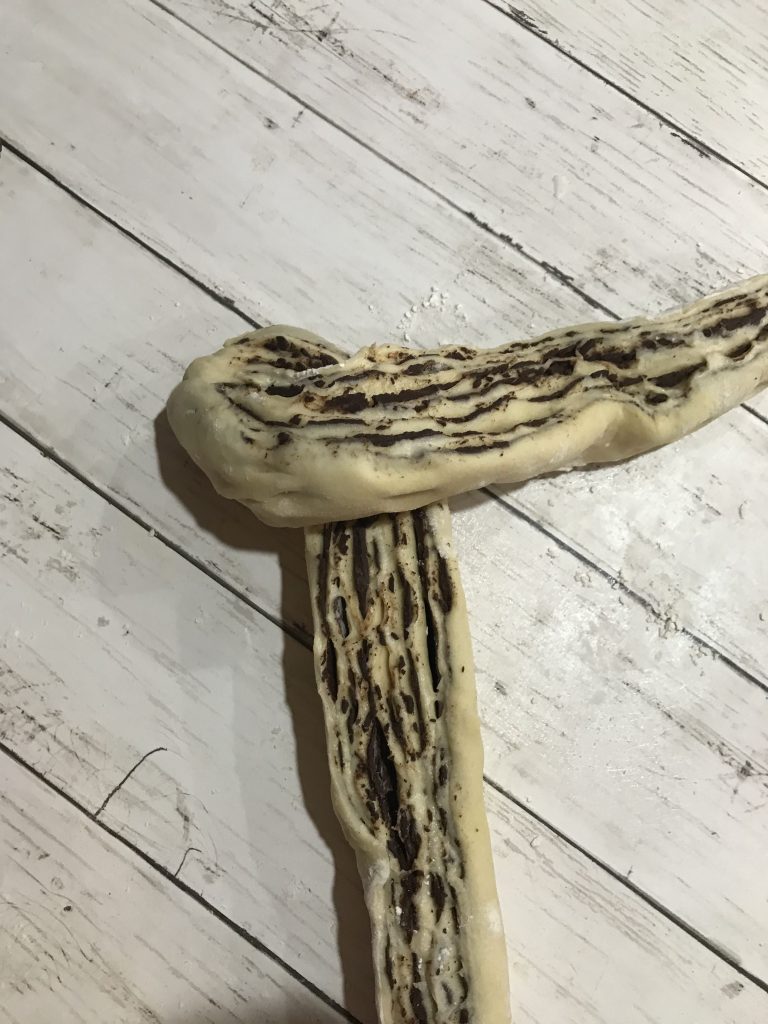
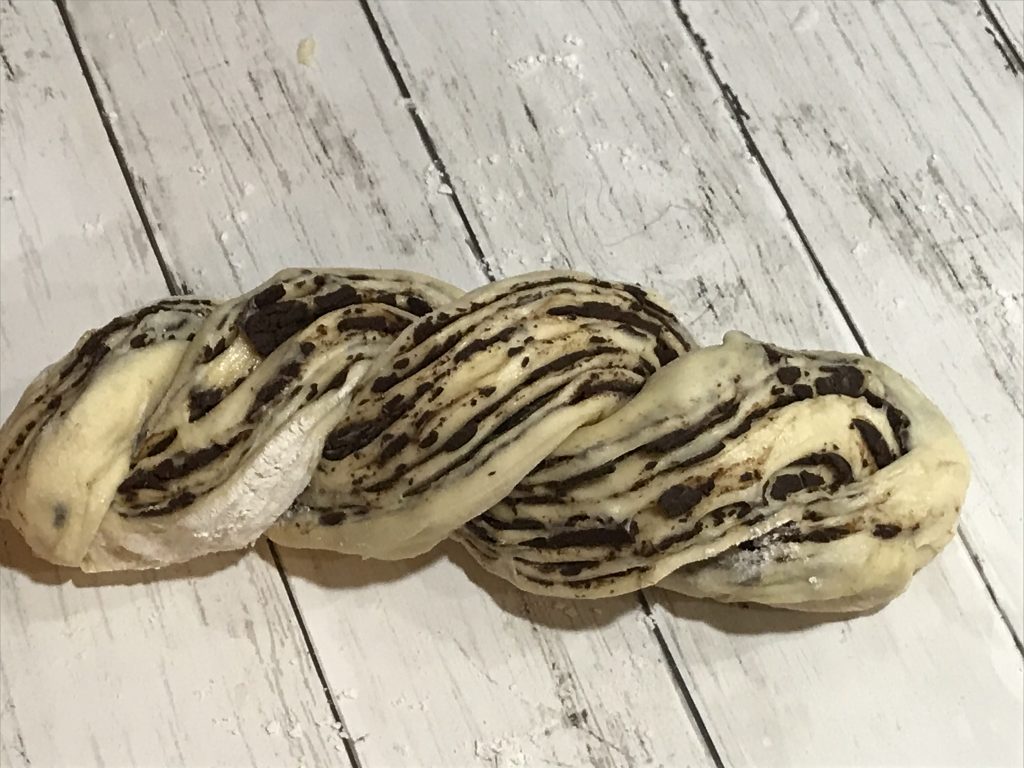
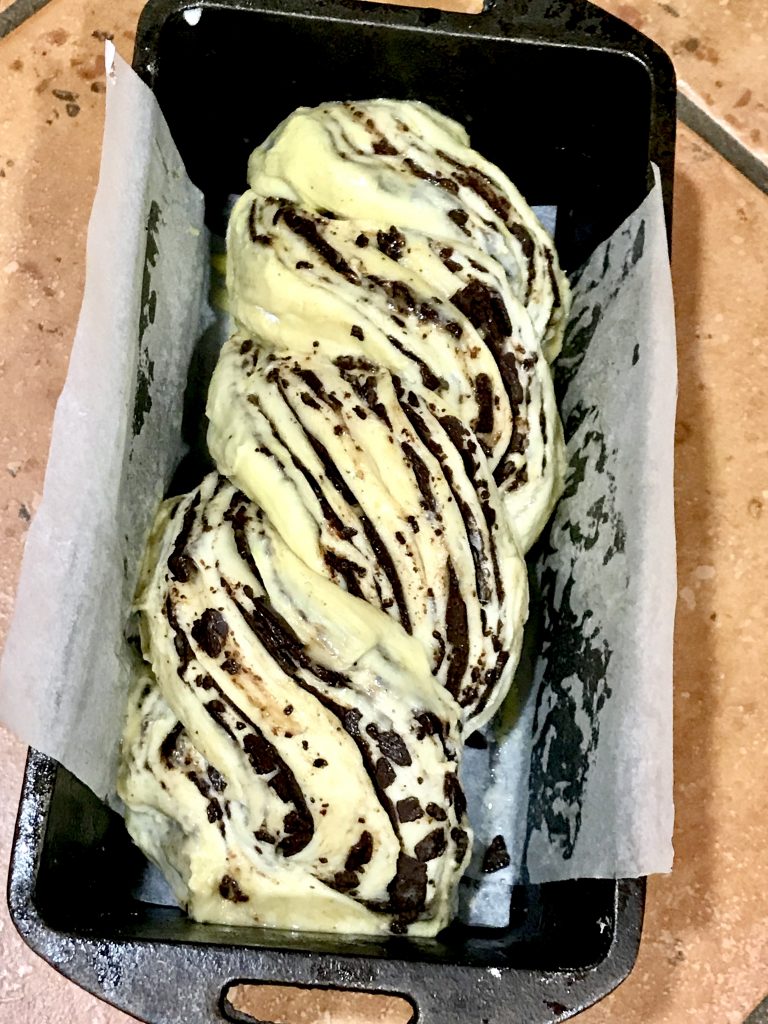
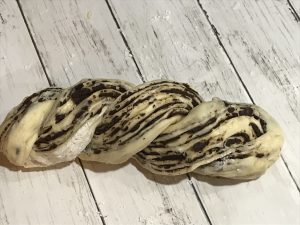
Work on only one log at a time and leave the other in the refrigerator. Unwrap the log. Slice the log lengthwise. Open up the log so that the chocolate is facing up and pinch the log back together at the top. Begin twisting the loaf by lifting each strand and passing the left over the right, so that the pieces change sides. Do this 3-4 times until you reach the end. Pinch the end pieces together.
Place the twisted loaf into the prepared pan. Repeat for the other log.
To Proof and Bake the Loaves:
Before the loaves get set aside to proof, I like to brush them with an egg wash. Do it gently so that it doesn't smudge the chocolate marble pattern. Once both loaves are shaped, gently cover them with a kitchen towel and allow them to proof. The amount of time it will take depends on your kitchen temperature. Mine usually takes about 2 hours. When the dough is a rounded up over the lip of the loaf pan, preheat your oven to 325 degrees. Bake the loaves for about 35 minutes. You can use a probe thermometer to verify that the loaves are done. The temperature should be 205° to 210°.
When the loaves come out of the oven, brush the tops with the sugar glaze. Use the entire amount over the two loaves.


Chocolate Brioche Bread
Equipment
- Stand Mixer with Dough Hook
Ingredients
Brioche Dough
- 4 Cups All Purpose Flour
- 3 teaspoon Yeast
- 4 tablespoon Sugar
- 2 teaspoon Salt
- 6 ea Eggs
- 1 teaspoon Vanilla
- 1 cup Butter
Chocolate Filling
- 5 oz Dark Chocolate
- ½ Cup Butter
- ½ Cup Powdered Sugar
- ⅓ Cup Cocoa Powder
- ½ teaspoon Cinnamon
- ¼ teaspoon Salt
Glaze
- ¼ cup Sugar
- ¼ cup Water
Egg Wash
- 1 egg
- 1 tablespoon water whisk to combine
Instructions
Day One: Make the Brioche Dough
- In the bowl of a mixer fitted with a dough hook attachment, combine the flour, sugar, salt and yeast.
- Add the eggs and vanilla and mix on low speed 3-4 minutes until all ingredients are incorporated and a dough ball begins to form.
- Increase the speed to medium and mix 5-7 minutes until dough is smooth and elastic. Because different types of flour vary you may need to adjust the liquid. This recipe has no water, but you can add a tablespoon of milk if the dough is too stiff.
- Add the softened butter and mix on medium speed for 3-5 minutes until the dough is smooth and shiny.
- Place the dough in an oiled bowl or glass dish with a tight fitting lid. Refrigerate over night.

Day Two: Make the Chocolate Filling
- Heat the butter and chocolate in the microwave in 30 secdond incriments untilboth are melted. Stir to combine.
- Add the powdered sugar, cocoa powder, cinnamon and salt. Stir to combine.
Day Two: Make the Glaze
- In a small sauce pan heat the water and sugar until simmering and remove from heat.
- Day Two: Prepare the Pans
- Spray two loaf pans ( approx. 9x5) with pan spray and line them with a strip of parchment paper that covers the bottom and two long sides.
Day Two: Assemble the Marble Braid
- Take the brioche out of the refrigerator, cut it into two equal size portions and place one peice back in the refrigerator until needed. PLace the other piece on a well floured surface. Working quickly so the dough doesnt get too soft, roll the dough out into a large rectangle approximately 18 x 12 inches.
- Spread half of the chocolate filling onto the brioche and gently work it out to the edges. Leave a one inch strip at the top of the dough plain. ( this will help the roll to seal up)
- Gently roll the dough as if you were making a cinnamon roll. Seal the edges. Wrap log in foil or plastic wrap and return in the the refrigerator for 30 minutes. Repeat with the other piece.
- Once the dough is chilled, remove one piece at a time at create the chocolate twist. With a sharp knife, cut the dough lengthwise down the middle of the roll, leaving one end connected by about an inch. Now twist the pieces over one another 3 times and pinch the ends together.
- Place the loaf into the prepared pan. Repeat for the other log. Gently brush the tops with egg wash. Gently cover the loaves with a kitchen towel.
- Allow the loaves to proof for about two hours or until the top of the loaf peaks over the sides of the pan.
- Preheat your oven to 325°. Bake loaves for about 35 minutes or until internal temoerature is 205°-210°.
- Brush the tops of the loaf with the glaze. Use the entire amount of glaze over the two loaves.
- Allow the bread to cool completely before slicing.
- Store the bread in an airtight container at room temperature for up to 2 days.

If you enjoyed this recipe, you might also like my Dutch Crunch Sandwich Bread or my Beginners Guide to Baking a Loaf of Bread.


Paula says
What kind of chocolate do you use for the chocolate babka? Unsweetened or sweetened?
Thanks,
P
Rose says
what kind of yeast to use? instant active dry yeast?